Implementing Online Leaderboards in Your Godot Game Using LootLocker
- Intro
- Before You Start
- Creating the Leaderboard in LootLocker
- Implementing Your Leaderboard in Godot
- Setting Players Names
- Switching Between Stage and Live Environments
- Let LootLocker Level Up Your Game Even More
Note
This guide has been updated to work with Godot v4.2, support for Godot 3.x is available at GitHub
We believe great games can come from anywhere - regardless of team size, location, funding, or choice of engine. In fact, it's thanks to new game engines that many people first get involved in game development. Because of that, we want to make sure every game developer has access to the full toolbox of LootLocker features and are working on integrations for all popular game engines, including Godot.
While creating an SDK for each engine will take some time, we didn't want to keep you waiting, so we've written this guide to get you set up with everyone's favorite online leaderboards.
Before You Start
In this example we will use GDScript to implement LootLocker in Godot and demonstrate:
- Authenticating a player
- Remember to enable the Guest platform in the LootLocker Console
- Handling a returning player
- Retrieving leaderboard data
- Uploading a leaderboard score
From there, you can use this code as a base and build upon it however you like.
Creating the Leaderboard in LootLocker
Before diving into Godot and writing some code, let's start by creating a free LootLocker account, setting up our game in LootLocker, and creating the leaderboard in the LootLocker dashboard. This only takes a few minutes.
- Create your free LootLocker account by signing up or following our guide. Follow the steps after creating your account to create your first game.
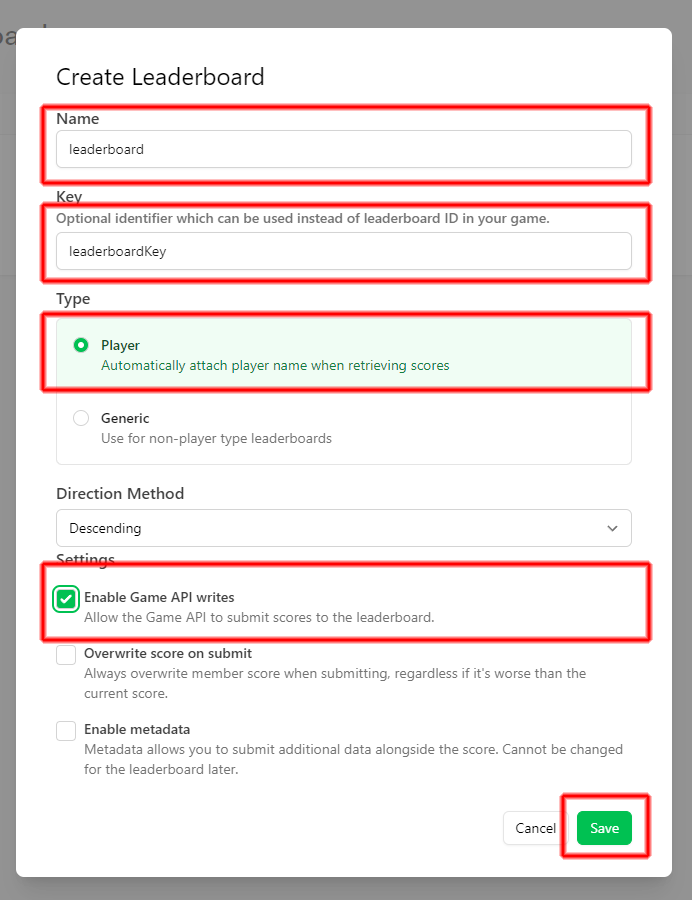
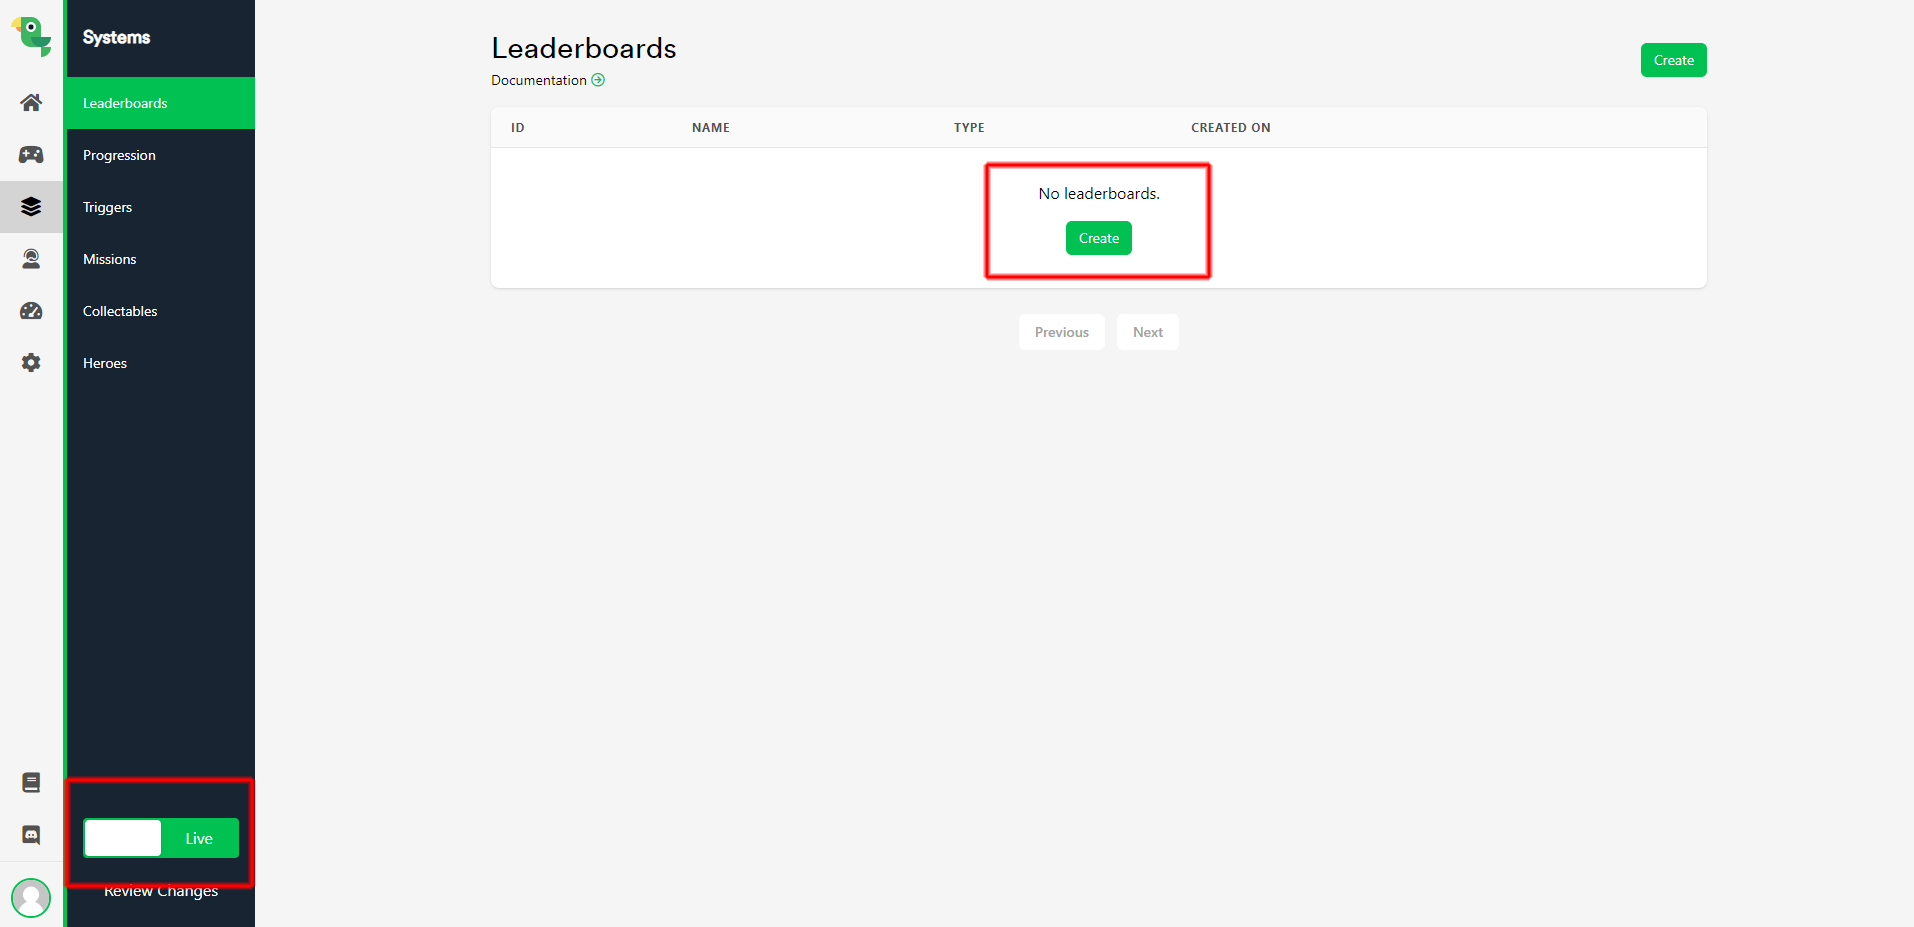
- Create a leaderboard by navigating to Systems, and then Leaderboards. Click the Create button create a leaderboard.

Implementing Your Leaderboard in Godot
Now it's time implement the LootLocker leaderboard directly in Godot.
- Add a new script in Godot and paste in the following code
- When pressing "ui_up"(up arrow); increase score by 1
- When pressing "ui_down"(down arrow); decrease score by 1
- When pressing "ui_accept"(Enter); Upload current score to leaderboard
- When pressing "ui_select" (Spacebar); Refresh leaderboards
- Use and/or build upon the provided functions
- func _authentication_request()
- Authenticate player, must be used before making any additional calls
- _get_leaderboards()
- Get the leaderboard with the current leaderboardKey
- func _upload_score(var score)
- Upload score to the current leaderboard with the currently logged in player
- That's it, now it's up to you to make an awesome game!
Setting Players Names
Currently each leaderboard entry will use the Player ID, but you might wish to let the player set a name so it's more clear who they are on the leaderboard. This can be done by adding the following code to your project. Between lines 140 and 186 you can see the functions we've added for getting and setting the player's name.
Switching Between Stage and Live Environments
Everything we've done so far has been in the Stage environment. When you're ready launch your game, it's wise to point players towards the Live environment. LootLocker comes with these two environments so that you can test and tweak your game in in the Stage environment without affecting your players in the Live environment.
You can switch between environments easily by doing the following steps.
- Create a new leaderboard for the Live environment on the LootLocker Dashboard by clicking on the environment switcher in the bottom left corner of the LootLocker dashboard. Use the same leaderboardKey as with the leaderboard from the previous steps.
Let LootLocker Level Up Your Game Even More
Now that you've got LootLocker leaderboards implemented in your game, it's time to add a few more features to your game, like player progression or unlockable cosmetics and items. These all come out of the box, ready to be added to your game. Check out all of our available features on our website, and their corresponding REST APIs in our reference documentation.
And of course, if you're stuck - we're always here to help. Reach out to us or better yet, join us on Discord.