Adding Online Leaderboards to Your GDevelop Game with LootLocker

- Intro
- Before You Start
- Creating the Leaderboard in LootLocker
- Implementing Your Leaderboard in GDevelop
- Switching Between Stage and Live Environments
- Let LootLocker Level Up Your Game Even More
As part of our ongoing work to make sure LootLocker can be integrated into all popular game engines, we didn't want to wait until we have a full-blown SDK before giving the communities of GDevelop a chance to start playing around with our plug and play backend service. That's why we've created this guide to show how quickly you can integrate LootLocker leaderboards into your GDevelop game using JavaScript and ur REST APIs.
This guide will walk you through authenticating the player using Guest Login, uploading a player's score to the leaderboard, retrieving the leaderboard data and using both our stage (test) and live environments depending on the development stage of your game.
Before You Start
In this example we will use JavaScript to implement LootLocker with GDevelop and demonstrate:
- How to authenticate a player
- Handling a returning player
- Retrieve leaderboard data
- Upload a leaderboard score
From there, you can use this code as a base and build upon it.
An example project with this set up is available in the link below (extract and open in GDevelop).

Creating the Leaderboard in LootLocker
Before we write any code, we'll begin by creating a free LootLocker account, setting up a game in LootLocker, and creating a leaderboard.
- Create your free LootLocker account by signing up. Follow the steps after creating your account to create your first game.
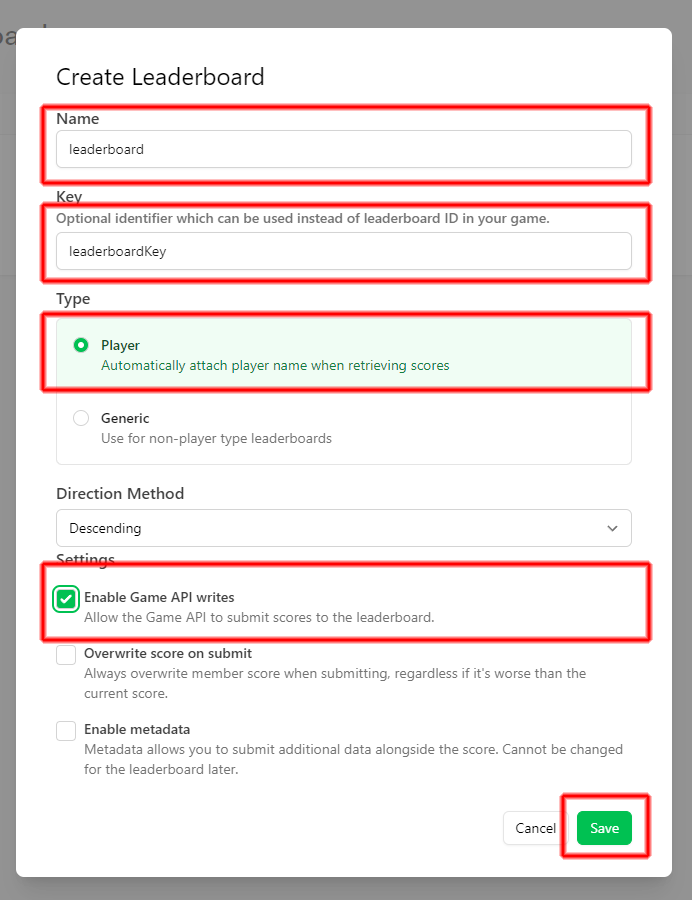
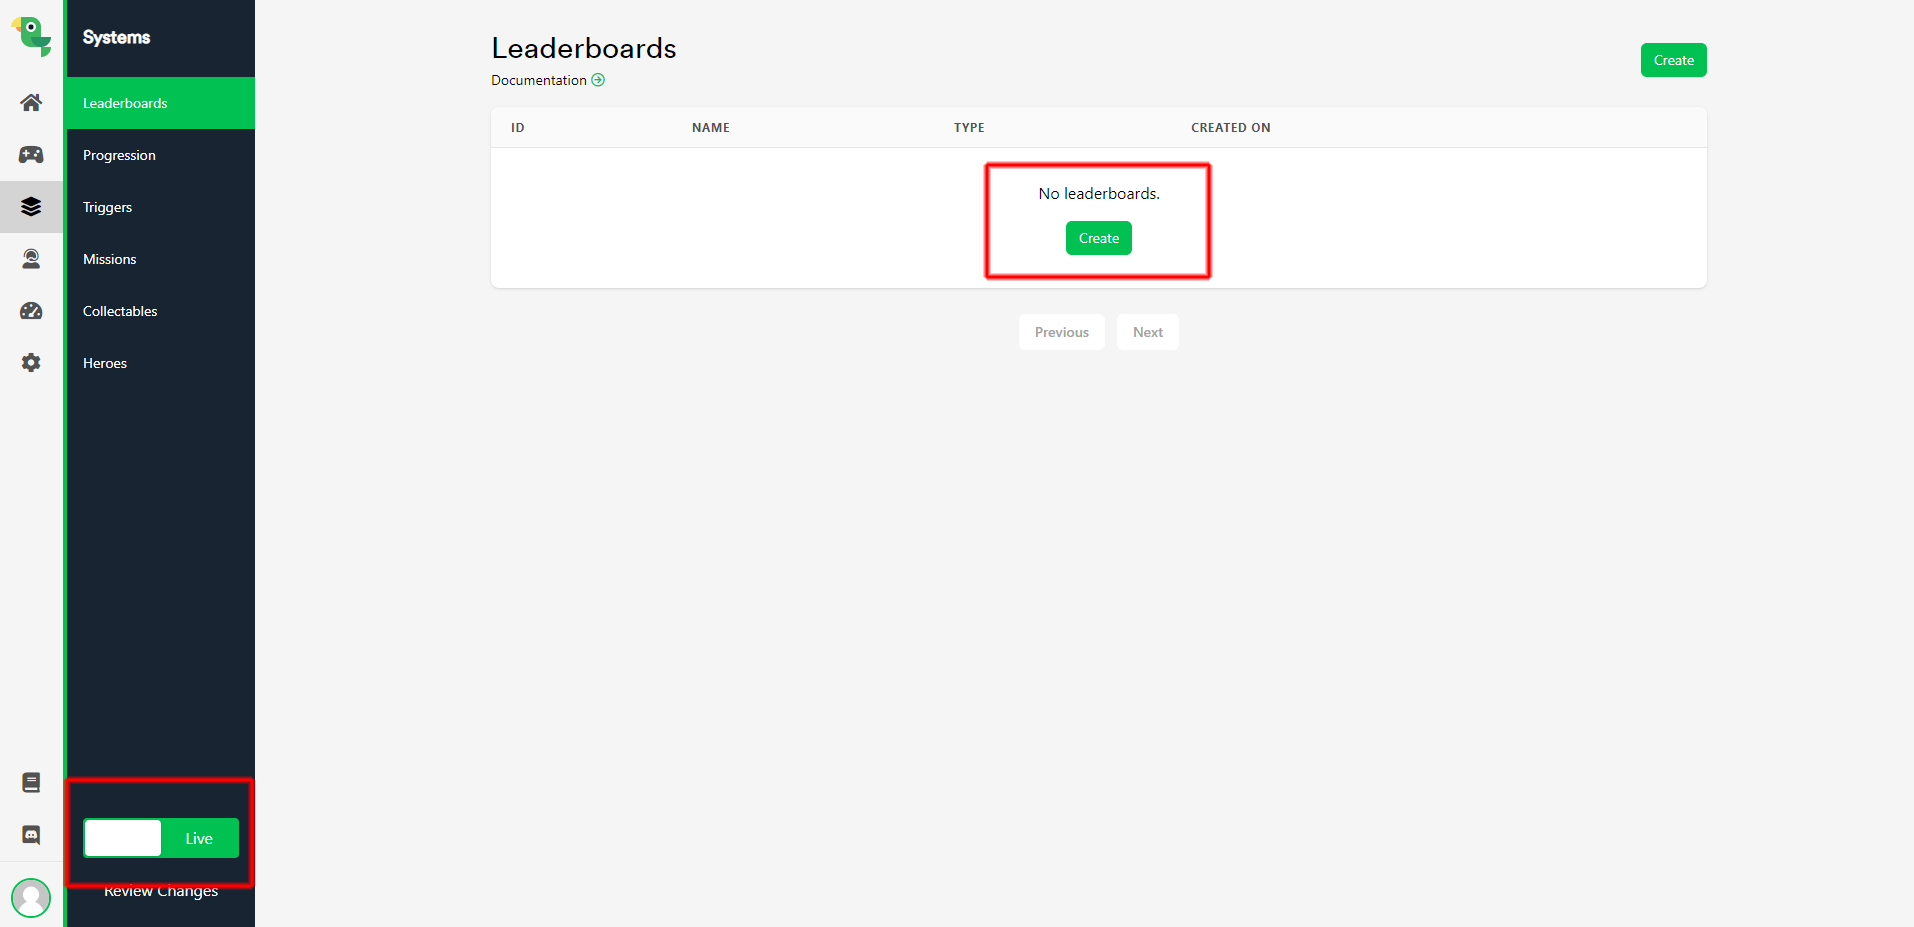
- Create a leaderboard by navigating to Systems, and then Leaderboards. Click the Create button create a leaderboard.

Implementing Your Leaderboard in GDevelop
Let's now implement the LootLocker leaderboard directly into GDevelop.
- Create two new scene-variables in GDevelop: score and leaderboardData.
- Create two new global variables in GDevelop: player_id and session_token.
- Add a new scene Event with condition At the beginning of the scene.
- Add a Javascript code block and insert the following code:
Switching Between Stage and Live Environments
When you're ready to show your game to the public, it's good practice to change between Stage and Live environments. LootLocker has these two environments so that you can test your game in safety using the Stage environment, and then have a fresh backend for your players to interact with with the Live environment.
You can switch between environments easily.
- Create a new leaderboard for the Live environment on the LootLocker Dashboard by clicking on the environment switcher in the bottom left corner of the LootLocker dashboard. Use the same leaderboardKey as with the leaderboard from the previous steps.
Let LootLocker Level Up Your Game Even More
Now that you've got LootLocker leaderboards implemented in your game, it's time to add a few more features to your game, like player progression or unlockable cosmetics and items. These all come out of the box, ready to be added to your game. Check out all of our available features on our website, and their corresponding REST APIs in our reference documentation.
And of course, if you're stuck - we're always here to help. Reach out to us or better yet, join us on Discord.