- Intro
- What is a CSV?
- Basic steps
- Creating a CSV
- Adding data to LootLocker
- Unity implementation
- Reading the data
- Request the data from LootLocker
- More use cases
As a game developer you are most likely familiar with the terms “nerfed” and “buffed”. They are industry standard terms for when something in a game is re-balanced to either become “weaker” (nerfed) or “stronger“ (buffed). When developing a game, game balancing can be one of the hardest things to get right, and it becomes even harder if all the data that you want to change is spread out in different places across your game. It's also hard to balance the game quickly if you have to push a game update with every balancing round.
So when you have a lot of data, it is best to keep all of that data in one place. While there are several ways to solve this problem, with this guide we’re going to take a look at one of the more common ways: using a CSV file.
But, we’re also taking it one step further and will be using LootLocker to enable game balancing on the fly (from the cloud) so that you don’t have to push game updates to balance your live game!
What is a CSV?
A CSV is a standard file format used in a lot of industries and places, it stands for Comma Separated Values, and that is exactly what it is. CSVs are often used in game balancing since they are a file format that can be easily exported from something like Microsoft Excel or Google Sheets.
There are a lot of benefits with using a tool like Google Sheets for game balancing, you have the possibility to algorithmically change values on things instead of manually tweaking things among lots of other things.
Basic steps
Using a CSV for game balancing can be very powerful, since it allows you to very quickly and easily change values on everything in your game that uses this CSV. So you could for example have enemies health points be calculated on the number of hits you want an enemy to die from instead of actual damage values.
To get this implementation up and running, we just need to do a few things:
-
Create a CSV
-
Upload it to LootLocker
-
Read and parse the information in a Unity game
For the sake of keeping things a bit more interesting, we will create some data for some fictional enemies in a fictional RPG.
Creating a CSV
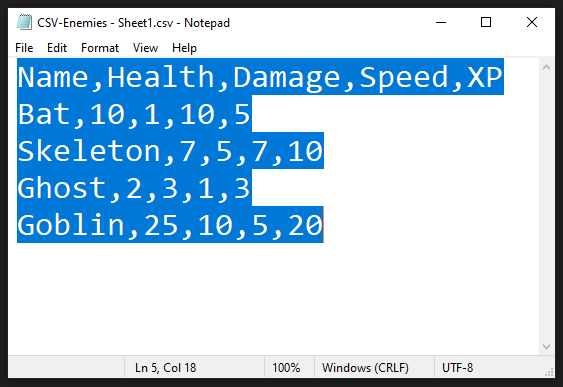
We will start off by creating a Google Sheet that contains data for four different enemies in our game: bat, skeleton, ghost and goblin.
-
Go to sheets.google.com and follow the instructions on how to create a new sheet (If you don’t have a Google Account, you will need to create one)
-
Enter the below information in the first tab of the sheet:
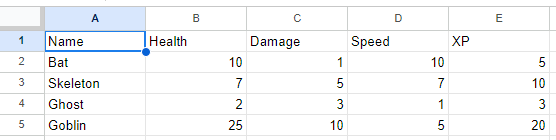
Great, we now have the data! The next step is to upload this to LootLocker, so that we can retrieve this from our game.
Adding data to LootLocker
Since we want all players to receive the same game balancing stats, we want this data to be accessible by all players. The easiest way to do this in LootLocker is to store the data in an asset, and instruct the game to read the asset at the appropriate time
Alright, let’s start off by creating our game balancing asset on LootLocker first:
-
Create a new LootLocker account and a new game if you haven’t done so already
-
Go to the LootLocker Web Console
-
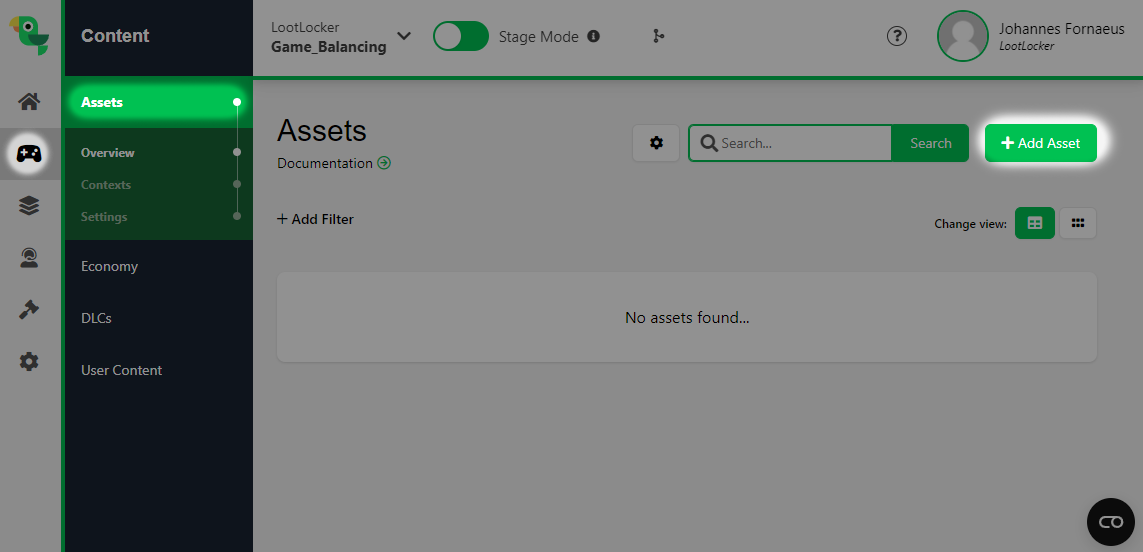
Navigate to Content -> Assets and click +Add Asset
- Enter a name for your asset (for example enemy_stats)
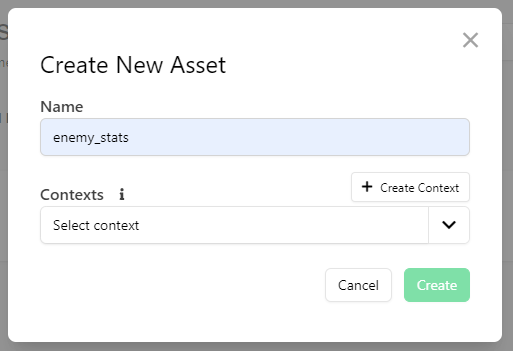
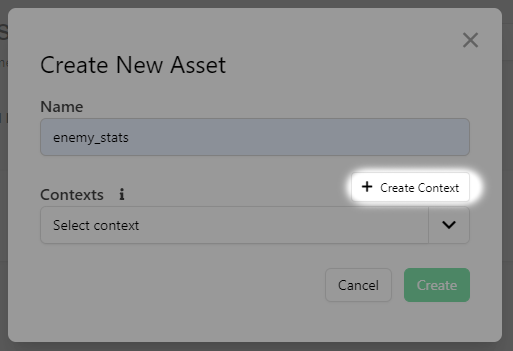
- Click Create Context
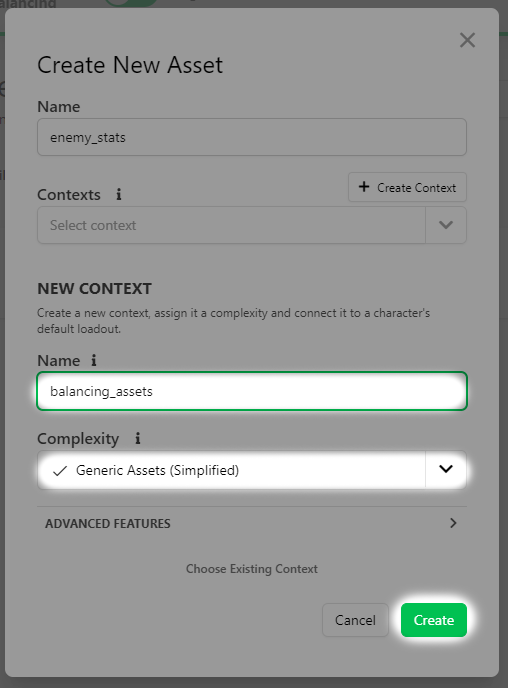
- Enter a name (for example balancing_assets)for your Context, choose Generic Assets (Simplified) and click Create
Now, our asset is created and ready to be filled up with enemy data!
So, let’s go back to our Google Sheets to export our data to a CSV.
- File-> Download-> Comma Separated Values (.csv)

- Next, open the downloaded file with a simple text editor (Notepad/TextEdit) and copy all the contents of the file (CTRL+A -> CTRL+C / Command+A -> Command+C)
Alright, all data is copied, so now we just need to put it somewhere!
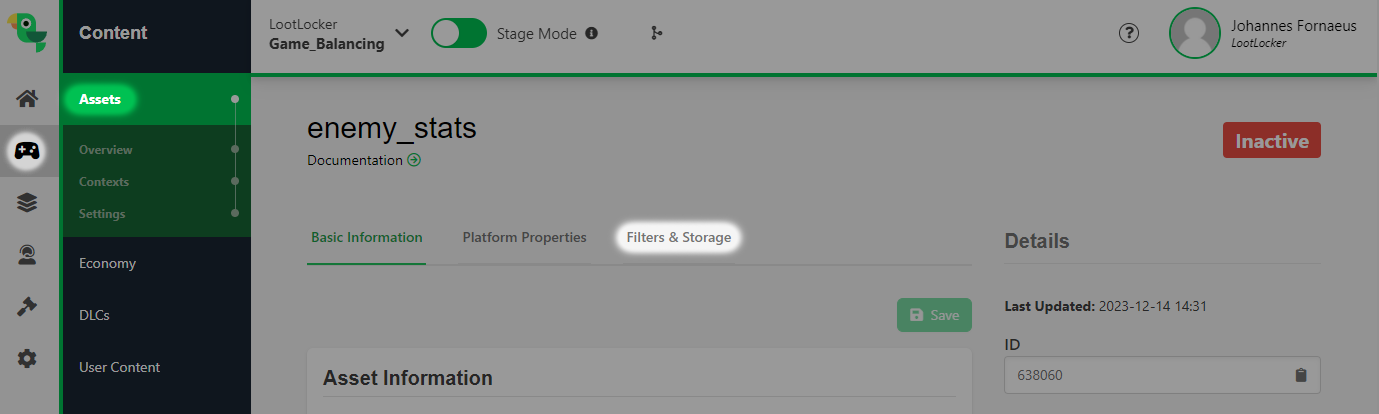
- Go back to our previously created asset in the LootLocker Web console and click the Filters & Storage-tab
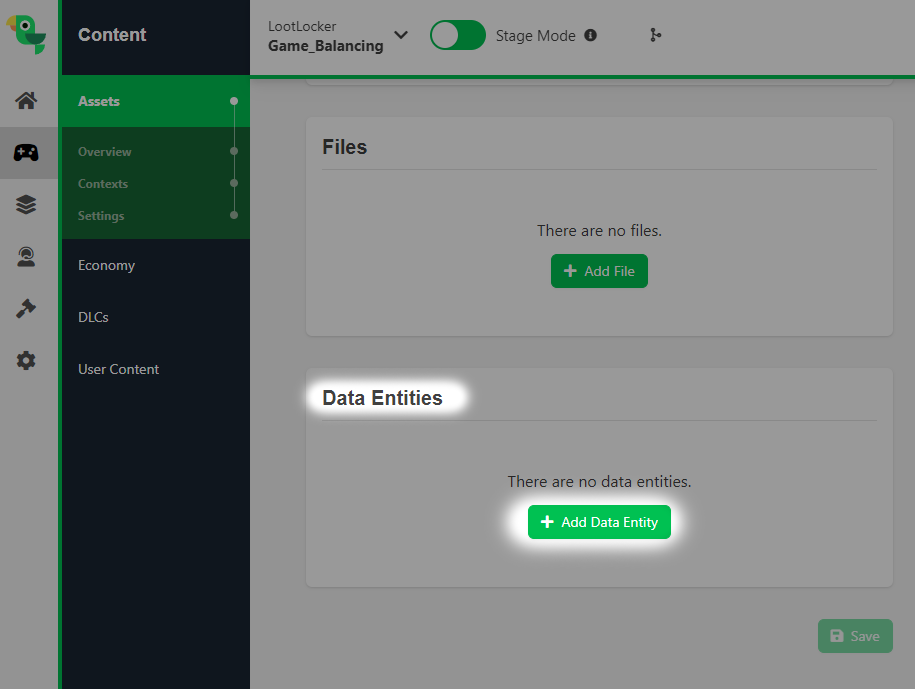
- Scroll down to Data Entities and click + Add Data Entity
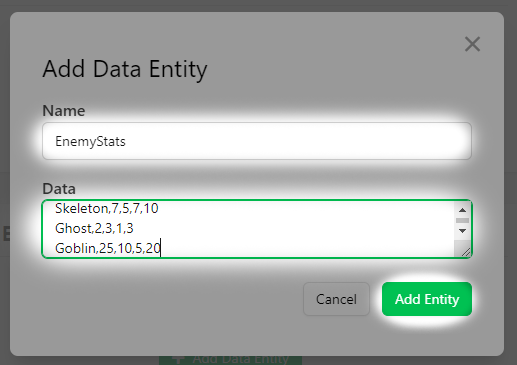
- Enter a name for the data entity (EnemyStatsfor example) and paste the previously copied CSV-data into the Data text field and click Add Entity:
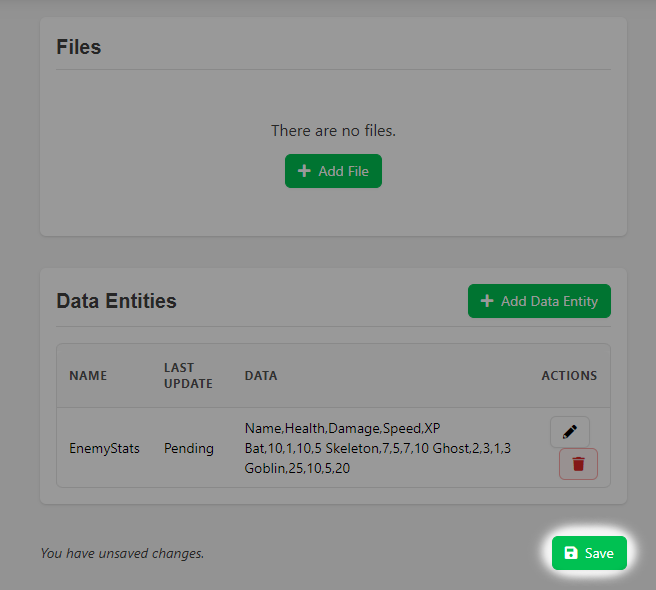
- Click Save to make sure that all our data is safely stored:
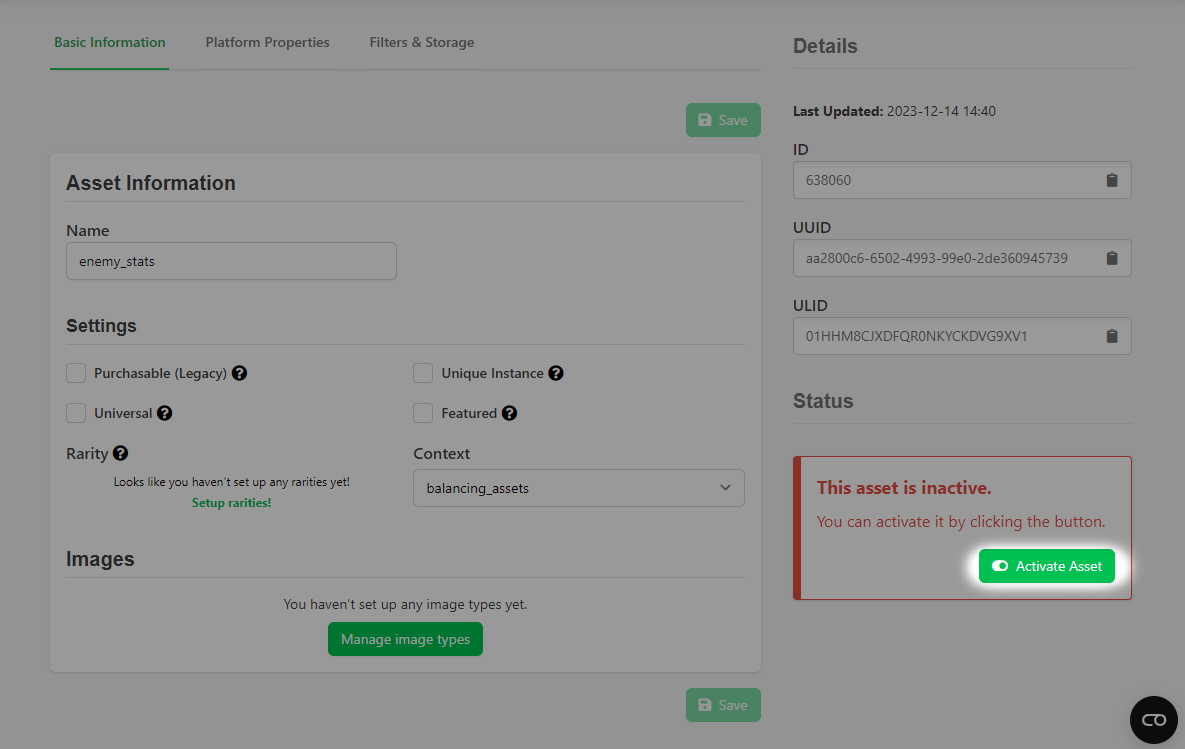
- And last, activate the asset by going to the Basic Information-tab and click Activate Asset
Awesome, we’re now roughly halfway through the implementation, we have created and stored the data, now we just need to fetch and parse it so that we can use it in our game!
Unity implementation
Everything in LootLocker starts with a session, we provide multipleidentity providers but for the sake of simplicity, we’ll use a Guest session for this implementation.
The steps that we’ll need to implement are as follows:
-
Start a Guest session
-
Retrieve the game balancing information from our EnemyStats asset
-
Parse the information to an enemy class
Simple enough, let’s get going!
Make sure that you have downloaded and installed the LootLocker SDK before continuing!
Reading the data
Before we request the data from LootLocker, we must be sure that we can read the data first. Now, to read the data in our game, we first need to create a class for our enemy data:
Great, we now have the structure of our enemy data, next we need something to parse the data when we receive it. For that we’ll use a StringReader and split the data on every comma to get our enemyData in a neatly organized list:
Disclaimer
This should work fine for most cases, but if your CSV is more complex with for example text that can include commas, you will need to do this step differently.
Great, everything is now prepared for us, so let’s fetch that data!
Request the data from LootLocker
To get anything from LootLocker, we must first start a session.
So let’s start off with a guest session:
If the response was successful, we want to fetch the data from our EnemyStats asset. To do that we need the asset_id which we can find on the basic information tab on the asset in the Web Console:
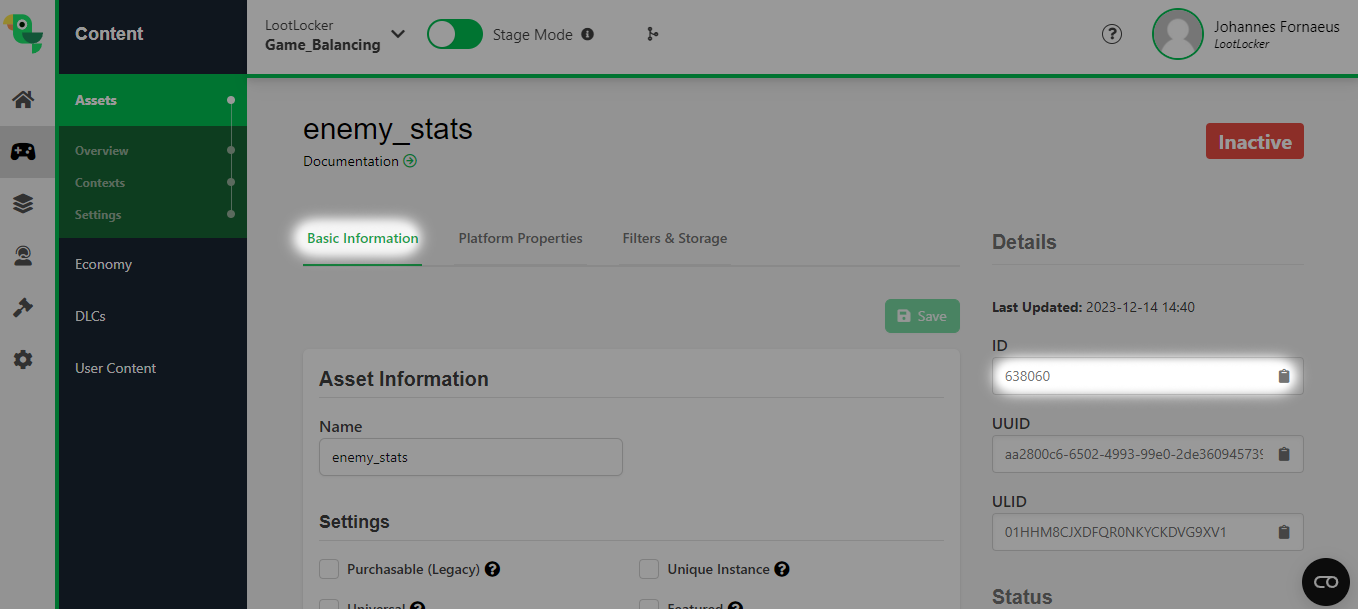
Copy the asset_id and insert it as the asset_id parameter in the GetAssetInformation()-function that we call when getting a successful response:
Perfect! If you run your script now, you should get a response in the Unity console with information about your asset, something similar to this:
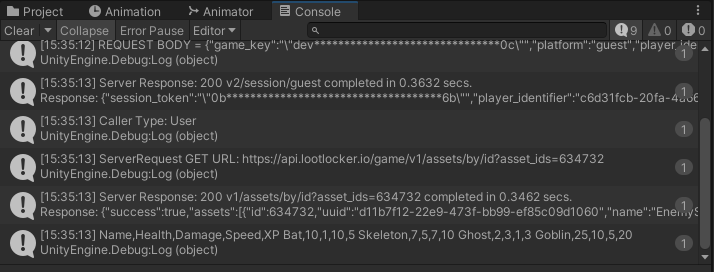
Alright, all that’s left to do now is to parse the CSV in our asset to get the information for our enemies:
Our CSV data has now been retrieved in our game!
Now, to utilize this implementation easily, you could make this into a singleton to have it easily be readable from other classes:
Then, when you for example want to set the stats for say a skeleton, you would just do:
Keep in mind that this request is not instant since it needs to contact our servers, so if you fetch the stats the same moment that you create your enemies, you would also need to wait for the stats to be ready, like so:
Now, whenever you want to change any stats in your game you just simply need to change the values in your CSV in google sheets and paste it into your asset on LootLocker!
With this simple implementation you can make sure that all your players always have the latest game balancing changes in your game as soon as they start it up.
More use cases
This guide provided only one example of utilizing data on assets, it can just as easily be configured for game settings, game events, seasons and much more!
There are several other ways you can utilize data on assets, for example:
Game Configurations
Game configurations can be used to enable and disable specific features in your game. Having this information available in the cloud allows you to quickly and easily enable or disable certain features in your game. Say for example that you want to run a specific event, you can add all information about this certain event in LootLocker and the event will then execute automatically if you say that this feature is active.
Game Events/Seasons
Similar to Game Configurations, you can also set up seasonal events by storing data on assets. By storing dates and seasonal information in a CSV or a JSON on an asset, you can have your game enable or disable certain features whenever a specific event is occurring.
Localization
It can often be cumbersome to translate a game and when all work is done, realizing that something is completely wrong in a different language. But if you instead store the translation data as a CSV on an asset and download it when the player starts the game, you can be sure that your players always have the latest language pack available.
And much more!
Since this is data that is available for all your players, you can easily use it to distribute any information to your players! You could even store entire games on assets! Let the player play different games every week? Can you upload python code and interpret it on the client to introduce completely new enemies and enemy behaviors on the fly? All of this is possible by preparing your data and making sure that the client can interpret it in some way.
Let us know if you used this to make any interesting and fun setups!
I hope you found this guide useful and please reach out if you have any questions, thoughts or feedback!