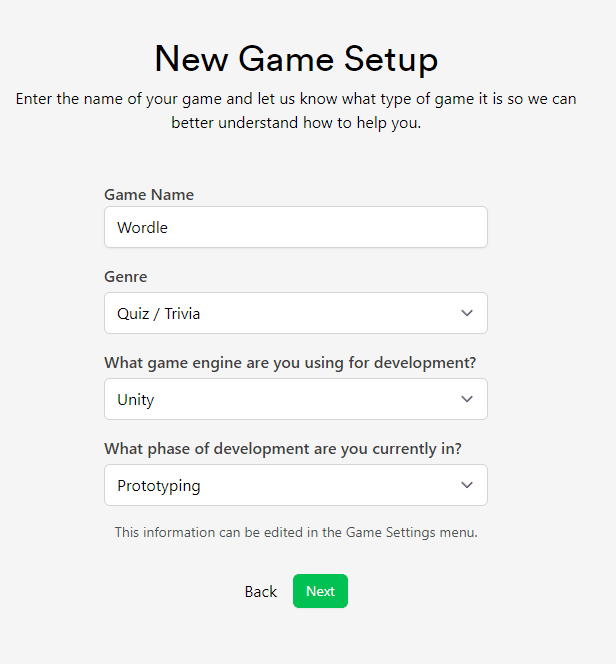
How to Make Flappy Bird with Online Leaderboards

- Intro
- Introduction: FlappyLoot
- 1.1 Setting up
- 1.2 Adding physics
- 1.3 A quick break to animate our bird
- 1.4 SDK Setup
- 1.5 Submitting scores to the leaderboard
- 1.6 Showing the leaderboard
- 1.7 Giving players names
- 1.8 Centering on scores
- 1.9 Polishing the UI
- 2.0 Adding some scenery
- 2.1 Polishing the death effect
- 2.2 Adding sound effects
- You’re finished. Now onto the next steps
Table of Contents
- Introduction
- 1.1 Setting up
- 1.2 Adding physics
- 1.3 A quick break to animate our bird
- 1.4 SDK Setup
- 1.5 Submitting scores to the leaderboard
- 1.6 Showing the leaderboard
- 1.7 Giving players names
- 1.8 Centering on scores
- 1.9 Polishing the UI
- 2.0 Adding some scenery
- 2.1 Polishing the death effect
- 2.2 Adding sound effects
- Summary
Introduction: FlappyLoot
Let’s make a Flappy Bird game with Unity and LootLocker. We’ll call it… FlappyLoot.
Why Flappy Bird?
Creating a simple physics game is great practice. And they don’t come any simpler than Flappy Bird. So we can run through creating, polishing and adding features to the game, without spending hours and hours on the core gameplay loop.
Also, the original Flappy Bird was missing one thing that we think would’ve made it much more fun: leaderboards. So we’ll run through the process of adding leaderboards to pretty much any game.
If you’re new to LootLocker, this will be good practice for creating leaderboards. And if you’re just checking out LootLocker to decide if it’s right for you, this will show you just how quick and simple it is to use.
What you’ll need to get started
To follow this guide, you’ll need to know the basics of programming in Unity and C#. We’re using Unity 2021.2.7f1, but you should be fine using any similar version.
If you need any help with using Unity, go to: https://learn.unity.com/.
It’ll also help to know what it’s like to play Flappy Bird. You can play our finished version of this game on Itch.io.


Bird goes up, bird goes down: the rules of Flappy Bird
Flappy Bird is an extremely simple game that went viral in 2013. I works like this:
- You control a bird as the screen scrolls from left to right. The aim is to guide your flappy bird through the gaps in the pipes.
- If you hit a pipe or the ground, you lose. You then have the option to start again from the beginning.
- You hit the button (spacebar, touch the screen, etc.) to make your bird fly up. When you’re not hitting the button, your bird falls.
- Your score goes up by one for every pipe you successfully pass.
We’ll put all these features into our game, but with an online leaderboard too.
Let’s get started.
1.1 Setting up
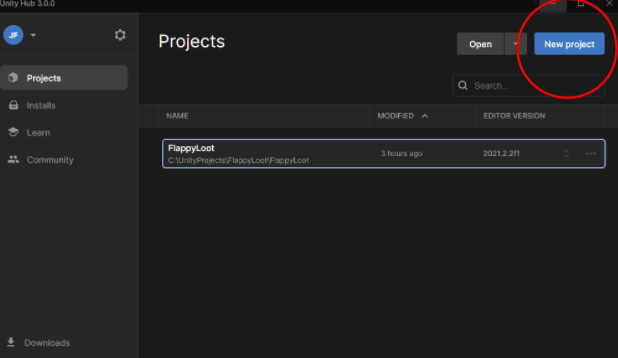
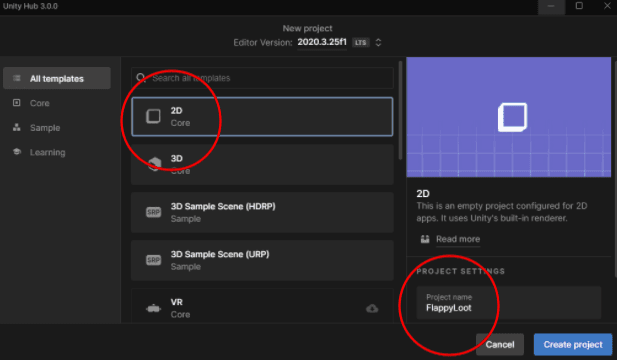
Creating a project
- Open Unity Hub.
- Click New Project in the top-right corner:
Setting up the camera
We now have an empty Unity Project. Let’s tinker with the settings so it looks a bit nicer.
We’ll start by changing the background color to something a bit more fitting.
- Select the Main Camera.
- Click background and select the color you want your sky to be. We went with this color(#5FC5CB), but you can choose any. You could go for a cloudy sky, dystopian sky or an otherworldly sky.
Adding a character (meet Hector)
There’s nothing to say your character has to be a bird. You could have a bee, a dragonfly or even a person with a jetpack.
We’re going to use a bird though – namely Hector, the bird in our LootLocker logo. We think he’ll enjoy the exercise.
Feel free to use our images for your project, or create your own if you prefer:

- Drag and drop the downloaded package into Unity and click Import when prompted.
- Create a new GameObject and name it Bird:
- Drag and drop the images from the Bird folder in the project to the Bird GameObject.
- The sprite order will be wrong to start with. Change the Order in layer of the different sprites like this:
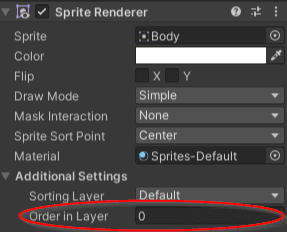
- Body: 0
- Eye: 1
- Lower beak: -2
- Upper Beak: -1
- Wing: 2
- Select the Camera in the Hierarchy window
- Change orthographic size to 3:
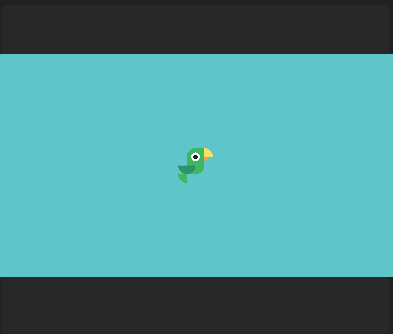
Quick test: Your game view should now show only your background color, with Hector chilling motionless in the foreground:
1.2 Adding physics
Adding gravity
Let’s give Hector some movement.
- Select the Bird Game Object in the Hierarchy
- Click Add Component
- Write ‘RigidBody2D’ and click Enter:
- Add a Polygon Collider in the same way:
- Edit the collider shape to something roughly matching Hector’s outline:
Quick test: Press play and Hector should fall down.
Making Hector fly
First we’ll give Hector the ability to flap by himself on the start screen. Then we’ll put that function into practice in the game itself.
- Select the bird in the Hierarchy
- Click Add Component and Add a new C# Script called BirdController.
- Open up the script in your preferred code editor and insert this code:
In Update() check if the bird's position is below the y-position 0 (the middle of the screen). If so, set the bird’s velocity to the jumpAmount.
In case you were wondering: Setting the velocity directly, rather than using AddForce, gives us more control and a more arcade-like feeling. Using AddForce would just add the force to the bird. This would mean that if Hector’s falling very fast, the jumpAmount won’t be the same.
Quick test: Press play and you should see hector bouncing. He should bounce higher when you hit spacebar:
Adding pipes
Hector needs some pipes to navigate through. We need the pipes to behave like this:
- Spawn on the right side of the screen
- Choose a random vertical position
- Continuously move to the left
- When disappearing from the left side of the screen, reappear on the outside of the right side of the screen
- Repeat
Let’s create the pipe object first.
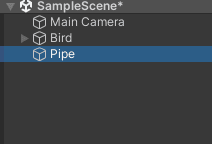
- Create a new GameObject and name it Pipe (Right click in Hierarchy -> Create Empty)
In case you were wondering: This code creates a pipe object, containing two pipe prefabs. It’ll then move all those pipes along the x-axis. When they reach the end of the screen, the pipes reset their positions and get a new random Y value.
Now, we’ll configure the settings in Unity to make the pipes work how we want them to.
Setting the pipes’ behavior
- Drag the reference to our pipe prefab from the project hierarchy:
- Enter the Pipe prefab. Add a box collider and scale it to fit the Pipe. This will give our bird something to collide with:
Quick test: Hit play and you should now have something that’s starting to look a lot like Flappy Bird.
Setting up the GameController
At the moment, the game’s playing by itself. (Well, it’s not really a game yet, but let’s call it one for simplicity's sake). We need the game to behave differently in different states:
- Menu state: Wait at the menu until the player presses spacebar
- Countdown state: Show a countdown
- Playing state: Let the player control the bird
- Dead state: Stop when the bird hits a pipe (or the ground, but we’ll get to that later)
So we need to create a GameController class that’ll handle this for us.
- Create a new Object in the scene and name it GameController:
- Add a script called GameController to it:
- Now we add this code to handle the different states of our game:
- Remove the placeholder text
- Make the text bold
- Align it Center and Middle:
Quick test: Press play and you should now get a countdown. When the countdown says ‘GO!’, the pipes will start spawning and you’ll have control of your bird.
Completing the game flow
‘Game flow’ is how we describe the whole ‘outer loop’ of a game. It’s the level above the gameplay loop itself.
In what order do we present things to the player? Writing these down in steps usually makes it easier to see what features we’re still missing.
We want our game to flow like this:
- Game starts at the menu screen
- Player presses spacebar
- Player plays the game
- Bird hits a pipe
- Bird dies
- Press spacebar to reset to main menu
- Go back to step one
With these steps, we can easily see what we need to add:
- An extra state, so pressing spacebar takes you back to the menu
- Something to stop the game when the bird hits a pipe
- A way of resetting everything when we go back to the menu
So let’s get started on that now.
- In GameController, add an additional GameState called dying:
In case you were wondering: We do this because when the player dies, they might press the spacebar too fast and jolt immediately back to the menu screen. So we need some buffer time before the player can press the spacebar again. This will give us time to include a death animation.
Quick test: Press play in Unity and you should have a complete game flow – you can hit the pipes, die and restart.
Displaying the score
We now have a playable game. But we have nothing to quantify how well we’re playing it. For that we need a scoring system. So we’ll:
- give the player one point for each pipe they pass
- show the score both during the game and on the ‘game over’ screen
- Add an integer together with a ‘get and set’ function. And a Text component for the score in GameController:
But first, we need to make sure a pipe can’t give a score more than once. In the Pipe class, let’s add a bool to fix that:

Quick test: When you play the game, you should now see your score at the top of the screen.
1.3 A quick break to animate our bird
It’s nice sometimes to take a break from adding new features – and spend some time on the little visual flourishes.
So let’s quickly do two things to make our bird feel more alive:
- Rotate the bird, based on its y-velocity
- Animate the bird’s wings as it flaps
Ro-Ro-tate your owl!
This is pretty simple: we just read the Y velocity and angle our bird based on that value.
Physics uses FixedUpdate() instead of Update(). By using FixedUpdate() we know the physics engine will be done when we set the rotation there.
- We want the rotation to be smooth, not instant. Open up BirdController.cs and set up variables to handle that:
Quick test: Press play and see how much more alive your bird looks with this one little tweak.
Making our flappy bird flap
You might’ve expected this to be task one of the guide. But no, Hector’s been literally unflappable thus far.
Luckily, this is quick and easy to fix with a coroutine.
- In BirdController.cs, add
- a reference to the bird’s wings
- an animation curve
- a duration:
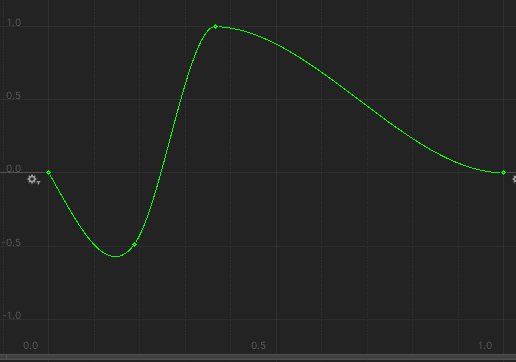
[Ctrl+C, Ctrl+V on the Flap Curve field]
In case you were wondering: On our curve, we go down quite a bit before we go up to 1. We think this looks more realistic. Think about how an actual bird flaps its wings. They don't just move their wings down – they lift they, and then swiping them down. So we try to mimic that by overshooting the curve.
Here’s the difference between an unclamped(overshooting) and clamped curve.
We think the unclamped version looks a lot better.
Quick test: Play your game and make sure the wings are flapping just how you want them to.
1.4 SDK Setup
Our players can see their scores now, but they can’t really compare them. To do that, two players would need to screenshot their scores, or print them out on paper and send them by pigeons. Not optimal.
So let’s add online leaderboards.
This is quick and simple to do with LootLocker. We’ll start by implementing the LootLocker SDK.
Creating an account
We’ll start off by creating a LootLocker account and setting a few things up. This is all totally free, and you don’t have to submit any personal data.
(If you’ve already got a LootLocker account, you can skip this part.)
- Open your web browser and go to https://lootlocker.io
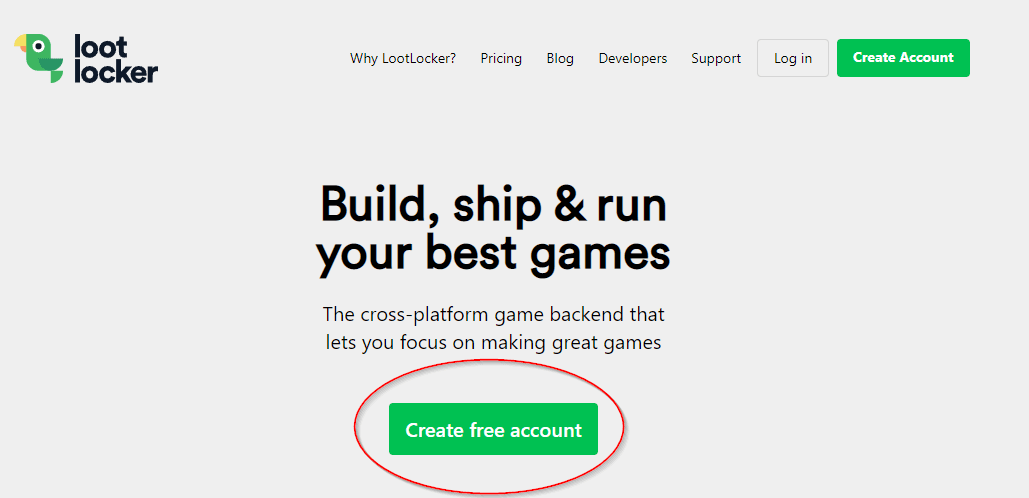
- On the front page, click Create free account

Now it’s time to install LootLocker into our Unity project.
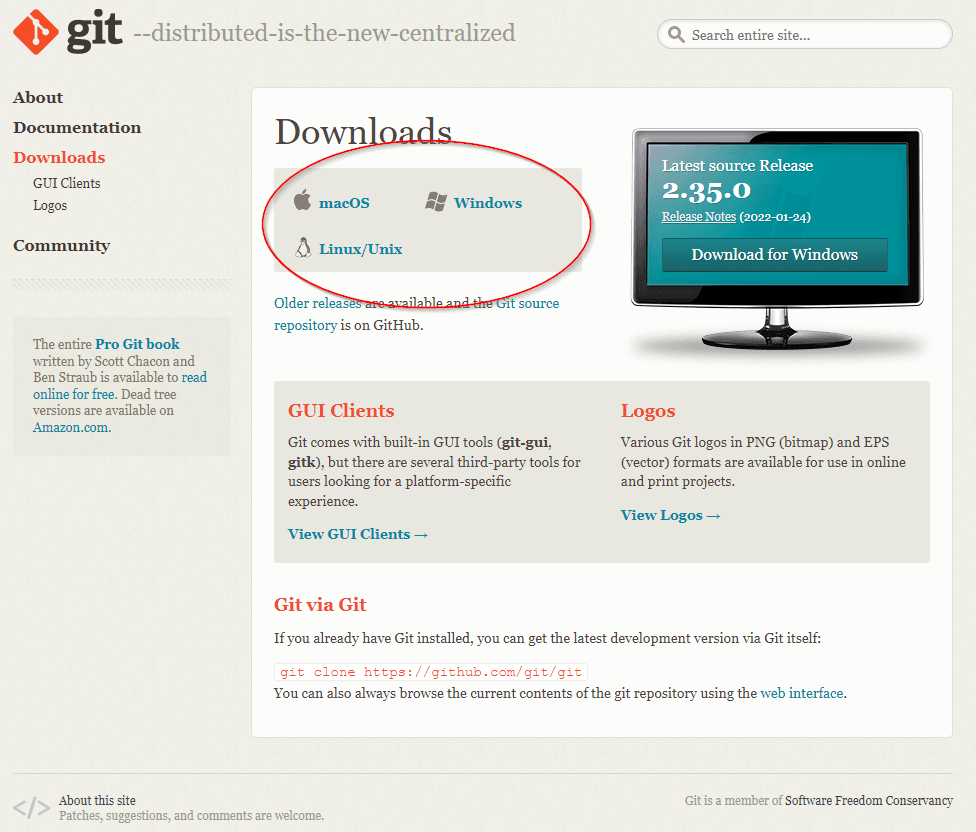
Installing Git
We’re going to install the LootLocker SDK into Unity.
To do this, we need to install Git first. This will allow us to add the SDK into our project quickly and easily. (If you already have Git installed, you can skip this part.)
- Go to: https://git-scm.com/downloads
- Choose the right download for your platform:
Adding the SDK to Unity
Now with Git installed, we can add LootLocker to our FlappyLoot project.
Quick note: You might need to restart Unity before it recognizes you’ve installed Git.
- Open up our FlappyLoot project in Unity.
- Select Window -> Package Manager
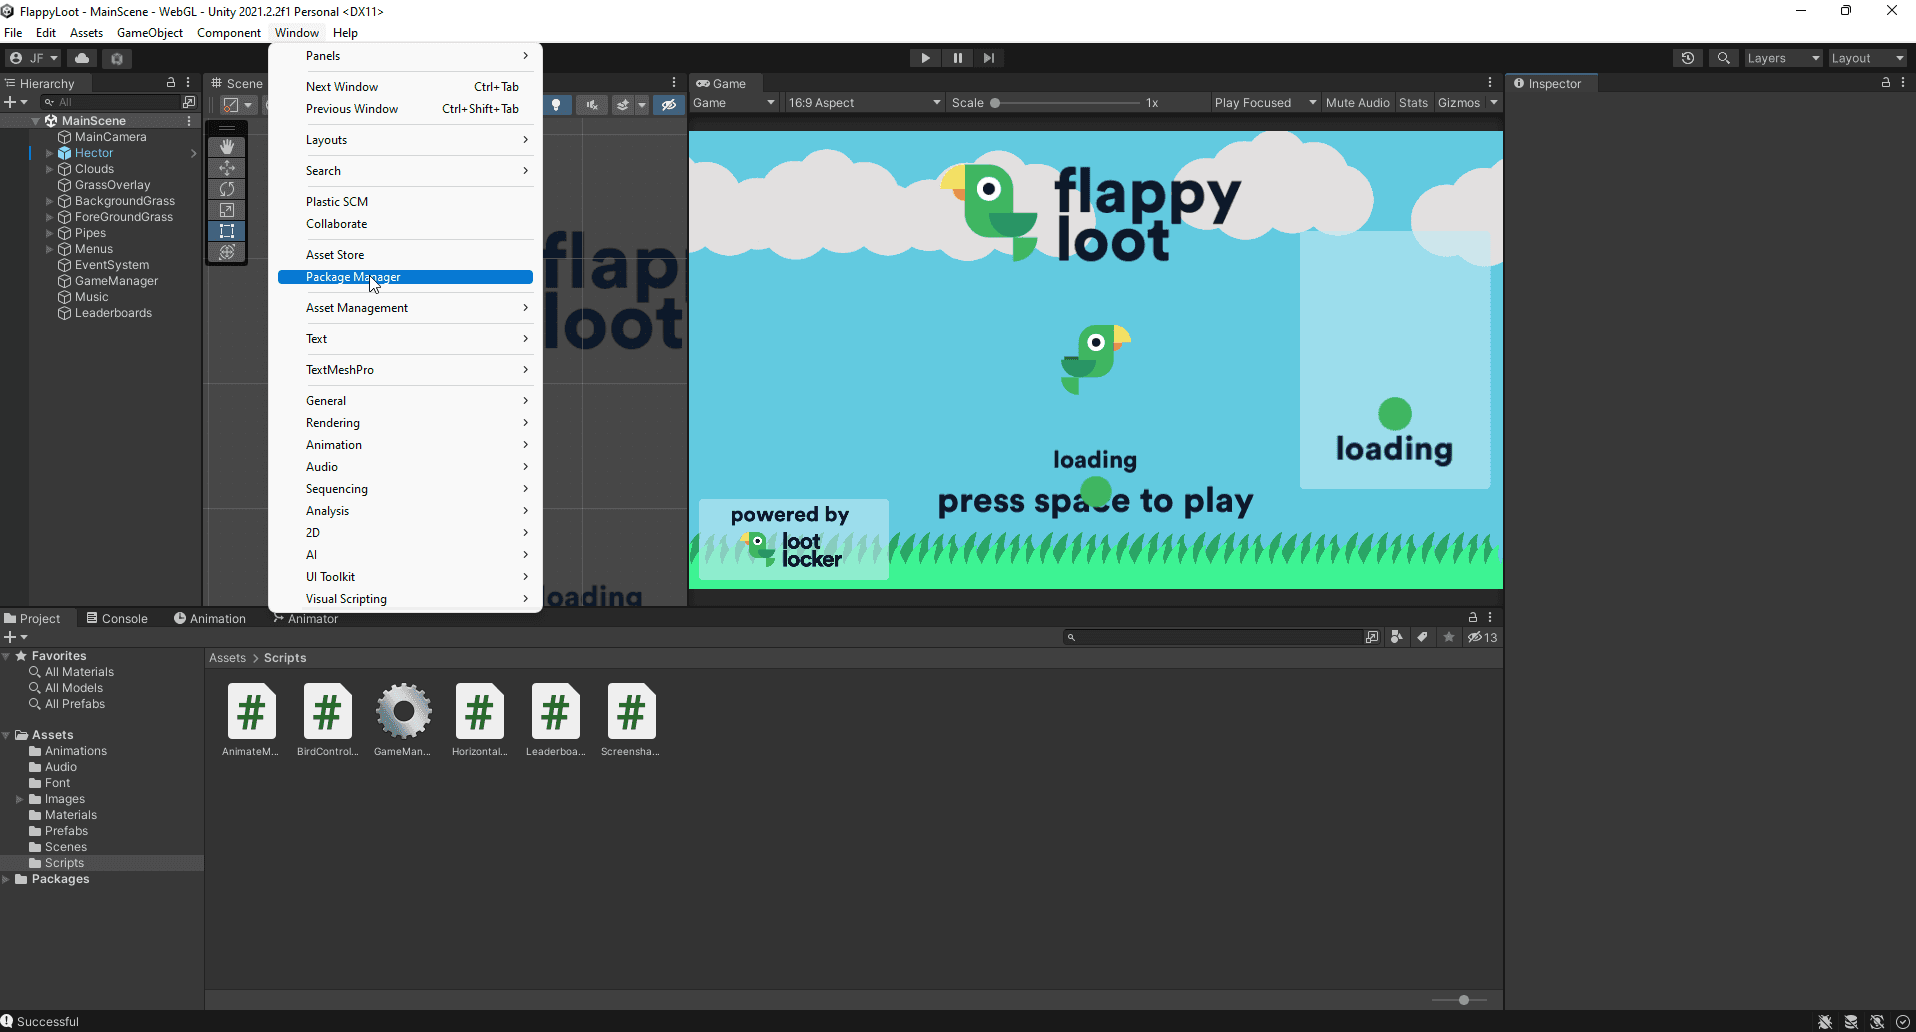
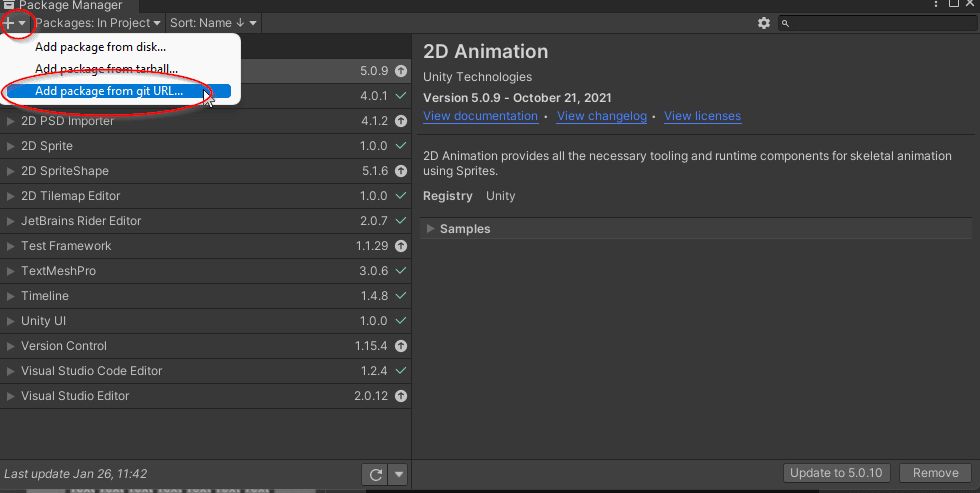
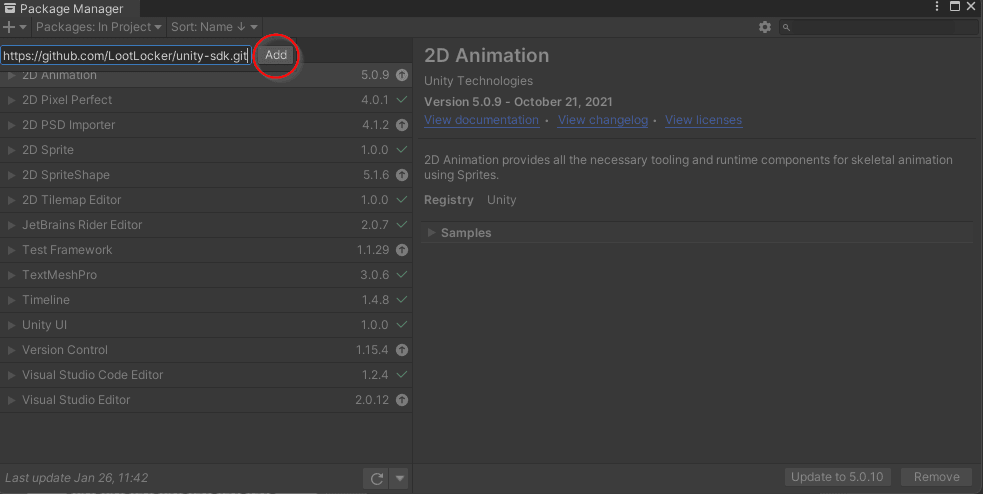
Unity will now have a quick think and then start downloading the LootLocker SDK.
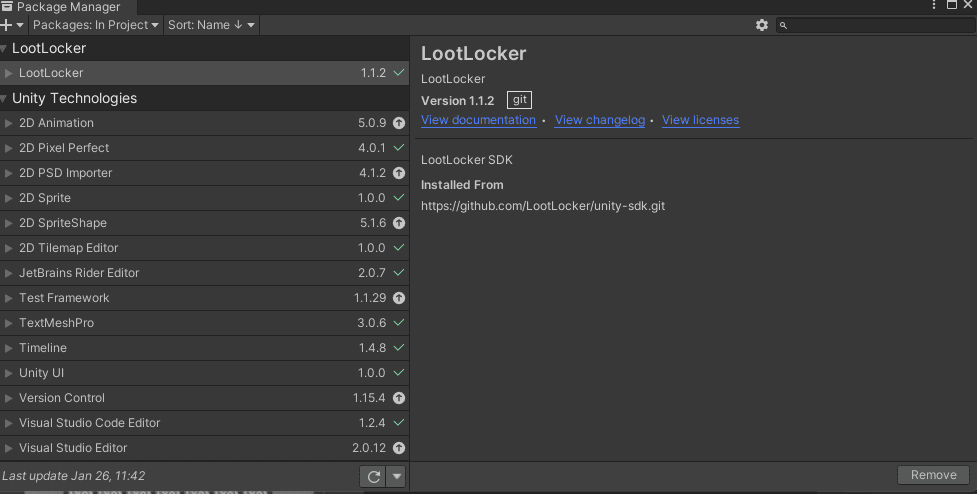
And that’s it. We now have the SDK installed. Simple, huh?
Configuring the game
Now we’ve installed the SDK, we’ll turn on the feature we’ll use for this part of the guide.
- Go to https://my.lootlocker.io/login and Log In:

Now we have our LootLocker settings just how we want them.
Configuring the SDK
We need to tell the LootLocker SDK in Unity what game it should be referencing.
First we copy the identifier for our game – our API key.
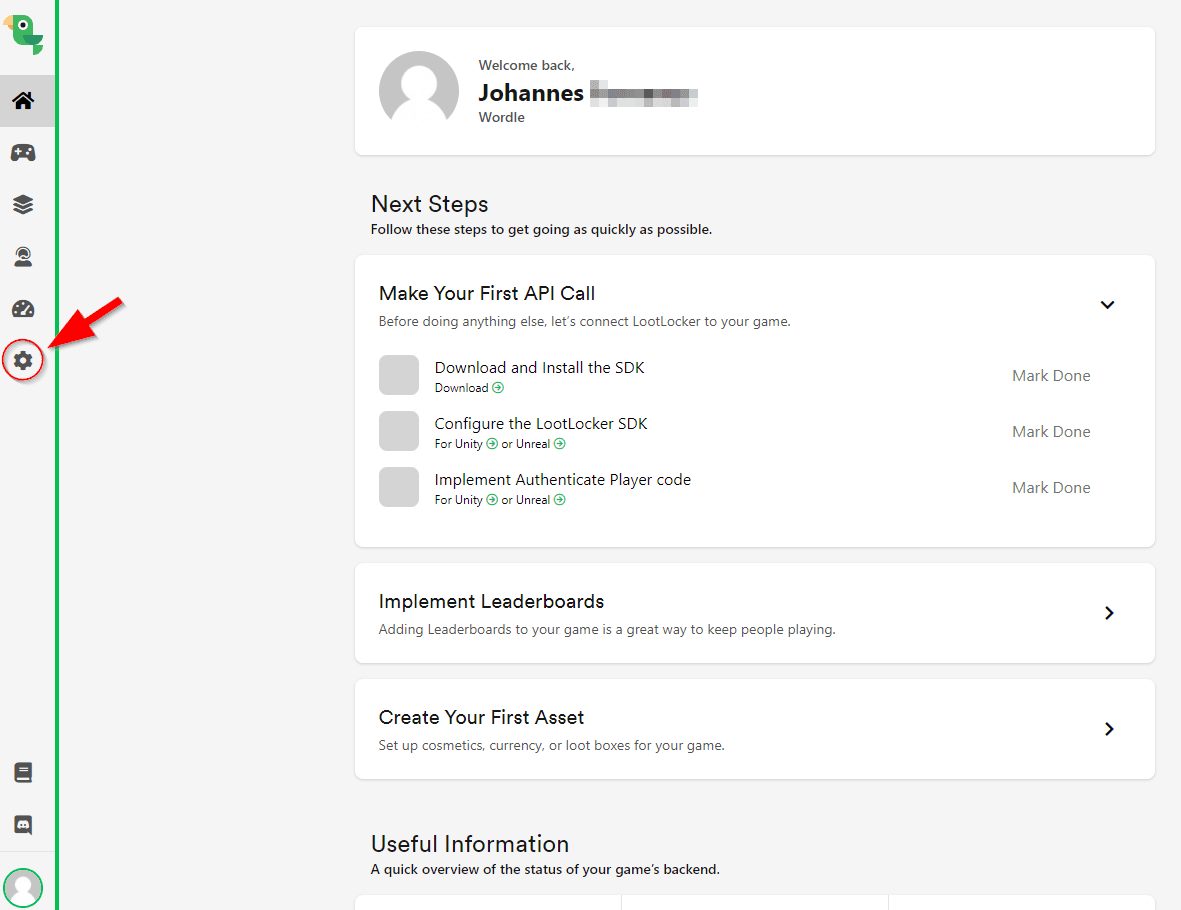
- Head back to the LootLocker dashboard (https://my.lootlocker.io) and click on the cogwheel again:


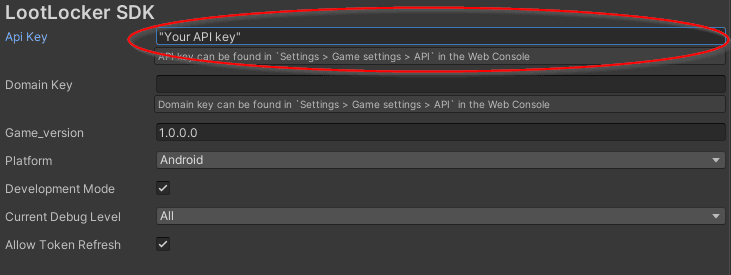
Now Unity and LootLocker can communicate.
1.5 Submitting scores to the leaderboard
Now we have the SDK setup, we can add the actual leaderboards.
We’ll store our players’ identities and let them upload their score so they can compare them with their friends.
Here's what we’ll do:
- When the player dies, let them choose to upload their score or return to the main menu.
- Show the top leaderboard on the main screen.
- Let players add a name to their score when they upload it.
- Show the newly uploaded score and its ranking, once it’s uploaded.
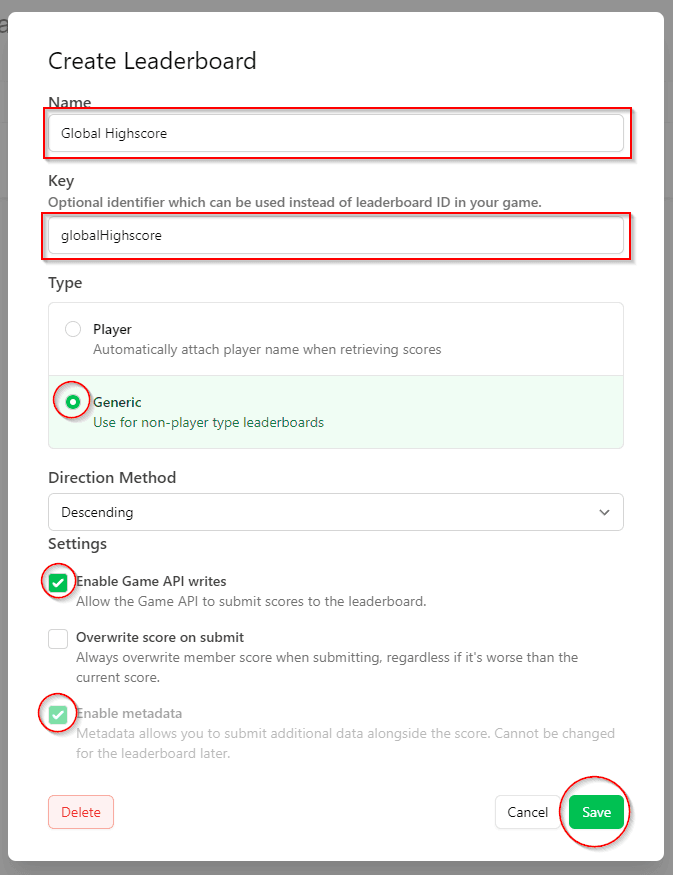
Creating a LootLocker leaderboard
There are different types of leaderboards that fit different types of games. For our Flappy Bird game, we want more of an old school, arcade leaderboard – rather than a standard one. So we’ll create a generic leaderboard instead of a Player leaderboard.
We first need to create this leaderboard on the LootLocker dashboard.
- Log in to your LootLocker account https://my.lootlocker.io/
- Click the systems icon in the sidebar, and then Leaderboards:


- Name: Global Highscore
- Key: globalHighscore
- Type: Generic
- Settings: Enable Game API Writes
- Settings: Enable metadata
Creating a PlayerManager
You might be thinking: ‘what are we doing with all of these configurations and SDKs?’
Well, we‘ll log in our player and let them upload their score.
The PlayerManager class will handle all of this. It’ll take care of all the information about the player during their login session.
- Go back to Unity and create a new game object called PlayerManager:
- Add a C# script to it called PlayerManager.cs:
- Insert this code, which will start and handle the game session:
Quick test: Press play. If everything works, you should see text telling you to press spacebar. Otherwise the text should tell you it’ll retry logging in:
Submitting the score
If we show the leaderboard now, it won’t have anything on it. So let’s upload some scores to our leaderboard.
-
Create a new GameObject called Leaderboard:
-
Add a script called Leaderboard to it:
We want to let the player upload as many scores as they want, without needing to start a new LootLocker session each time. So we’ll add some more characters to the player’s ID and use that new ID when uploading the score.
We’ll also make sure the player can only upload their score once they’ve died. We’ll do this by adding a check that we’ll later reset in GameController.cs.
-
Insert this code to handle uploading our score to the leaderboard:
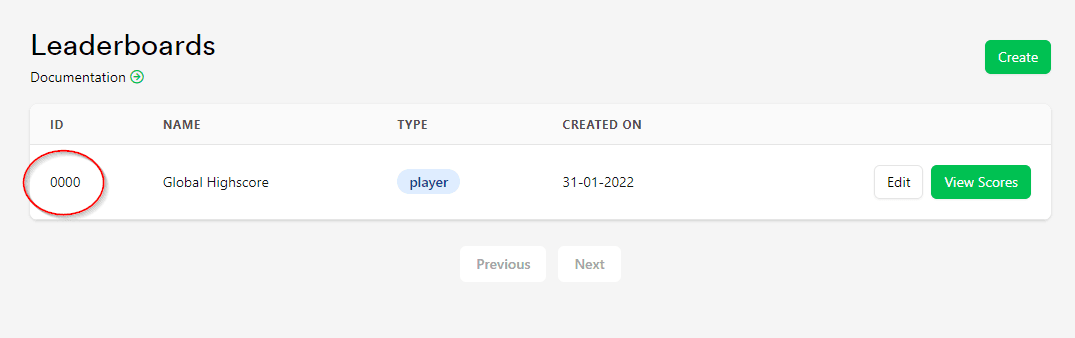
Where the code says "Your leaderboard ID", enter the ID for your own leaderboard ID (which you can find on the LootLocker dashboard):
In GameController.cs add a reference to Leaderboard:
In DeathRoutine() we’ll store away the score that’ll upload when the player dies. We’ll also allow the player to upload their score by setting canUploadScore to true:
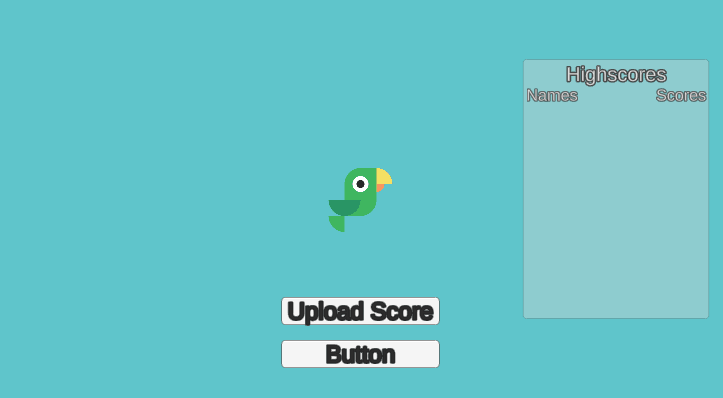
Set the reference to Leaderboard in GameController: Now we’ll set up the UI that’ll handle uploading our score.
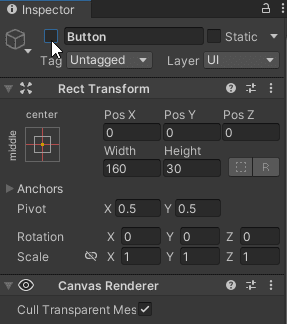
Add a new button to the canvas (UI -> Button) and deactivate the game object:
Scroll down to the button component and add a new OnClick() method to call SubmitScore() from Leaderboard:
Add a reference to the button in GameController.cs:
Then in SwitchGameState() we turn it on when we get to the Dead state, and off when we go back to the menu:
Drag the reference to the Button in GameController:
Quick test: Play the game and click the button when it appears. Then go to your LootLocker dashboard and see if a score has uploaded.
1.6 Showing the leaderboard
We can upload the players’ scores now, but we want to show it to them as well. We want the main menu screen and death screen to show the scores a bit differently. So we need our game to do these two things:
- On the menu screen and death screen, display the top scores.
- After the player submits their score, display that score and the ones around it.
Leaderboard UI
First we’ll make our leaderboard UI so we have somewhere to show the score.
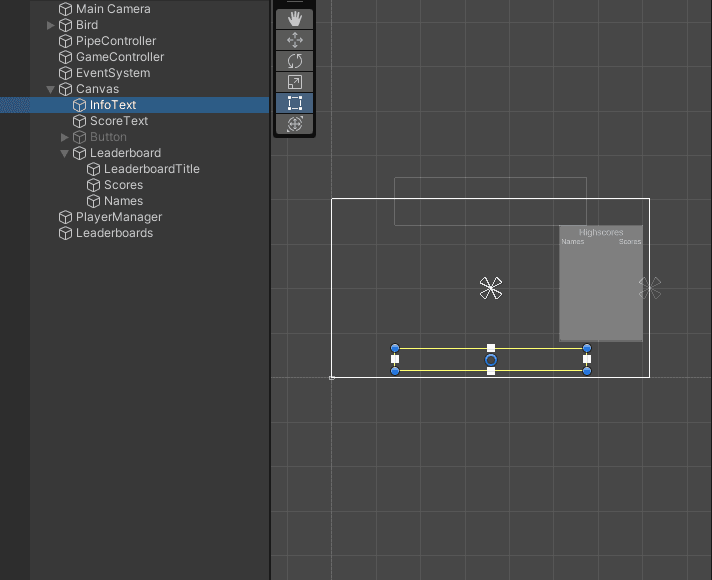
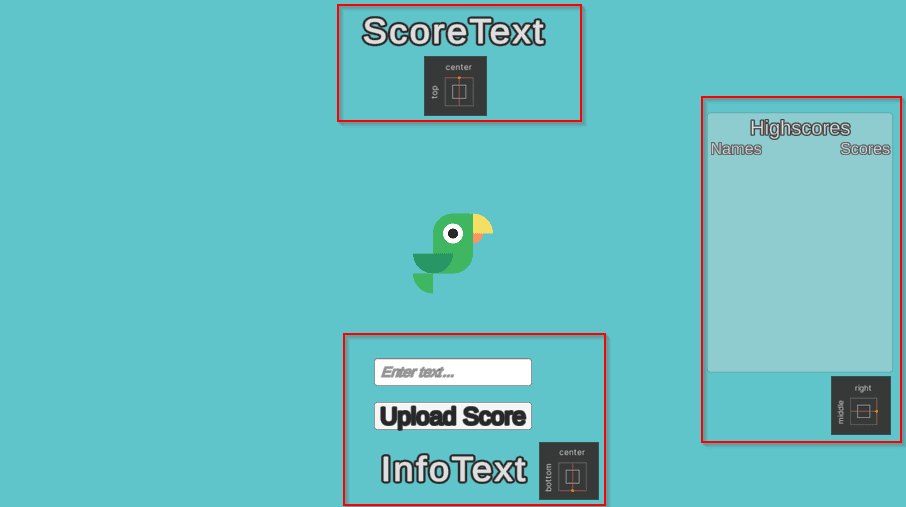
- Right click canvas in the scene hierarchy, select UI -> Panel and name it Leaderboard:
- Scale it with the handles (‘T’) and fit it on the right side of the screen:
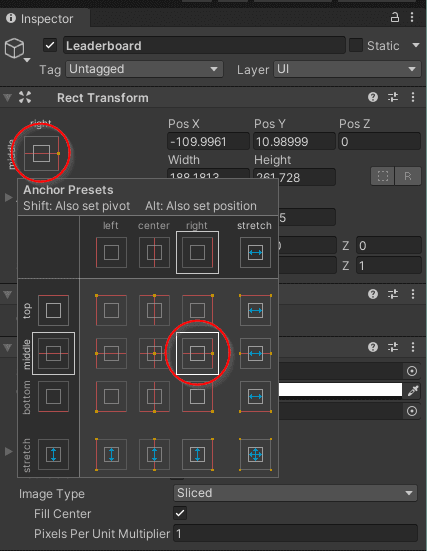
- Anchor it to the right side of the screen in the Rect Transform Component in the Inspector:
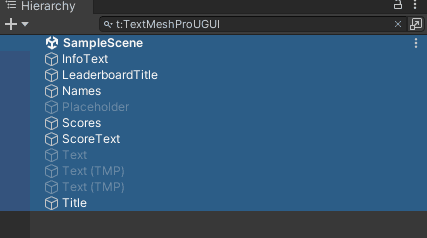
- LeaderboardTitle
- Scores
- Names
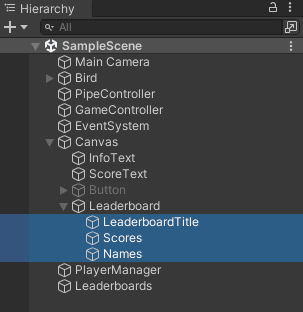
(Scores is right aligned and we’ve tweaked the text size on the Text component)

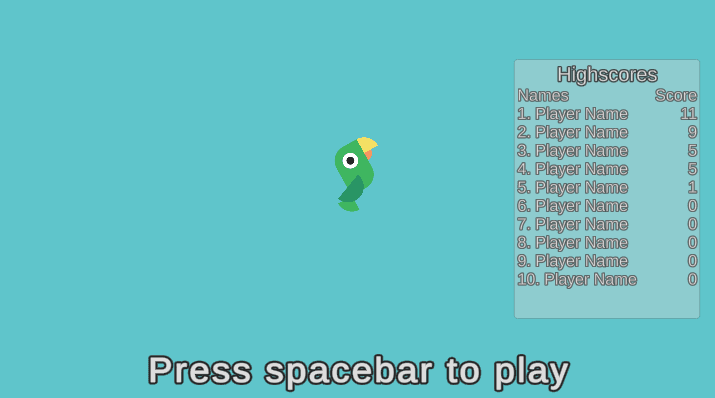
Showing top scores
We have the UI for our leaderboard set up. Now we’ll create a function to fetch the top performing players from our leaderboard. We’ll show this on the menu screen and when the player dies.
- In Leaderboard.cs, add a using statement for TextMeshPro:
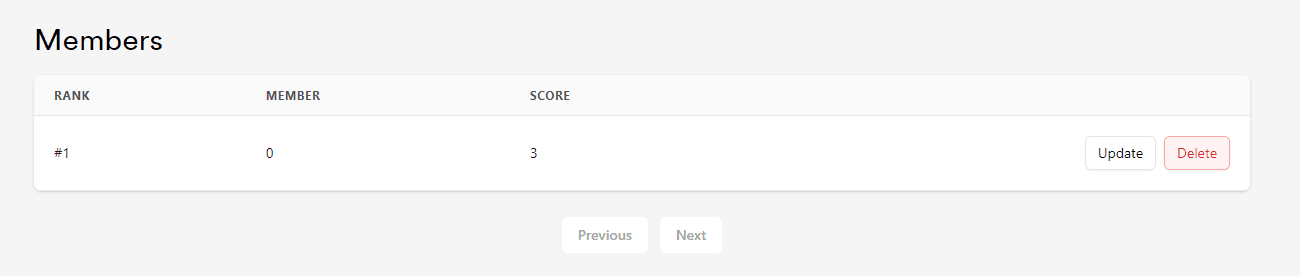
Quick test: Press play and you should immediately see the top ten scores from the leaderboard.
Showing and hiding the leaderboard
We want to show and update the leaderboard in two places: on the menu screen and when the player has died.
So we need to hide it when we start the countdown – because having the leaderboard open while playing the game would be nothing but a nuisance.
- Add a reference to the leaderboard game object in GameController.cs:
Quick test: Play the game. Check to make sure the leaderboard shows and hides when we want it to.
1.7 Giving players names
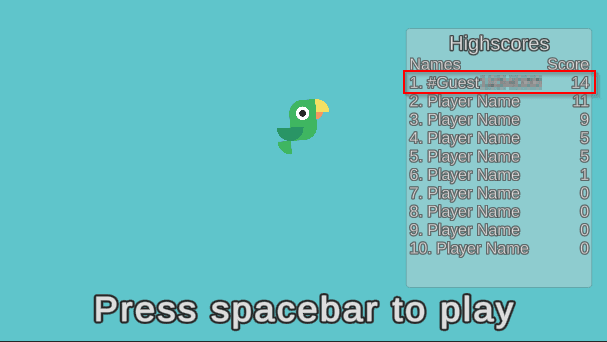
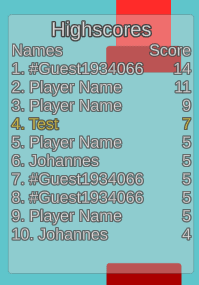
At the moment, our leaderboard only says ‘Player Name’. Obviously that won’t do – our players need to give themselves nicknames when they upload their scores.
We’ll give each new player a default ID like #Guest000000 (where 000000 is their ID). But we’ll make sure they can change it if they want to.
We won’t use the players’ actual IDs when uploading the score – we’re using a generic leaderboard, so we don’t need to change the players’ names either. We can just store that in PlayerPrefs.
Giving names to uploaded scores
- Update PlayerManager.cs to store the players default name in PlayerPrefs:
Quick test: Play the game in Unity and upload a score. This new score should now show on the leaderboard as a default name, like #Guest000000.
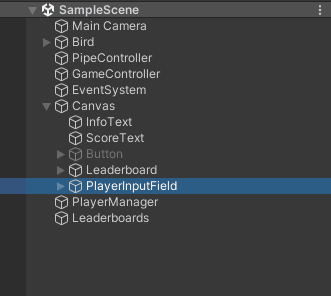
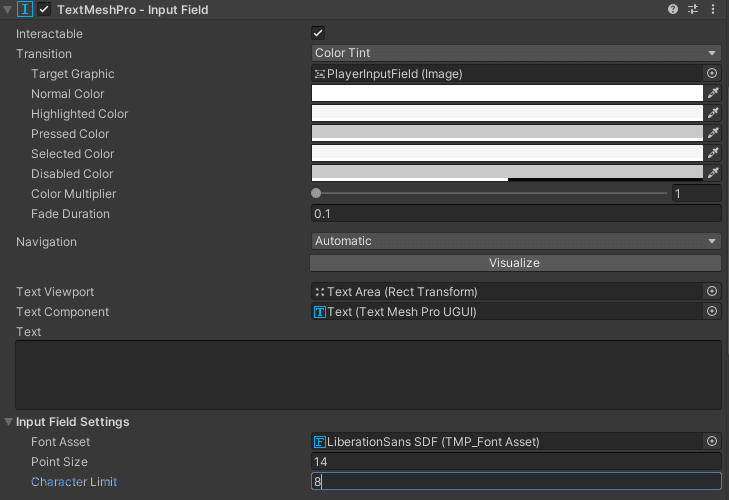
Creating an input field
Our players now have unique names, but not particularly distinctive ones. It’s not easy to beam with pride as you see your score atop the leaderboard, tagged as Guest#3928474.
So we need to let players create more expressive nicknames, like SockRock, FlappyNerd or WeLoveHector.
First we need to set up the UI to handle this.
- Add a new Input Field to Canvas (Right click, -> UI -> Input Field - TextMeshPro) and name it PlayerNameInputField:

Quick test: Play a quick game and upload your score. You should now be able to change your name and keep that name preserved between playing sessions.
1.8 Centering on scores
When the player uploads their score, we want to show them where they are on the leaderboard.
At the moment, we can only show the top ten. So we need our leaderboard to focus on the score the player’s just uploaded.
- In Leaderboard.cs, add this new function. It fetches the scores immediately above and below the score we just uploaded, and highlights it using rich text format:
Quick test: Play in Unity and upload a score. The new score you just uploaded should now be highlighted in yellow.
1.9 Polishing the UI
Our game’s pretty much done now. But there’s still an important stage left: polishing.
It’s always important to go back to the features we added early on, and make sure they still work okay now we’ve added more features.
We’ll polish more aspects of the game later on. But we need to start with the UI, since it hasn’t really been able to keep up with all the new features we’ve added.
The leaderboard can be hard to read with the outlines we added early on. It also looks a bit unfinished when it just appears out of thin air.
So here’s what we’ll do with the UI:
- Make all UI swoosh in and out from the sides of the game screen
- Add a button to return to the menu, rather than pressing the spacebar
- Make the text more readable
- Animate the score text
- Give our game a title
Swooshing the UI
At the moment, we’re just switching the game objects on and off. That looks pretty clunky, so instead we’ll ‘swoosh’ them in from the sides.
To do this, we need to read the anchor points of our different UI’s: If it’s anchored to the right, it’ll swoosh in from the right side of the screen, and vice versa for the left side.
Let's swoosh.
- This IEnumerator will read the anchor position and use it to decide where the object will appear from. Insert this into GameController.cs:
Quick test: Play your game and look at all the swooshy movements.
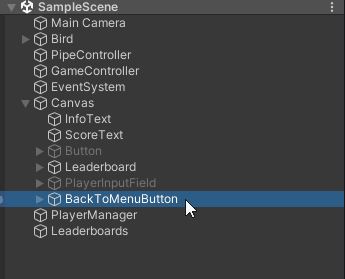
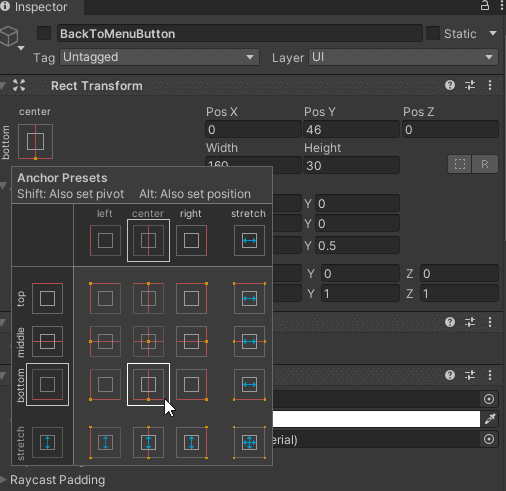
The ‘main menu’ button
We still have text telling the newly-dead player to press spacebar to return to the menu. This doesn’t really fit anymore – it’ll fight for attention with the button we added for uploading the score.
So to return to the main menu, let’s have a button instead.
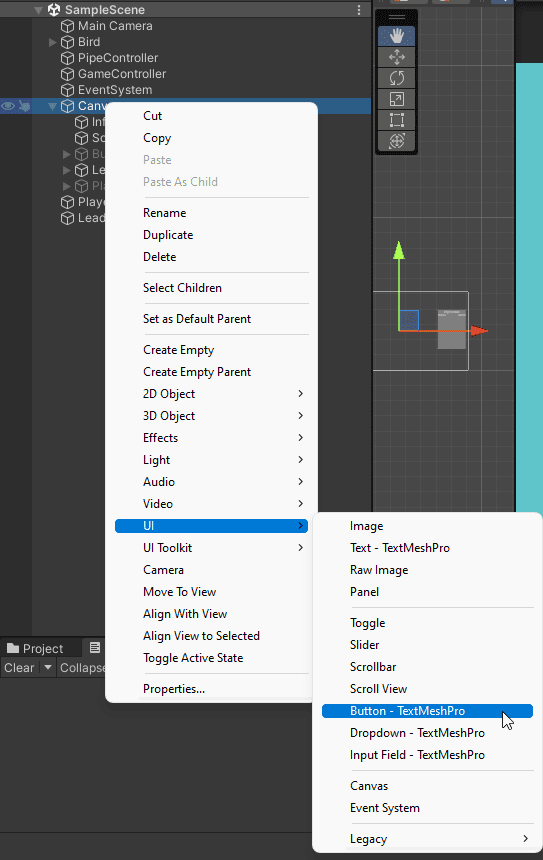
- Create a new Button by right clicking Canvas -> UI -> Button - TextMeshPro:


Quick test: Press play and do a full run through – play, die, upload score and return to menu. Just don’t get sidetracked by trying to beat your best score.
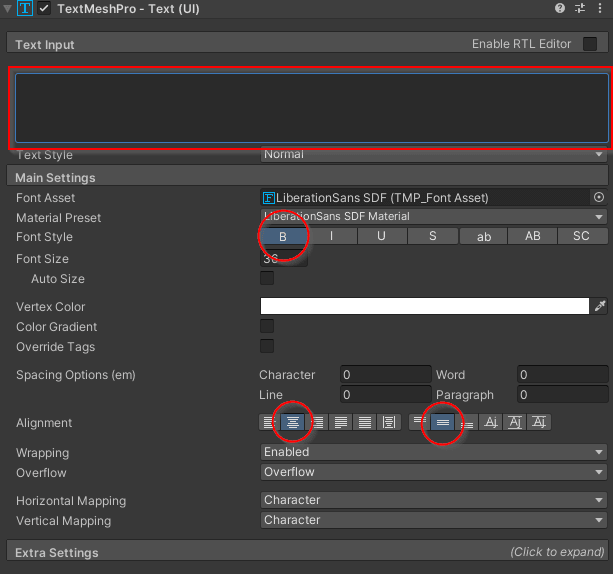
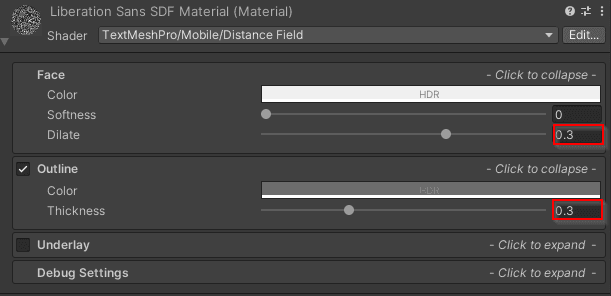
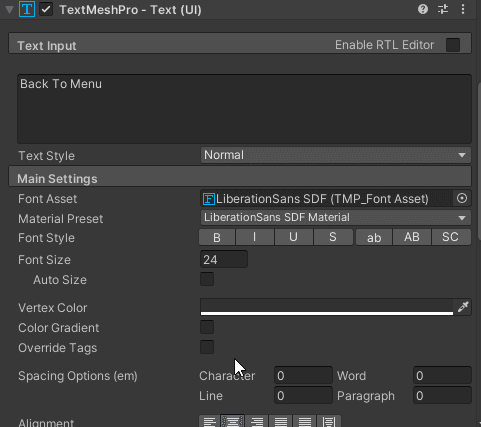
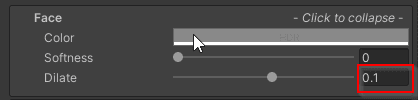
Updating all the text
With all the buttons and leaderboards we’ve added, the outline of the text doesn’t fit that well anymore. But that’s very quick to fix.
- Select any TextMeshPro - Text component in the scene hierarchy:
Quick test: Have another quick playthrough and make sure the text is looking nice and readable.
Animating the score text
When something happens in the UI that’s tied to something in the game, it’s good to show there’s a connection between the two. We can do this by animating specific parts of the UI.
At the moment, our score UI is only visible when the player’s playing our game. To show the connection between scoring a point and the score UI changing, we’ll animate it.
- Add this IEnumerator to GameController.cs. It’ll scale the text up and down again with a bit of ‘squash and stretch’:
Quick test: Play the game and watch the score ‘pop and spring’ with every pipe you pass.
Giving our game a title
At the start of this guide, we decided on a name for our game: FlappyLoot. But that name doesn’t actually appear in the game yet.
Let’s add a title to our menu screen, so the player knows what game they’re playing. We’ll give the title text a bit of animation too.
- Add a new text component to the canvas (right click -> UI -> Text - TextMeshPro)
- Name it Title
- Position it where you want the title to appear. This is where we put ours:
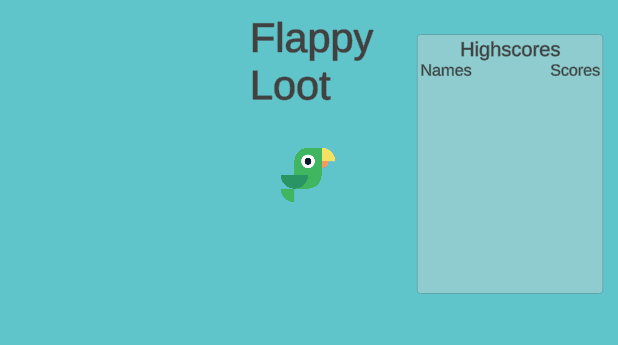
Quick test: Start the game and take a look at the main menu. You should now have your game title drifting up and down. It’s not the fanciest title screen, but it’s more interesting than static text.
2.0 Adding some scenery
Our bird dies when it hits the bottom of the screen – but it doesn’t actually have anything to collide with. So let’s add some grass to make it clear that the bottom of the screen is the ground.
Our sky’s a bit bland too. So we’ll add some passing clouds to make it feel more dynamic.
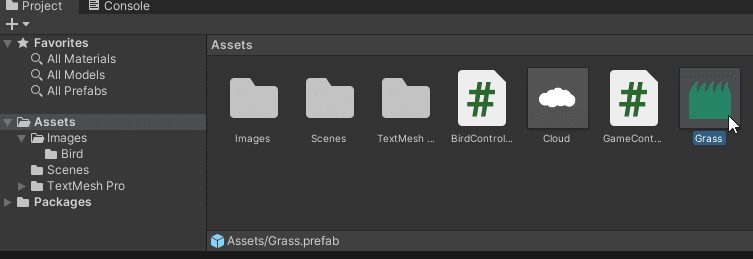
Adding Grass
The grass will behave pretty much the same way as the pipes – it’ll just appear on every screen, rather than only while playing the game.
First we’ll create a SceneryController class that’ll handle the scenery movement.
- Add a new game object to the scene called SceneryController. Then add a script to it called SceneryController: This code will move the objects until they reach the end of the screen. It’ll then wrap around on the other side of the screen, similar to how our pipes behave.
- Add this code into SceneryController.cs:
Quick test: Start your game and you should now see some grass whipping along the bottom of the screen as Hector flies along.
Adding clouds
This will be a pretty quick process now, since we just need to add some more things for the SceneryController to move.
To get a nice parallax effect, we’ll also randomize the scale of the clouds. And we’ll use that scale to determine what speed they should move.
- Add these new variables to SceneryController.cs for our clouds:
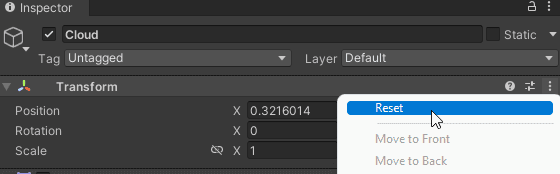
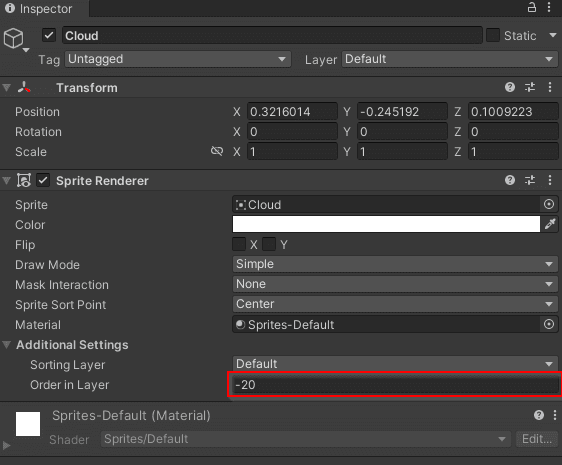
Quick test: Hit play and you should now see some nice, puffy clouds drifting by.
2.1 Polishing the death effect
When Hector dies, he just falls down at the moment. To make it more interesting, we’ll give him a bit of a spin and add something called a hitstop/freeze frame. A hitstop is when the game freezes time for a moment to give more impact and feedback. If you’ve played anime or manga games, you’ll see this effect used for punches and kicks. So it’ll work perfectly for our game.
Spinning and freezing time
We’ll create a function to handle this behavior for us. The code is small – it’s just one function, which we’ll call when our bird collides with something.
- In BirdController.cs, add a new IEnumerator called DieRoutine() to include this new behavior:
Quick test: Play the game and fly Hector into a pipe. You should now have a much more interesting death animation.
Creating ground collisions
When Hector falls down into the grass, the game setup we have now leaves him falling forever. That’s because he can’t collide with the grass yet – only the pipes. So let’s fix that.
- Open up the grass prefab by double clicking it in the Project tab:
Quick test: With these changes, any recently deceased bird should now land and stop on the ground.
2.2 Adding sound effects
We haven’t done any sound work yet. So our game’s completely silent.
Luckily, setting up sound is quick and easy. And since FlappyLoot is a pretty straightforward game, we don’t need many sounds. We’ll add only three:
- Flapping sound
- Bird dead sound
- Get score sound
Here are the sound effects we used. Feel free to use them or create your own:
Adding the flapping and dying sounds
- Add an audio source to the bird game object:
- In BirdController.cs add two new variables to store our sound effects and a reference to our AudioSource component:
Quick test: Play the game and listen to Hector flapping and squawking.
Adding the score sound
This process is similar to what we just did. The only difference is that we’ll call it from PipeController, since PipeController is the class that gives the score.
- In PipeController.cs, add a new AudioSource variable named audioSource:

Quick test: Play your finished game and make sure it’s all working how you want it to.
You’re finished. Now onto the next steps
And with that, we’re done with this guide.
Be proud of yourself – you’ve made a complete game from scratch. That’s no small feat.
On top of all the game features you’ve practiced, hopefully you’ve also learned:
- How to quickly add leaderboards to your game. This is a powerful tool for getting players consistently returning to your game and competing for the top spot.
- How to really polish a game and transform it from a prototype into a finished product.
So what now? If you want to take this project further, there are plenty of other things you can work on. Such as:
- More types of leaderboards
- A progression system
- A cosmetics system
- A triple-A, subscription-based FlappyLoot MMORPG
If you want to add more features from LootLocker, you can see our full repertoire on our website.
Now you’ve finished this guide, give us a shoutout. We’d love to see your game. You can find us here: