Improving Wordle with LootLocker (How to Make Wordle Part 2)
- Intro
- Introduction
- 2.1 Creating an account
- 2.2 Installing the SDK
- 2.3 Configuring LootLocker
- 2.4 Calling the LootLocker server
- 2.5 Syncing the daily word for all players
- 2.6 Storing our words in the cloud
- 2.7 Adding a leaderboard
- 2.8 Player Identity
- 2.9 Multiple devices, one account
- Setting up PlayerID UI
- Changing the player
- Copying and pasting for WebGL
- 2.10 Playing with friends
- Decide what to do next
Table of Contents
- Introduction
- 2.1 Creating an account
- 2.2 Installing the SDK
- 2.3 Configuring LootLocker
- 2.4 Calling the LootLocker server
- 2.5 Same word for everyone
- 2.6 Storing our words in the cloud
- 2.7 Adding a leaderboard
- 2.8 Player Identity
- 2.9 Multiple devices, one account
- 2.10 Playing with friends
- Summary
Introduction
In the first part of our guide, we showed you how to create Wordle in Unity. We set up all the gameplay features and mechanics, and uploaded the game to Itch.io.
But there’s still more to do! If you followed Part 1 of our guide, you’ll have a fully functional Wordle game – but it’s offline, and it has no way for players to share and compare their scores. The original Wordle is great but we think it could be made better with a few features and mechanics that LootLocker can provide.
What we’ll cover in part two
In this second part of our guide, we’ll use LootLocker to add the all-important social features. For example:
- We’ll set up a LootLocker account and sign the player in, so they can play on as many devices as they want
- We’ll get the correct word for the day at a specific time from a server, rather than doing it offline
- We’ll create a process for changing the player’s name
- We’ll create global leaderboards, as well as friends leaderboards
Don’t know about LootLocker yet?
Check out our website to see how we can help you make your most creative game ideas a reality. LootLocker works straight out of the box, and makes the less exciting aspects of game development quick and easy.
Now let’s get started.
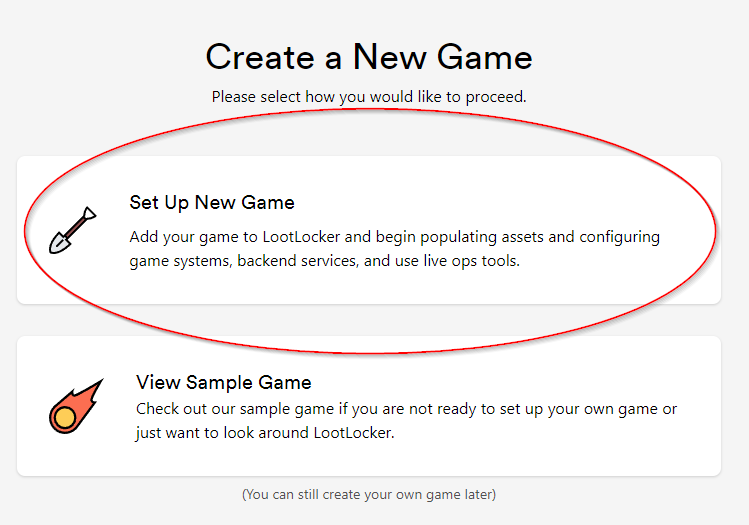
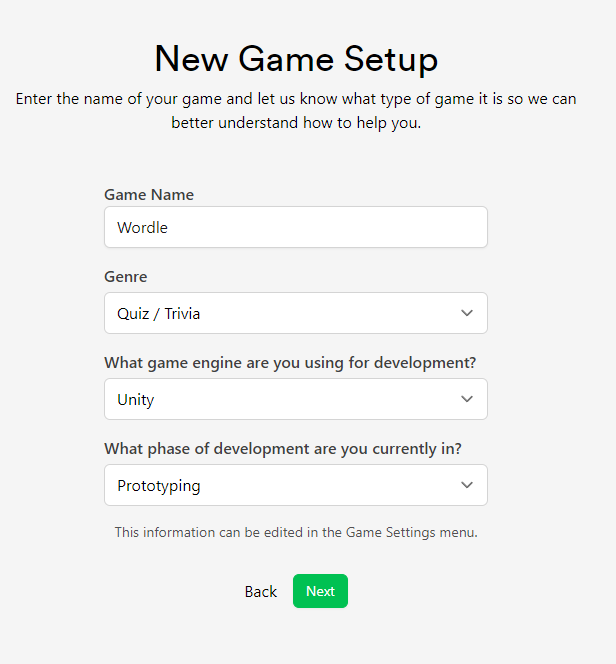
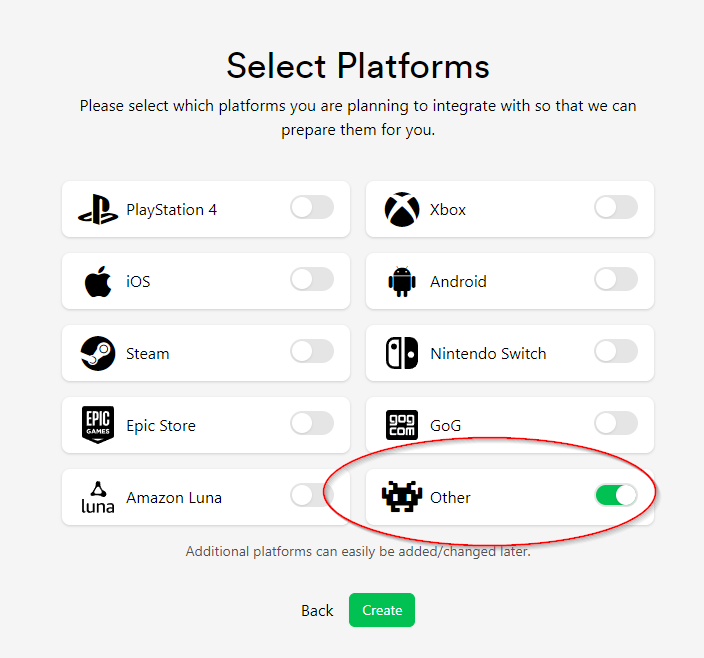
2.1 Creating an account
We’ll start off by creating a LootLocker account and setting a few things up - don’t worry this is all totally free.
(If you’ve already got a LootLocker account, you can skip straight to part 2.2.)
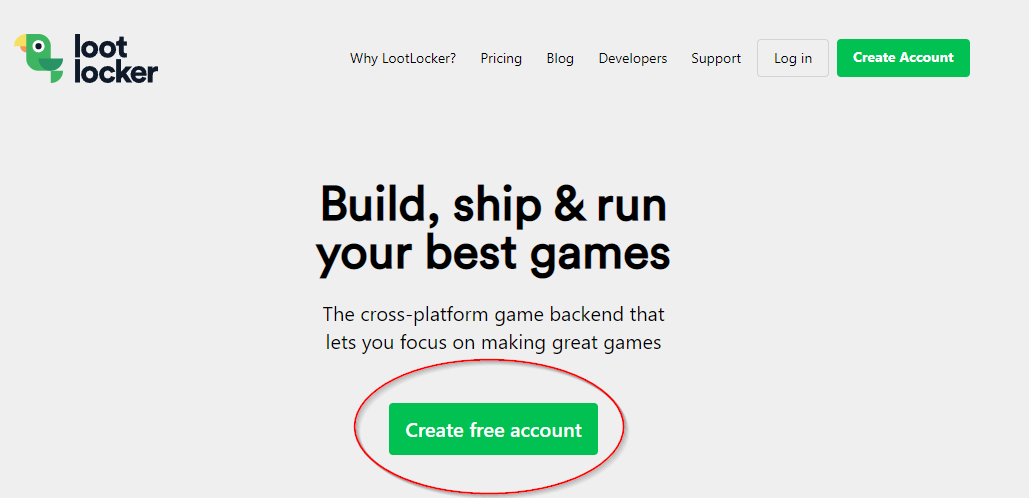
- Open your web browser and go to https://lootlocker.com
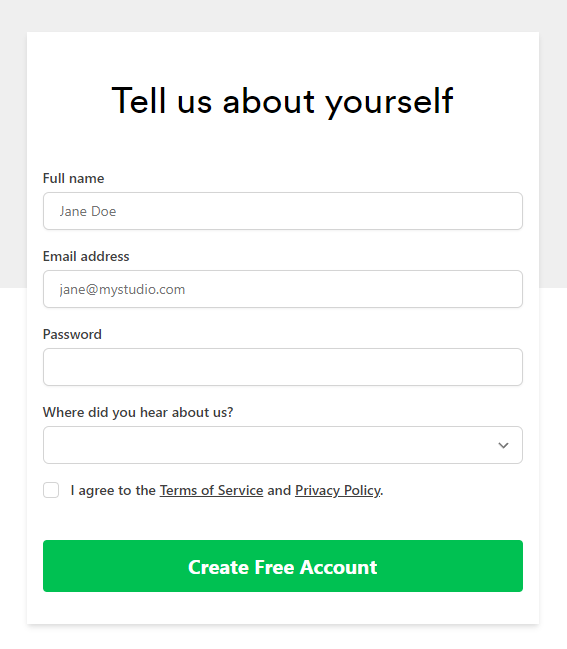
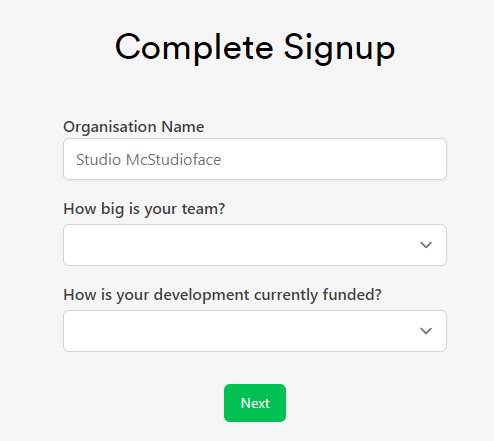
- On the front page, click Create free account
Now it’s time to install LootLocker into our Unity project.
2.2 Installing the SDK
Installing Git
We’re going to install the LootLocker SDK into Unity.
To do this, we need to install Git first. This will allow us to add the SDK into our project quickly and easily. (If you already have Git installed, you can skip straight to part 3.)
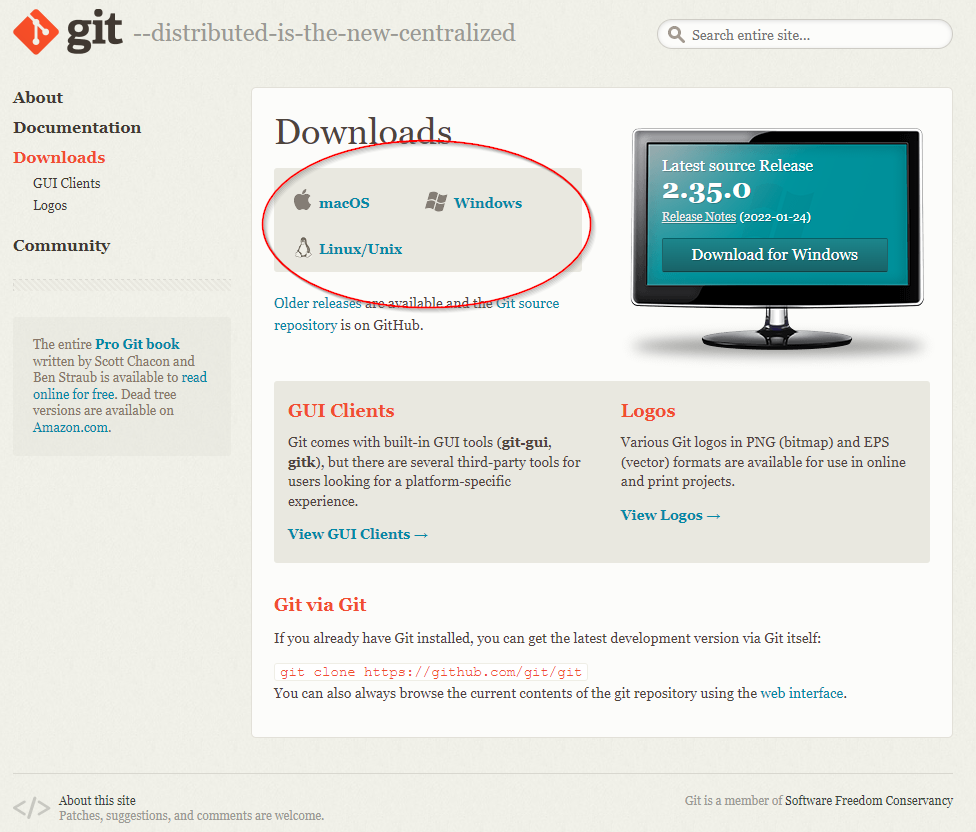
- Go to: https://git-scm.com/downloads
- Choose the right download for your platform:
Adding the SDK to Unity
Now with Git installed, we can add LootLocker to our Wordle project.
Quick note: You might need to restart Unity before it recognizes you’ve installed Git.
- Open up our Wordle project in Unity. (If you don’t already have this, it’s back to part one of the guide for you.)
- Select Window -> Package Manager
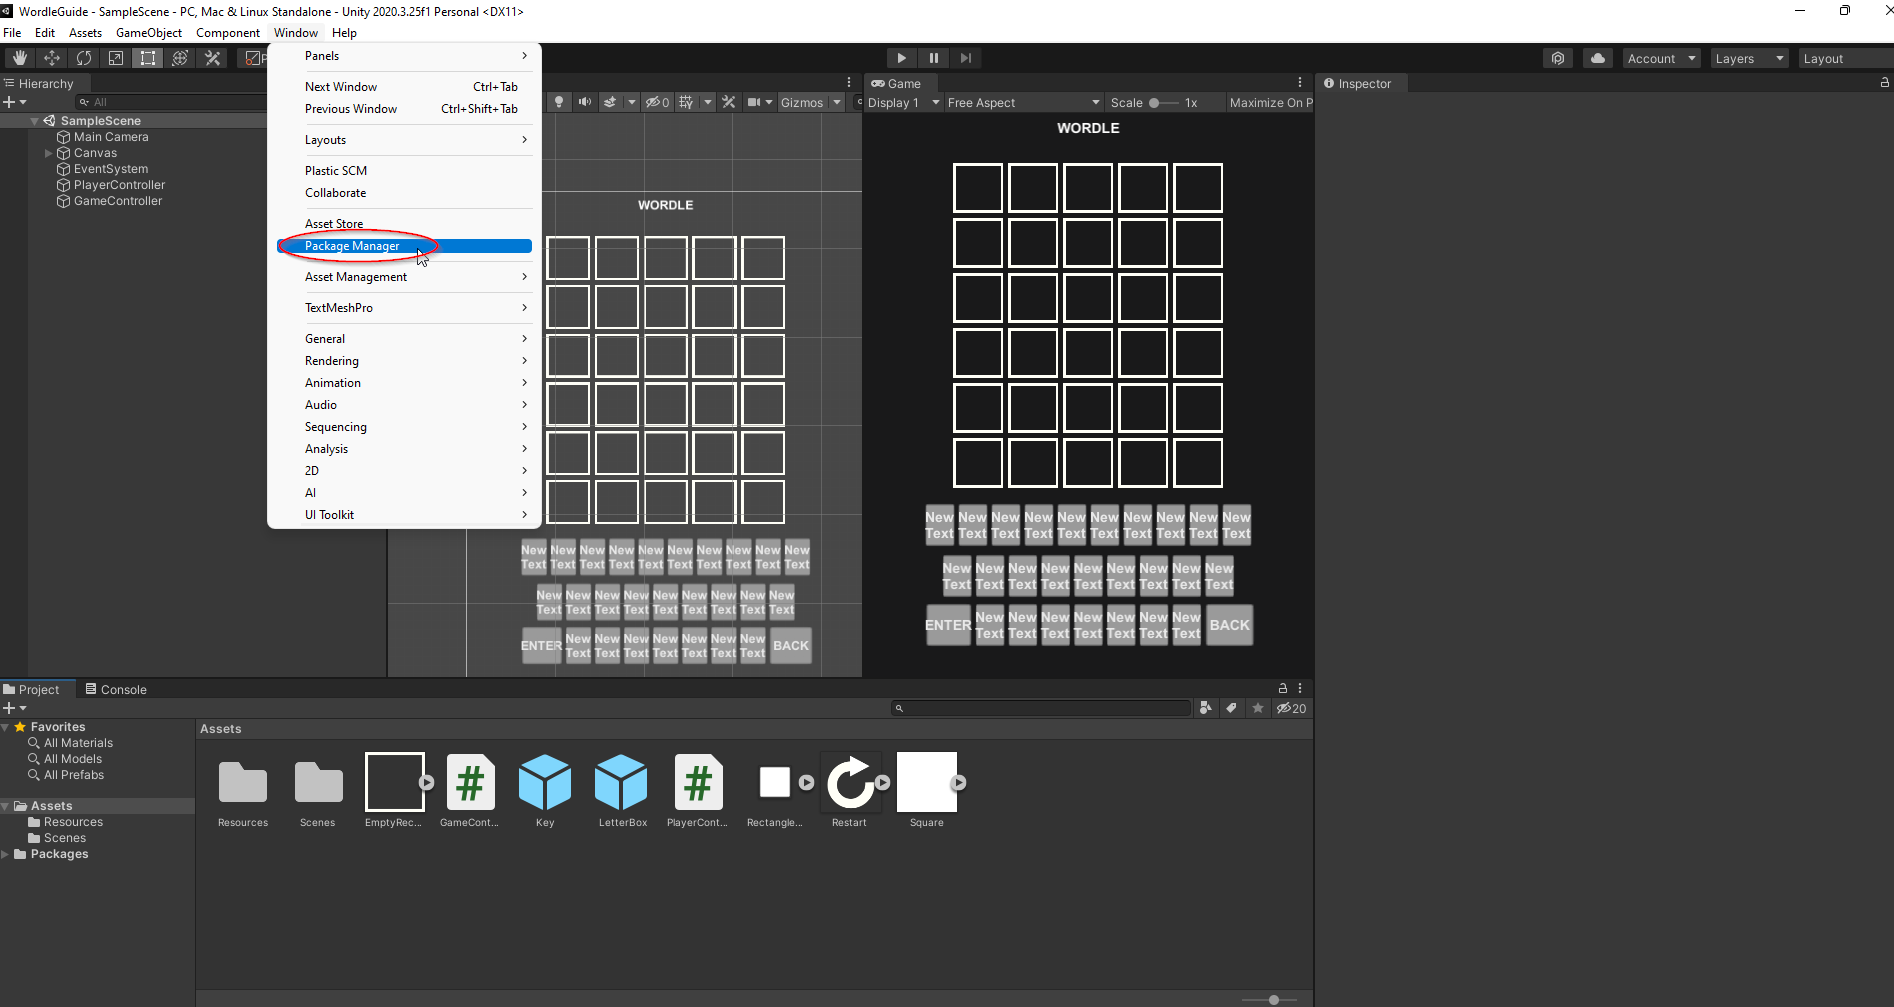
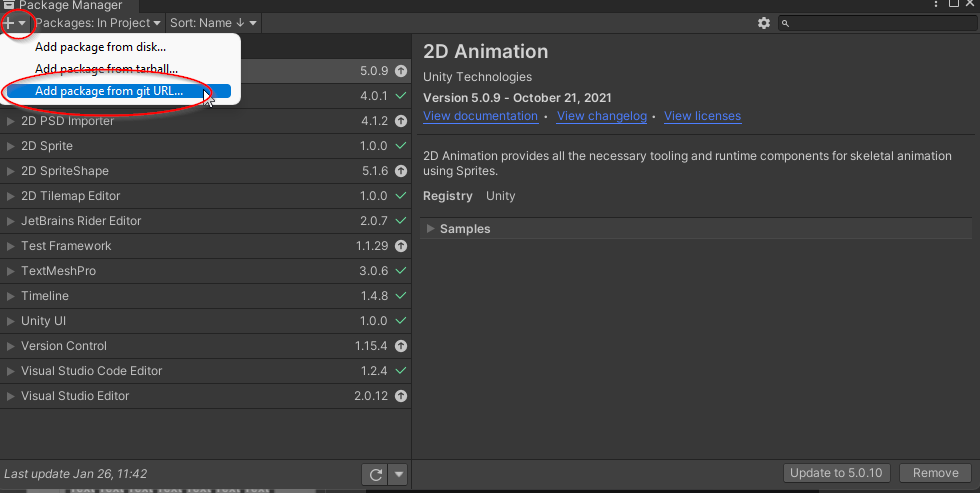
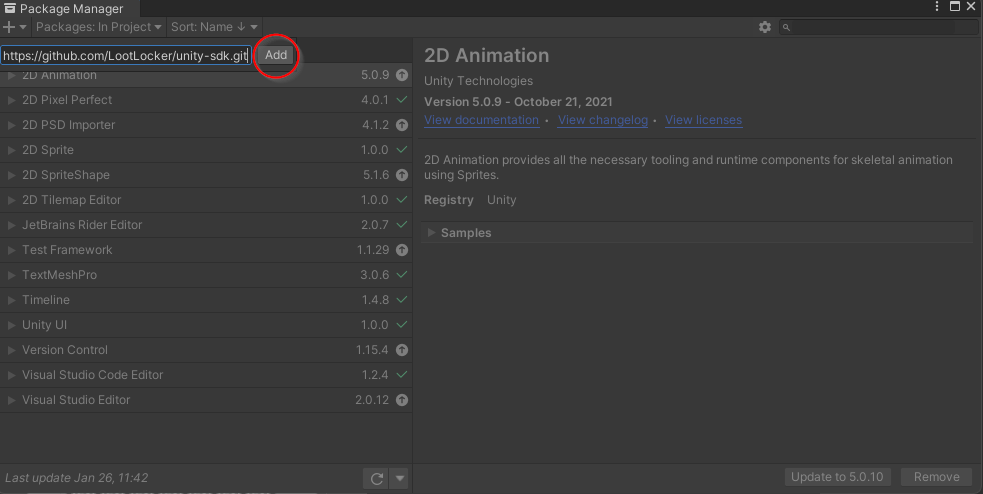
Unity will now have a quick think and then start downloading the LootLocker SDK.
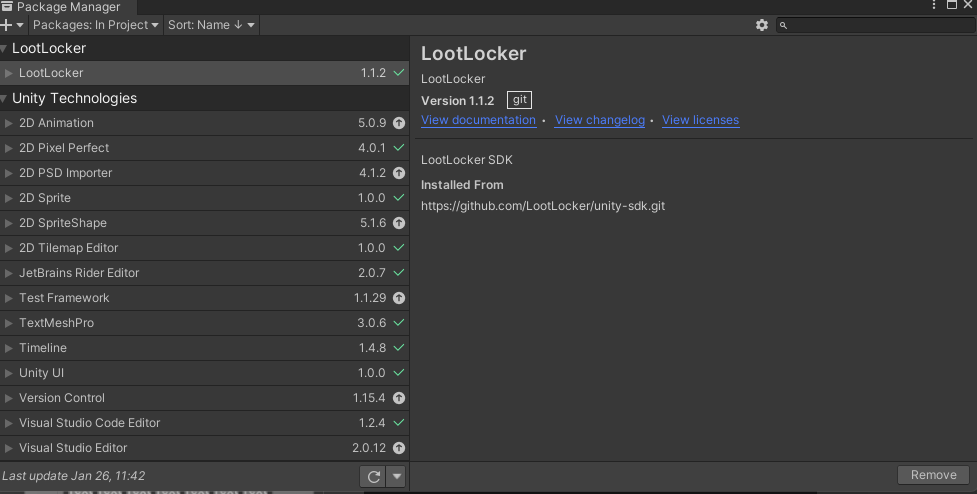
And that’s it. We now have the SDK installed. Simple, huh?
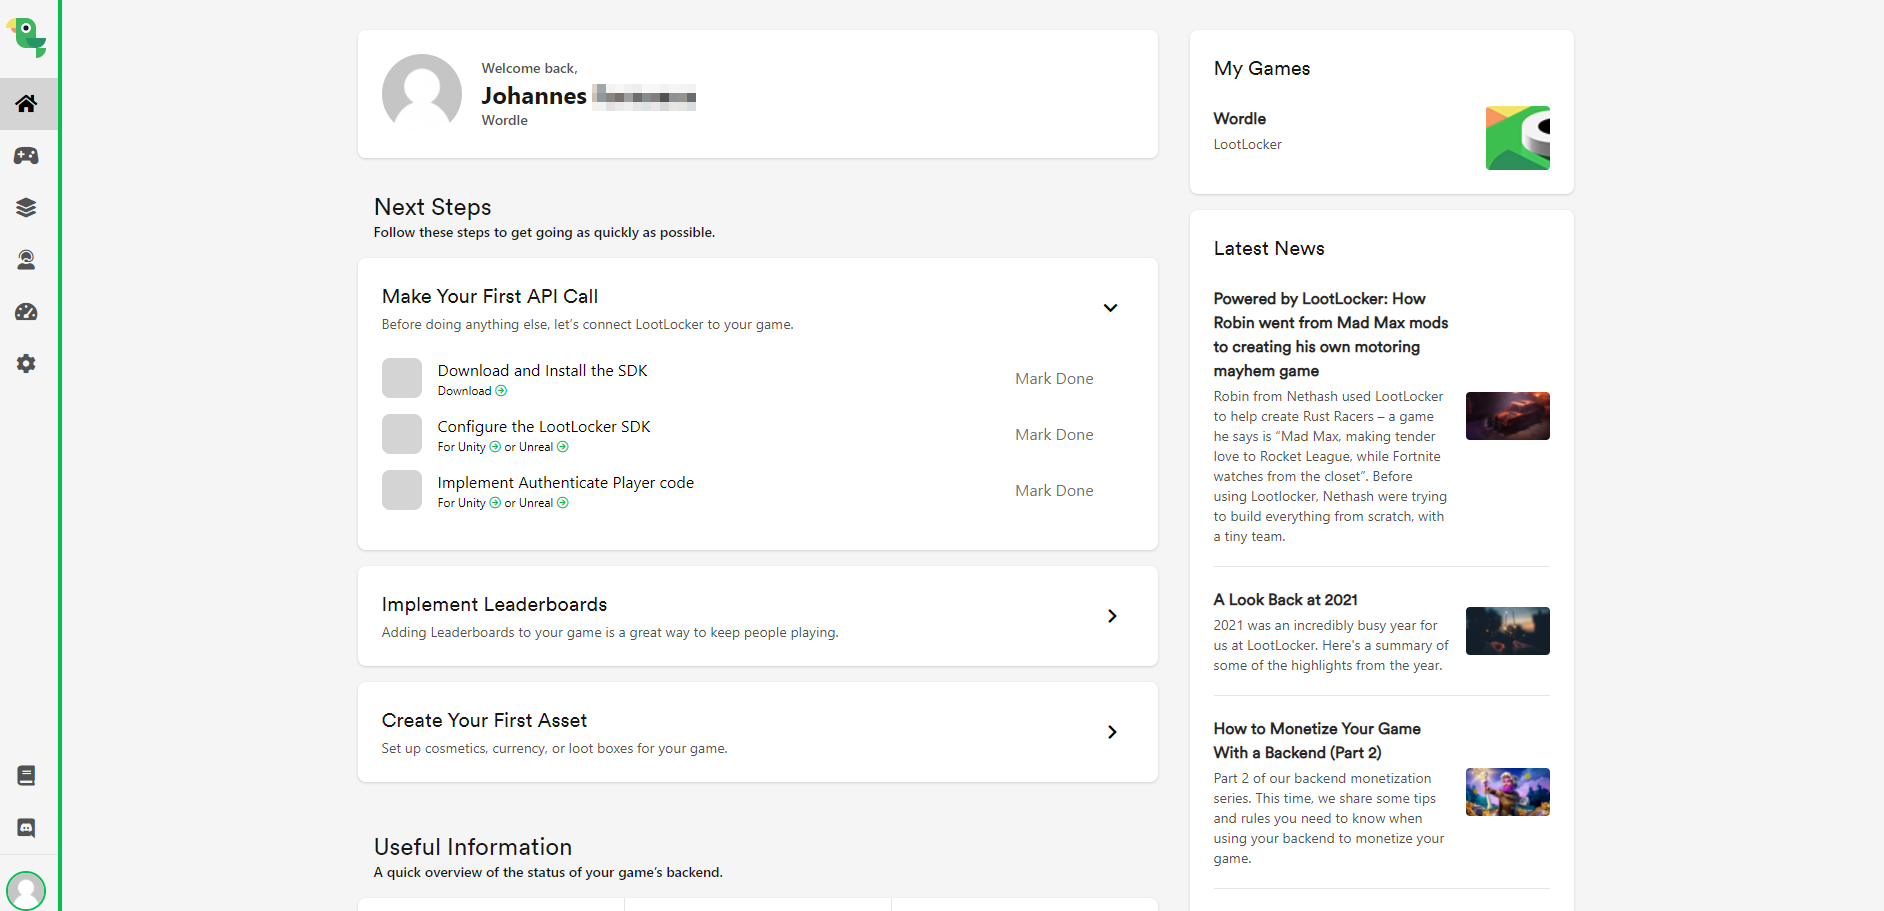
2.3 Configuring LootLocker
Configuring the game
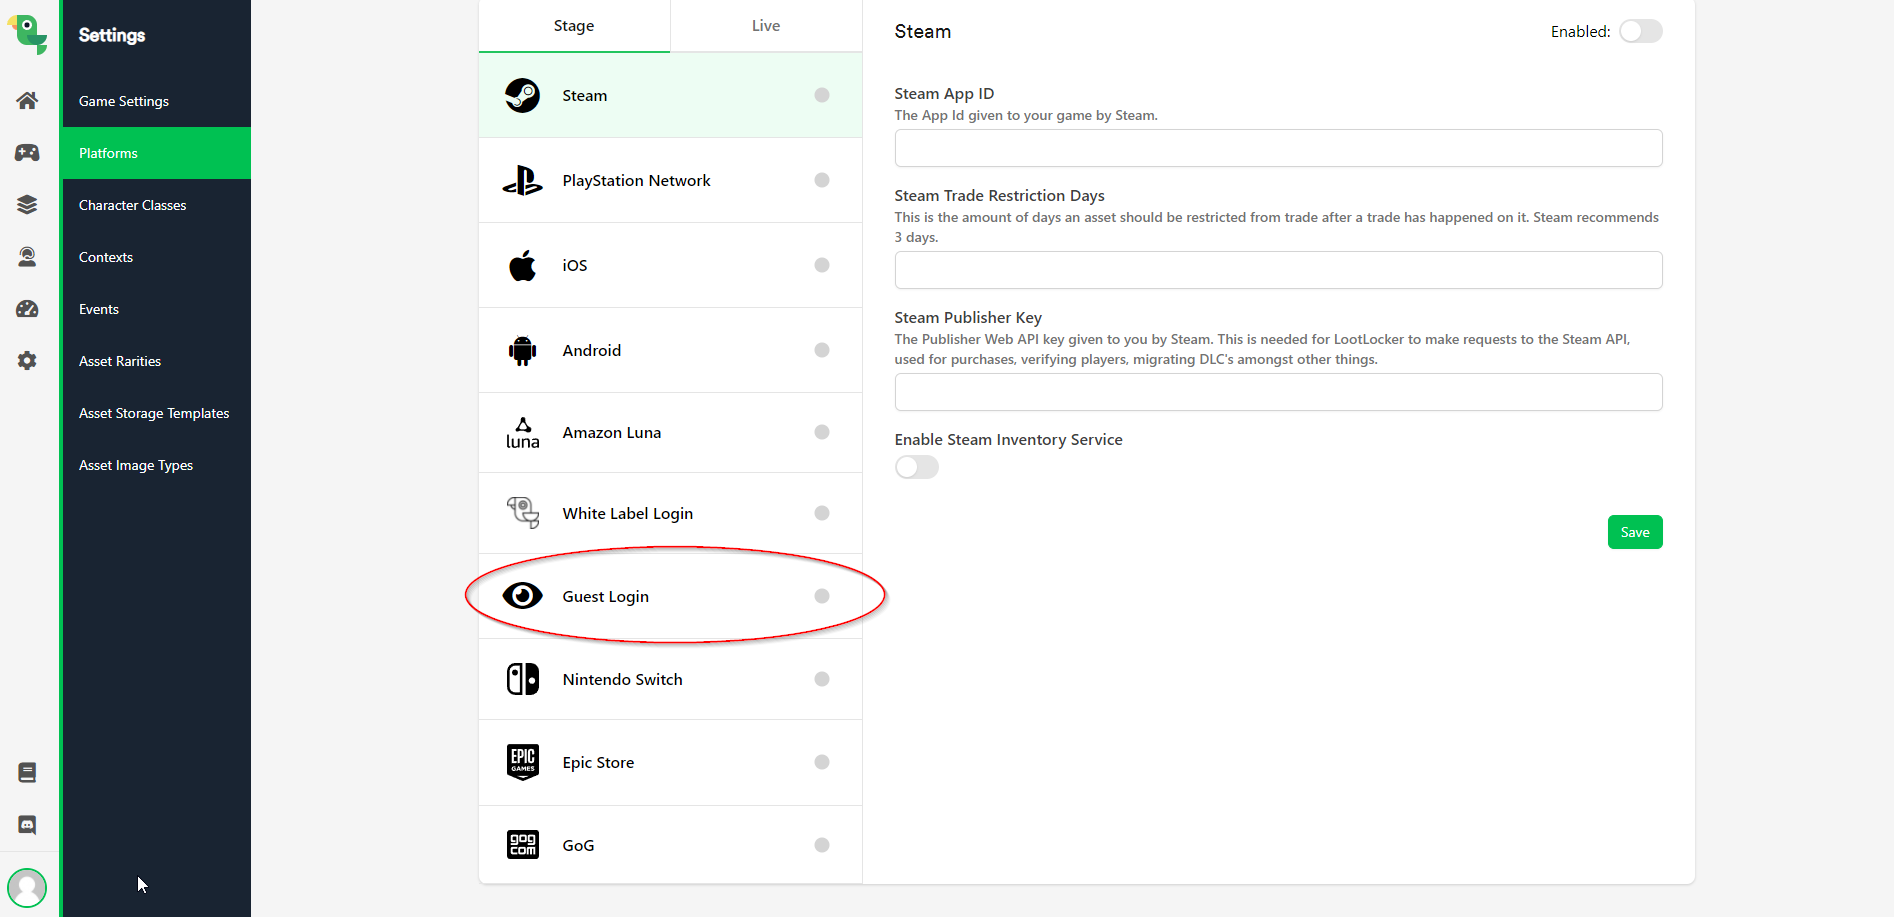
Now we’ve installed the SDK, we’ll turn on the feature we’ll use for this part of the guide.
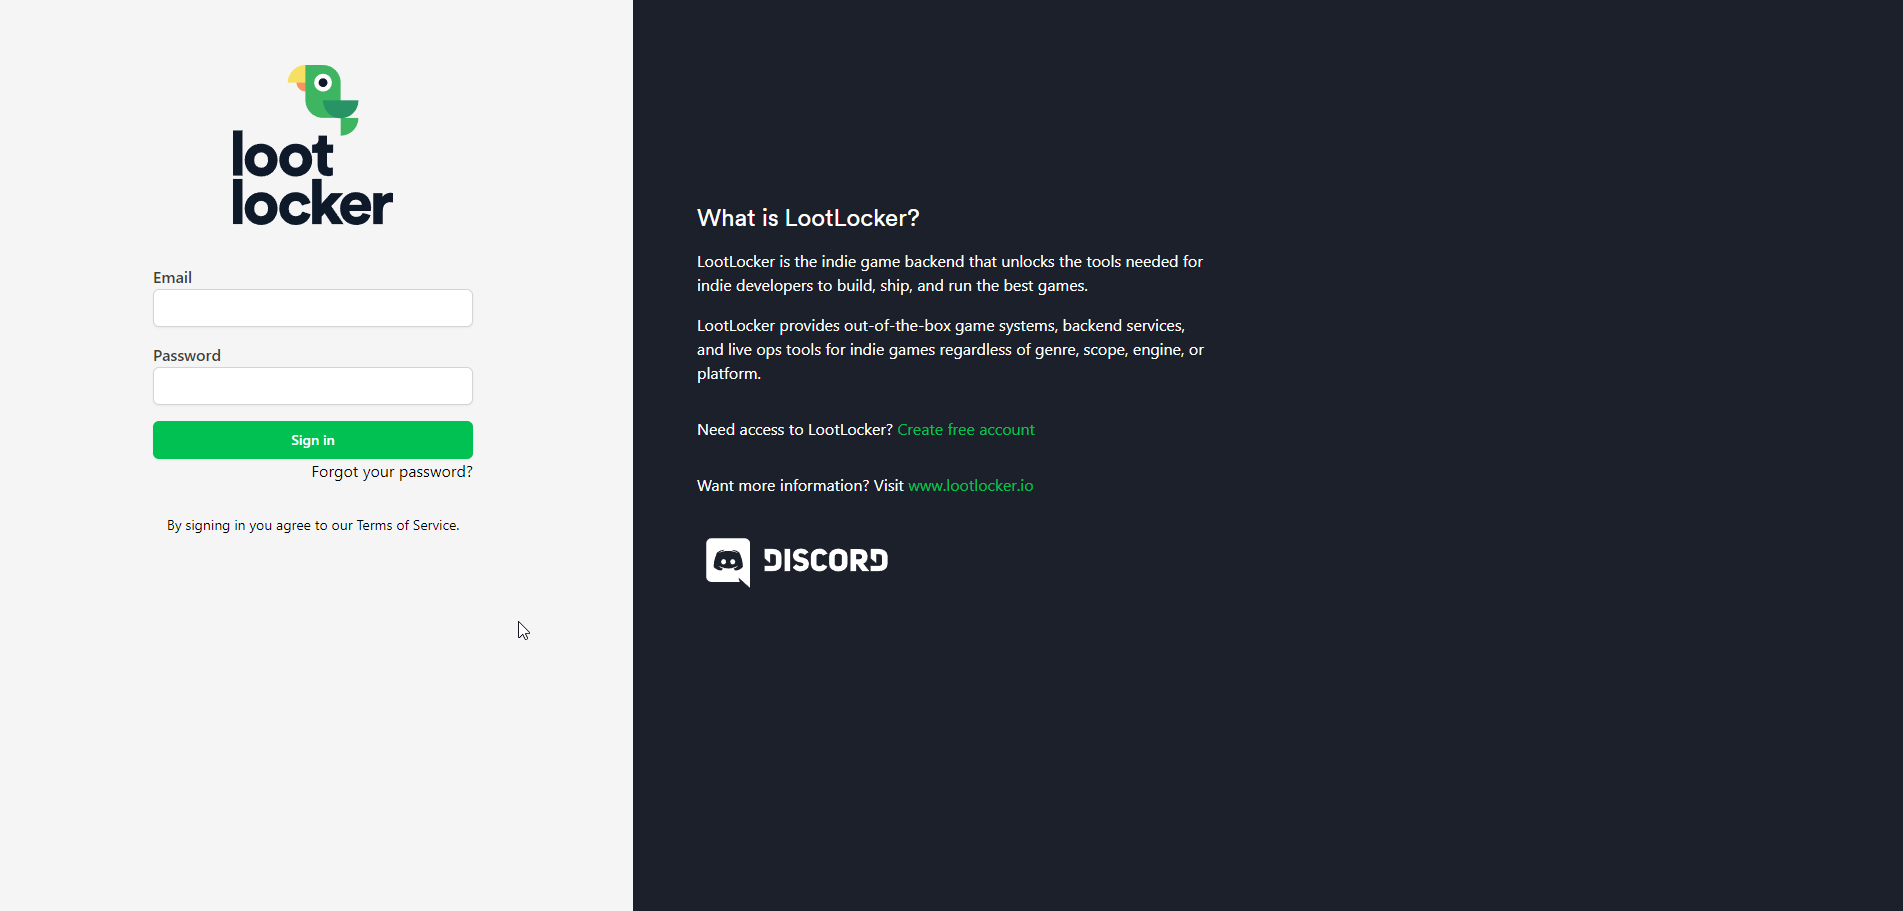
- Go to https://my.lootlocker.io/login and Log In:
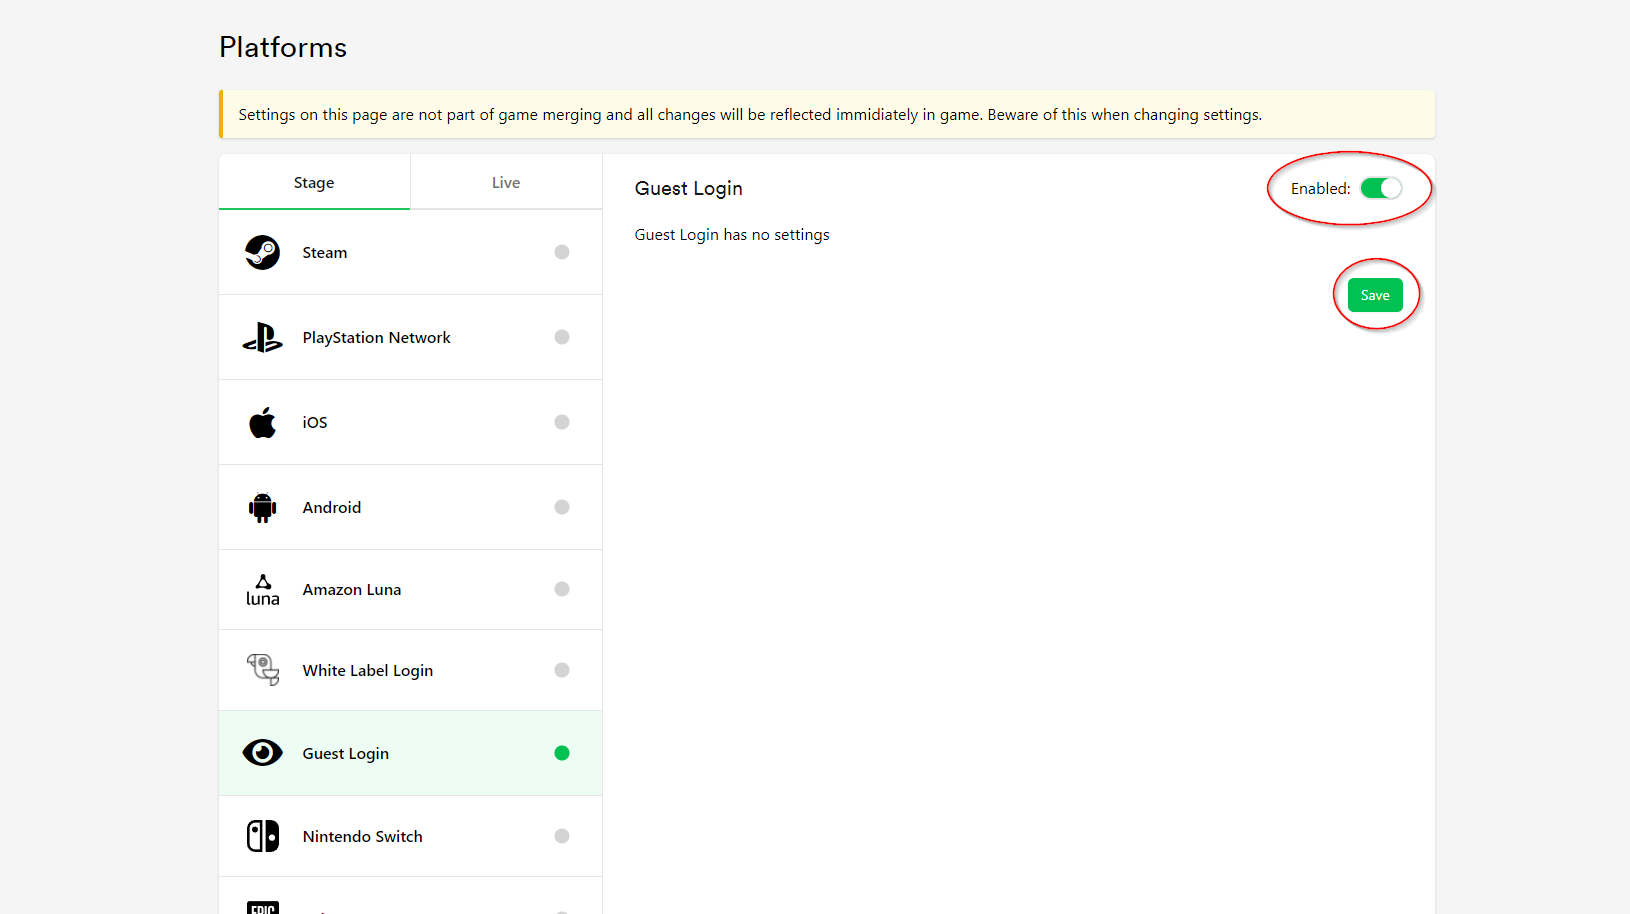
Now we have our LootLocker settings just how we want them.
Configuring the SDK
We need to tell the LootLocker SDK in Unity what game it should be referencing.
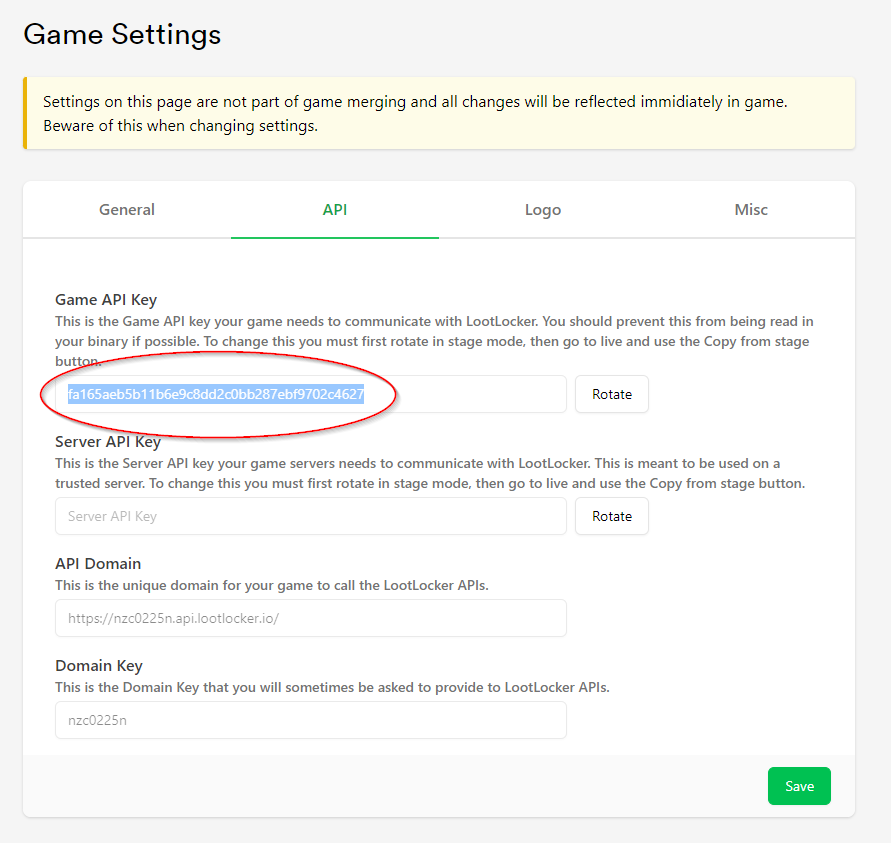
First we copy the identifier for our game – our API key.
-
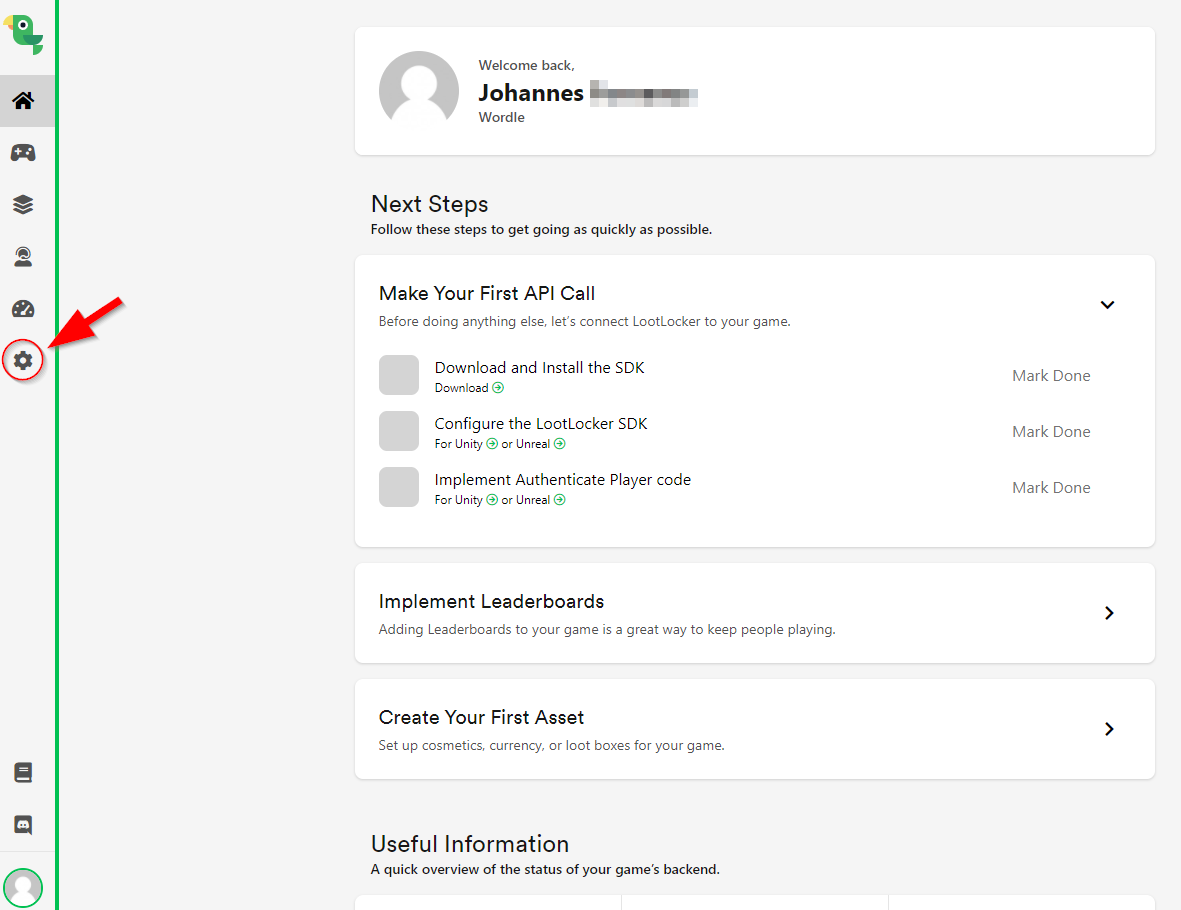
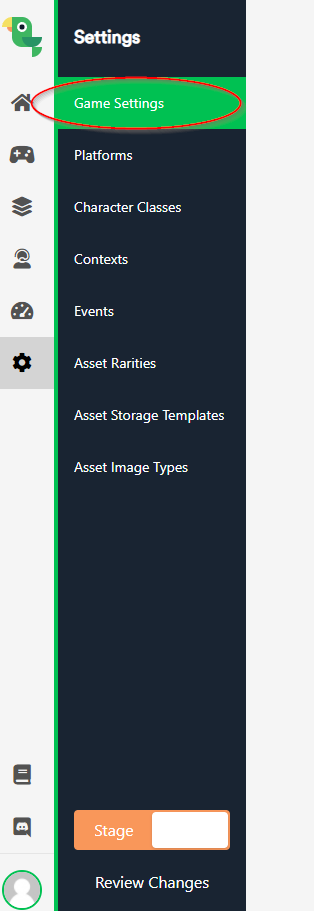
Head back to the LootLocker dashboard (https://my.lootlocker.io) and click on the cogwheel again:
Click Game Settings:
Click the API tab and copy the API key. (Select the text and hit Ctrl+C):
Inside Unity, go to Edit -< Project Settings and click LootLocker SDK:
Now paste your copied API key into the Api Key field:
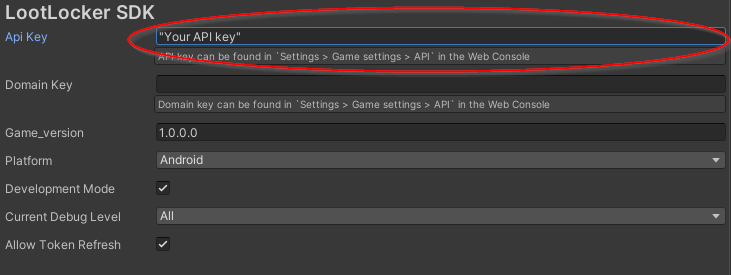
Now Unity and LootLocker can communicate.
2.4 Calling the LootLocker server
Now it's time to write the code that will communicate with the LootLocker server.
- Create a new GameObject in our scene called PlayerManager and add a C# script called PlayerManager.cs to it:
- Insert this code into PlayerManager.cs:
Quick test: Head back into Unity and press play. The console should say: “Successfully started LootLocker session”. This means everything’s working and we’re connected to the server.

2.5 Syncing the daily word for all players
As our game is now, the player gets a new word every time they start the game. We don’t want that though. We want all players to get the same word.
Here’s how we achieve this:
- We pull the current date from the internet
- We make a pseudo random function that gives us the same output with the same input.
Getting today's date
This is how we get the current date online and format it:
- In the script PlayerManager.cs, we first add a boolean to check if we have received a seed or not:
This function will get us the current time. We then format it so we only have the information about the current date left.
This means that whenever a player logs in, they’ll get the same number as any other player who logs in at the same time.
Making our own pseudo random function
We want to get the same output with the same input. This is why we do our own random function – rather than using a built-in one.
We can do this using an implementation of Xorshift. To explain it simply: it moves bytes around so you get a new number that looks nothing like the one you put in.
We won’t go into detail about how an Xorshift works. But if you want to read more about it, the Xorshift Wikipedia page will give you a deeper explanation.
-
Create a new C# script and name it Rand.cs:
Change the selection of the random word to use this new implementation. Add a reference to the PlayerManager:
In the function GetRandomWord(), change this:
…to this:
Now go back into Unity and drag the reference for our PlayerManager to the GameController:
Quick test: Press play and you should get a random word in the console. And then when you play again, you should get the same word for the rest of the day.
2.6 Storing our words in the cloud
At the moment, our version of Wordle is storing its words inside the game. This comes with a few disadvantages. For example: we can’t add or remove words without making a new game version.
So instead, we’ll store our words on LootLocker. This gives us much more flexibility.
With our words stored on LootLocker, we could even add multiple languages to our Wordle game without even needing to update the game itself. (This is a big task though, so let us know if it’s something you want our help with.)
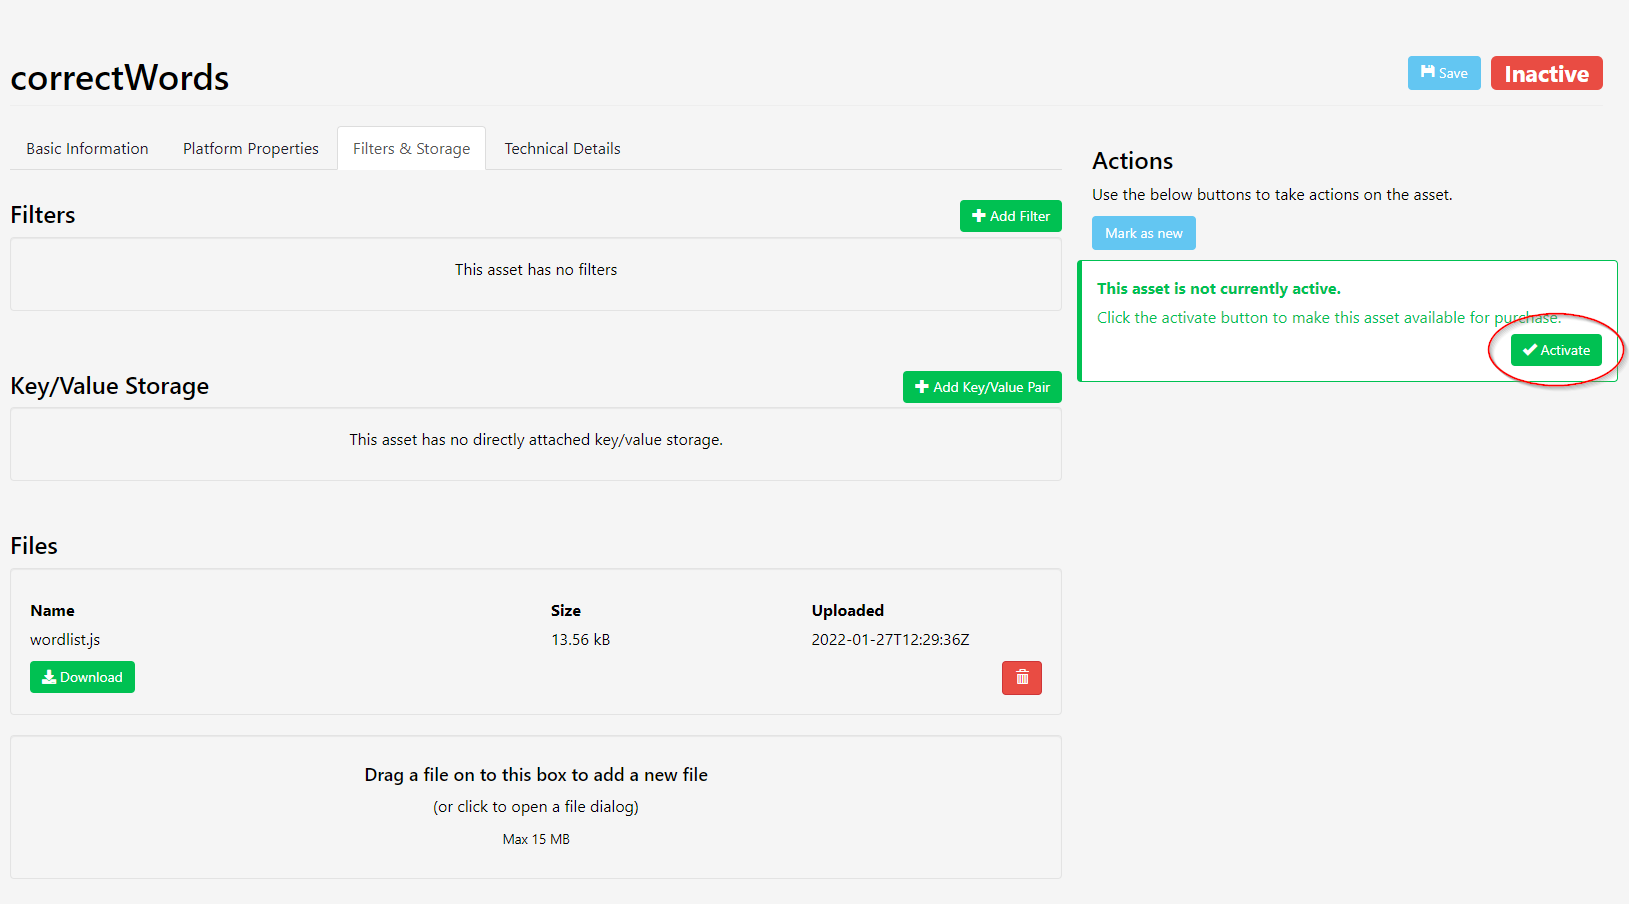
Setting up the asset
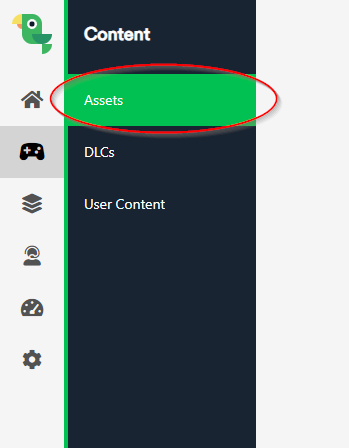
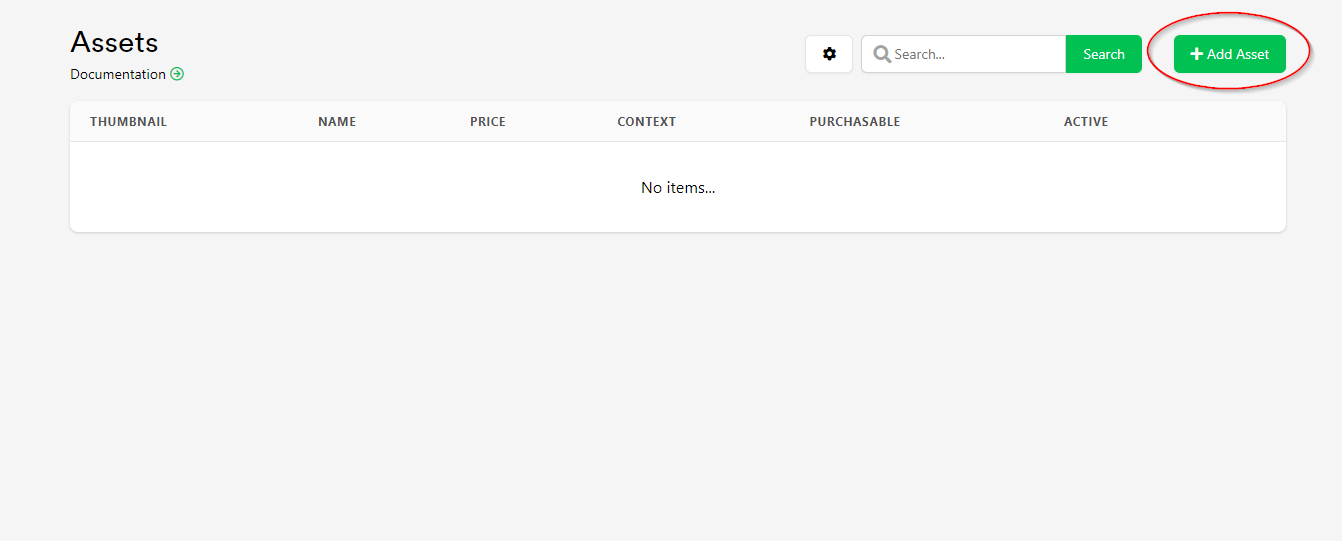
We’ll create an asset on LootLocker to store all our words.
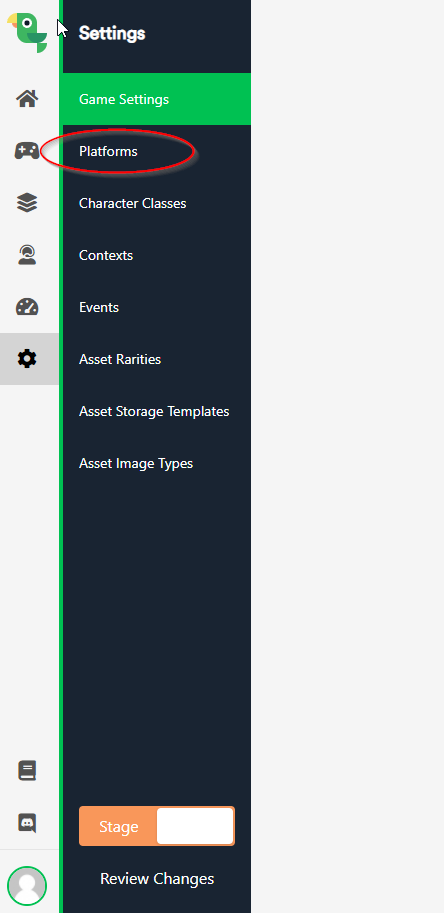
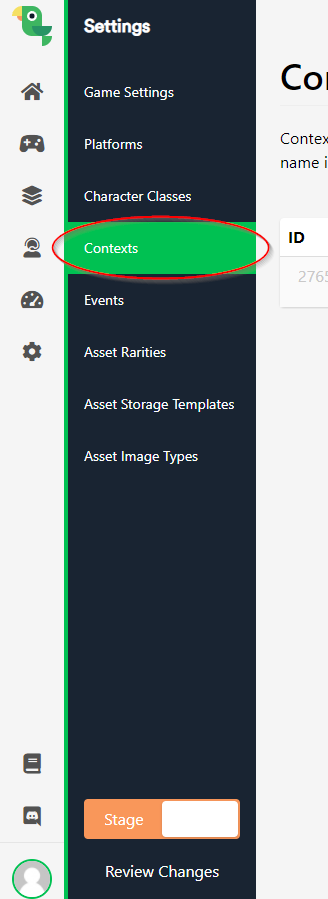
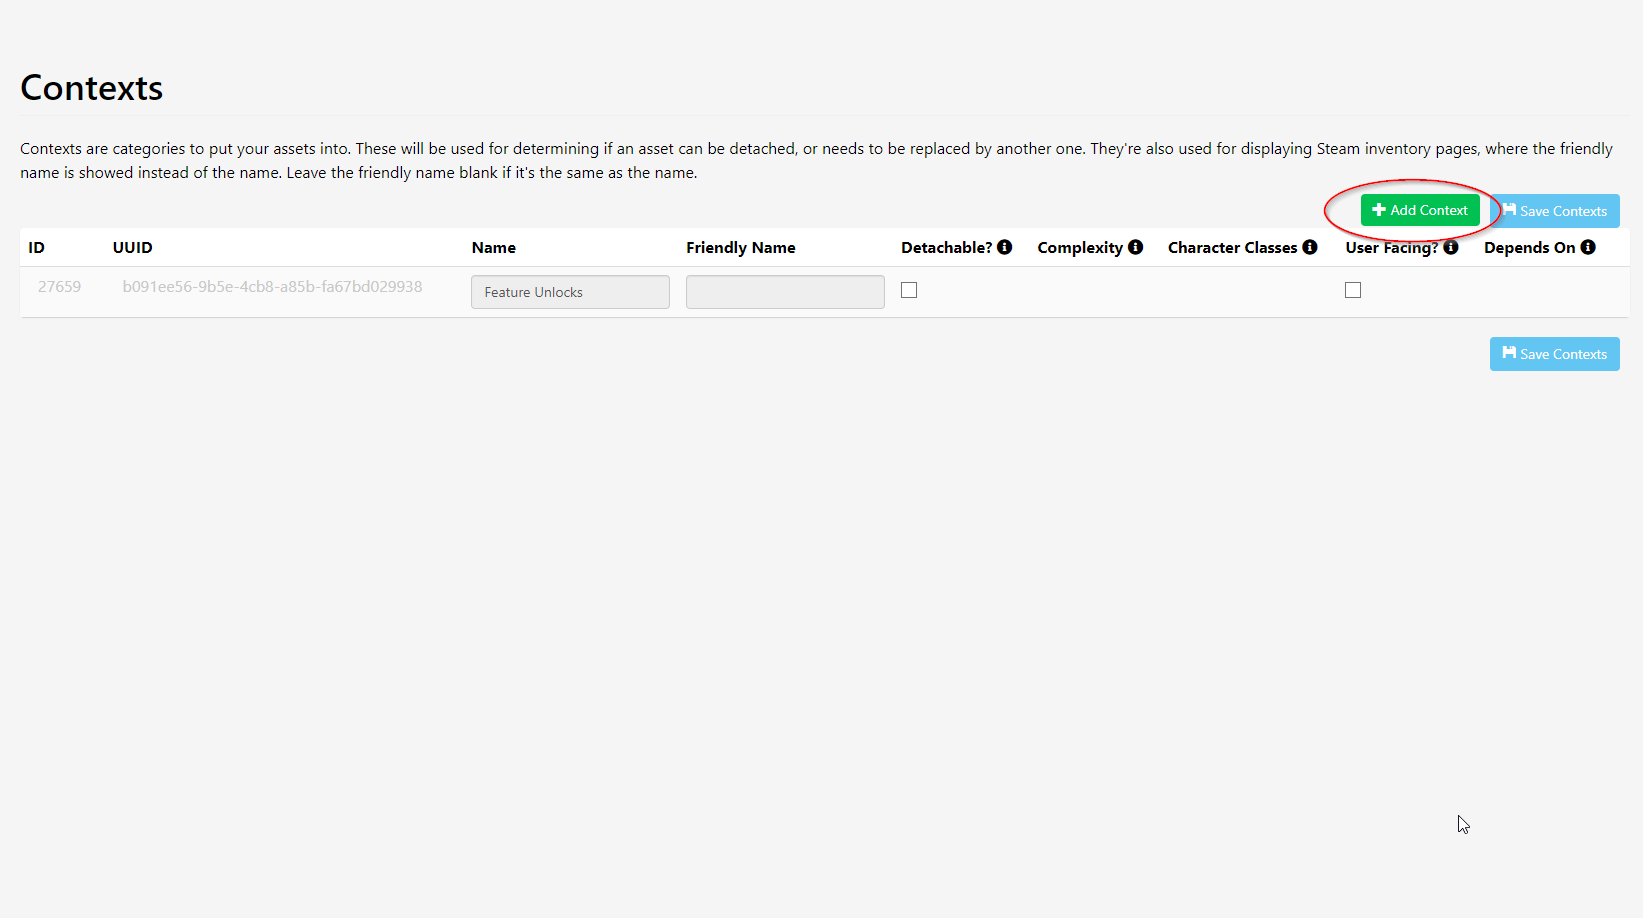
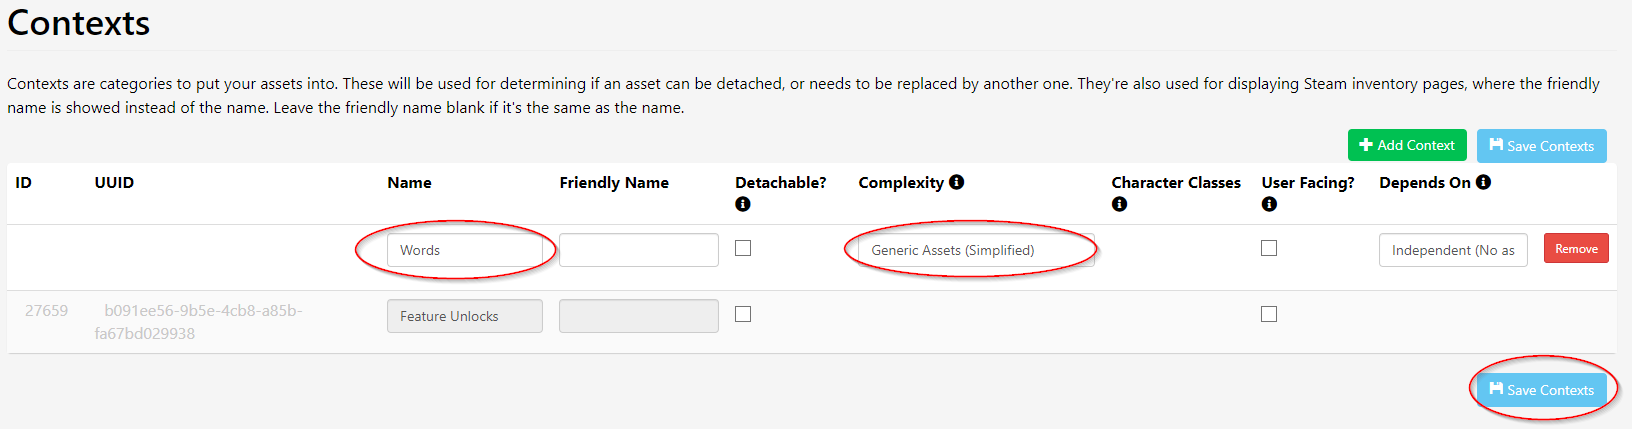
We start by configuring a Context.
- Login to your LootLocker Dashboard and click the cog wheel icon on the right-hand sidebar:

Quick note: You’ll notice there’s already one context configured, called ‘Feature Unlocks**’**. This type of Context needs to exist by default, in case it’s used to unlock other Contexts.


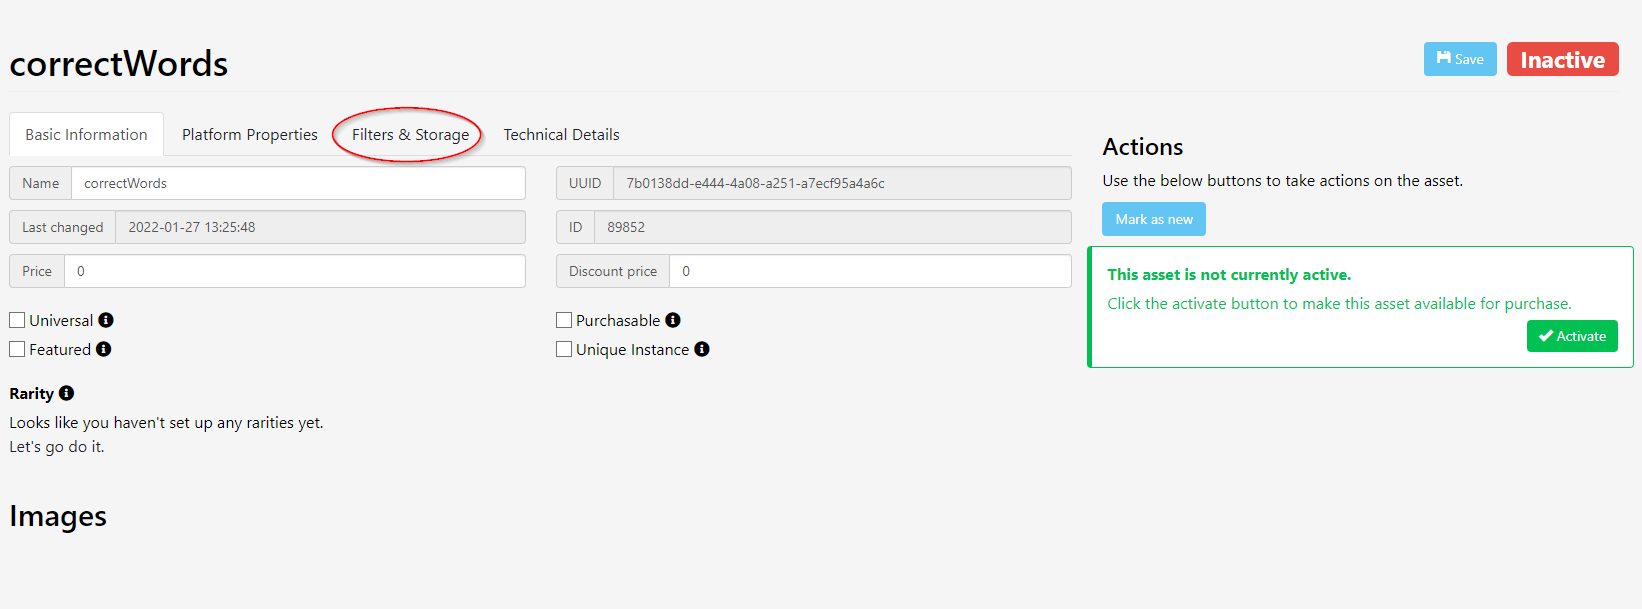
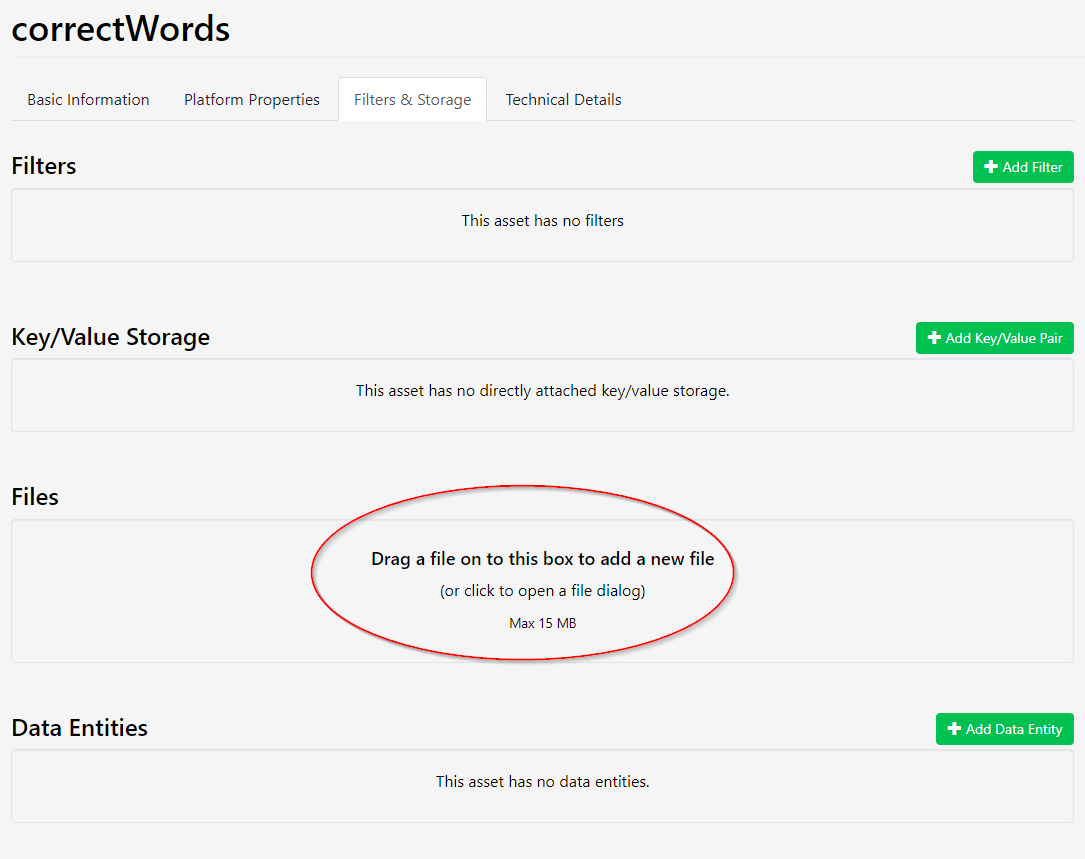
Fetching the asset
Retrieving things from LootLocker isn’t instant. We need to do everything in the right order.
We’ll create an IEnumerator called SetupRoutine() to handle this for us. It’ll do everything in the right order and wait until the current step’s done before it goes onto the next one.
We’ll do this in GameController, but first let’s set everything up in PlayerManager.
- Add two booleans and a string for our list of words to PlayerManager:
Game setup order
Now we’ll change how we load things to get it all in the right order.
- Add a new IEnumerator called SetupRoutine() to GameController, then call it from Start(). This will handle setting up and calling the different functions.
And that’s this part done.
Quick test: Press play in Unity. The console should now spit out a lot of information, before finally saying ‘Setup Done!’.
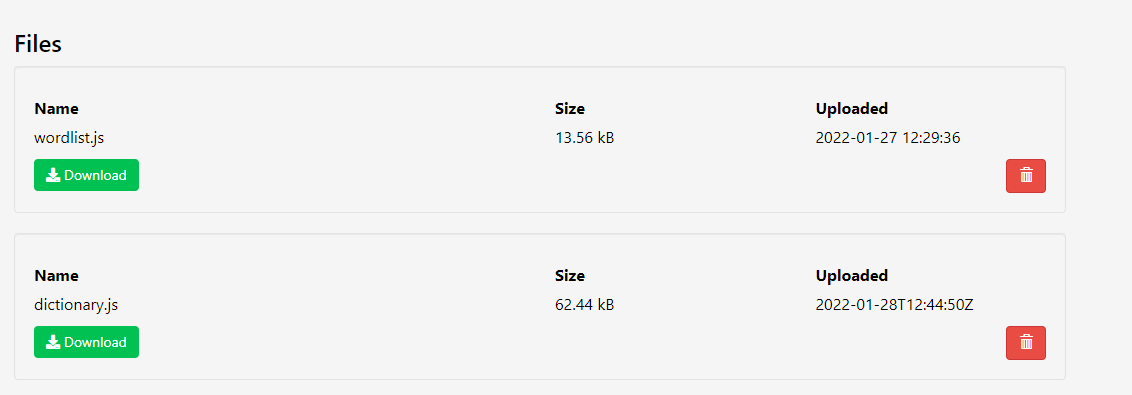
You can now remove the two files from the resource folder. We’re fetching them from the server now instead.
2.7 Adding a leaderboard
Games are more fun with a competitive edge, right?
So let’s give players the option to compete with each other on a leaderboard.
We’ll need to track the score a bit differently now. We’ll give the player a score of one to seven, based on how many guesses they needed to get the right answer.
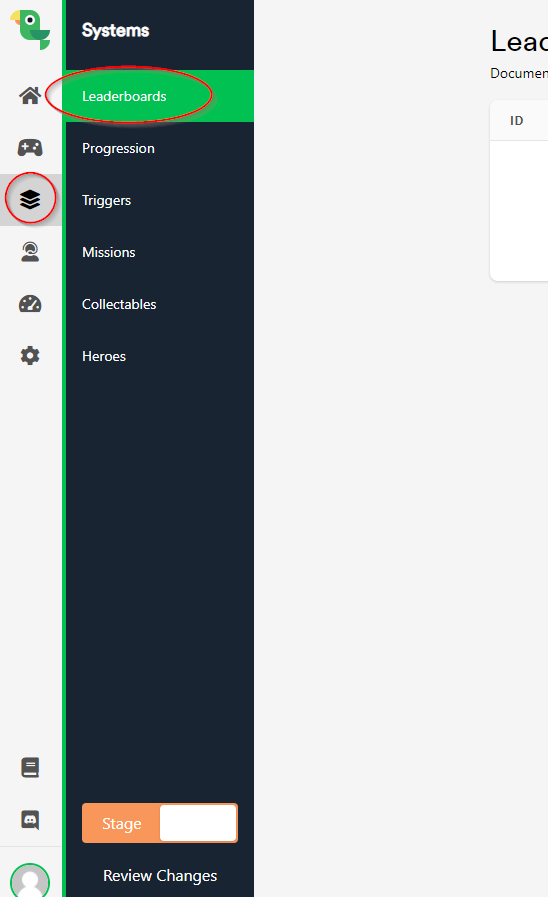
Configuring LootLocker
- Log in to the LootLocker Dashboard and click the Systems icon, then Leaderboards:
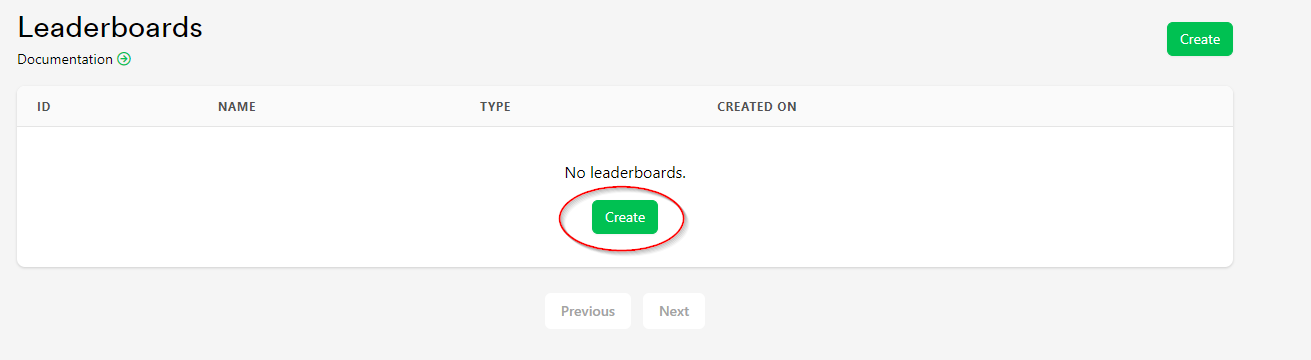
- Name: Global Highscore
- Key: globalHighscore
- Type: Player
- Tick Enable Game API Writes
- Tick Enable metadata
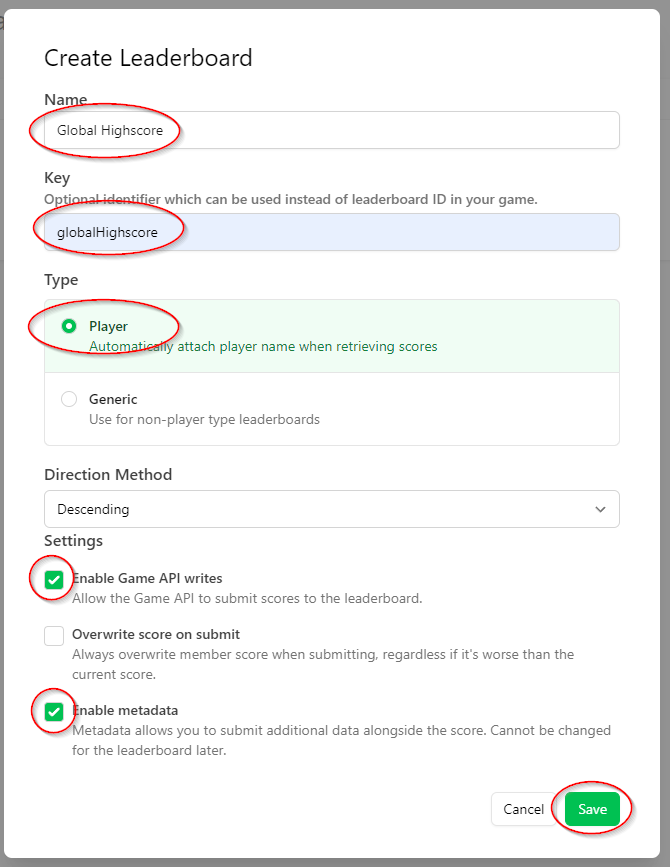
Quick disclaimer: ‘Enable Game API Writes’ lets the game write directly to the scoreboard. This can be vulnerable to players submitting fake scores – if they’re really that competitive that they’re willing to cheat on such a simple game.
Adding the score
We’ll submit the players' scores to the leaderboard (using player IDs) when they enter the correct word.
- Add two variables to the top of PlayerManager.cs:
In GameController.cs, we can now call this function when the player guesses the correct word.
- Add a private integer named ‘score’:
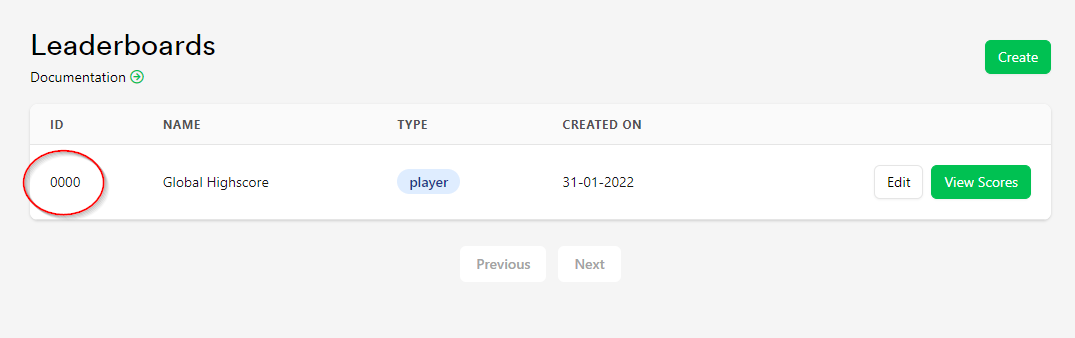
Quick test: Take a quick break to play a round of your game. (Or you can use the Unity console to cheat). Click the View Scores button on LootLocker:
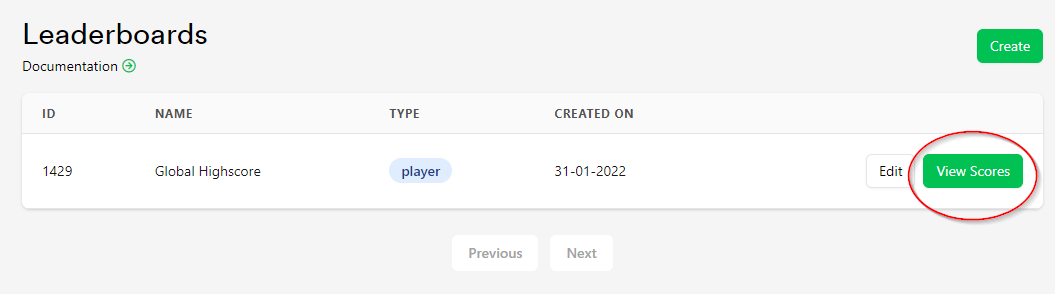
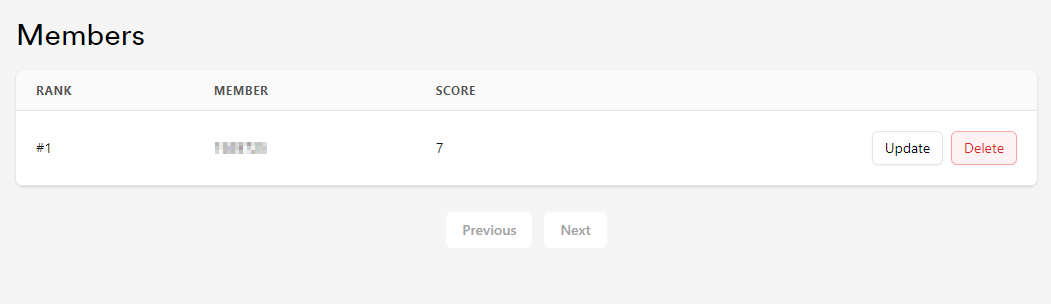
We now have a score uploaded. It’s really that easy.
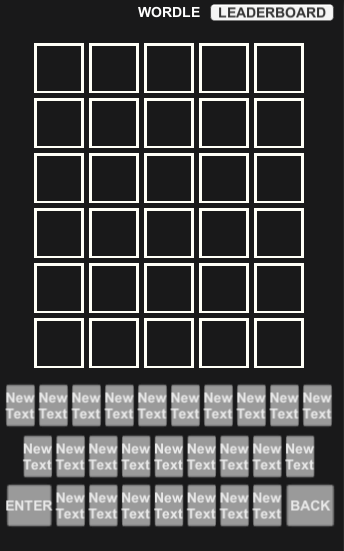
Score UI
We have a score system now. But that’s little use if the player has no place to actually view it.
So let’s add one.
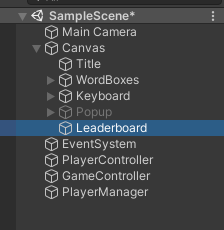
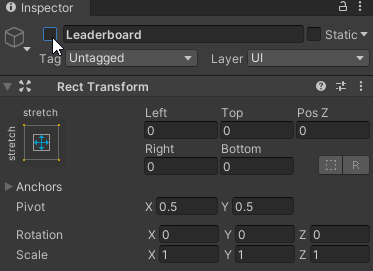
- Add a new Panel under Canvas in the scene:
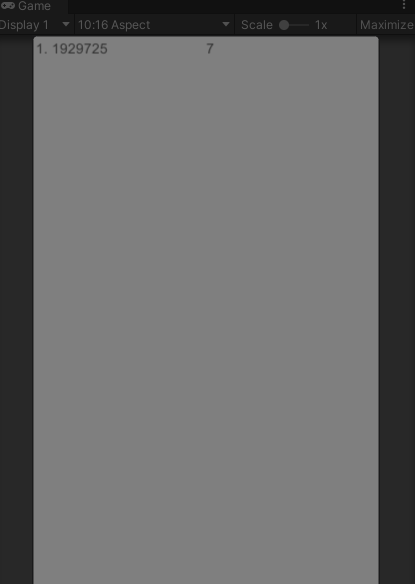
Displaying the score
Let’s go for the classic style of displaying leaderboard scores – players' names and leaderboard position on the left, and their score to the right.
-
In PlayerManager, add references to our newly created text components:
Add using UnityEngine.UI to the top of the script:
This next function will fetch the leaderboard and put the player names to the player names list, and the scores to player scores list. Add it to PlayerManager.cs:
We’ll update our leaderboard in Setup() in GameController.cs:
In Unity, drag the references to our two text components to our PlayerManager:
Quick test: Press play in Unity. The scores on LootLocker should now show up in the game as well.
Showing and hiding the leaderboard
We need buttons to open and close the leaderboard.
- Add a button and place it at the bottom (UI -> Button):
- Set it up to close the leaderboard when the player clicks it:
- Turn off the leaderboard in the inspector:
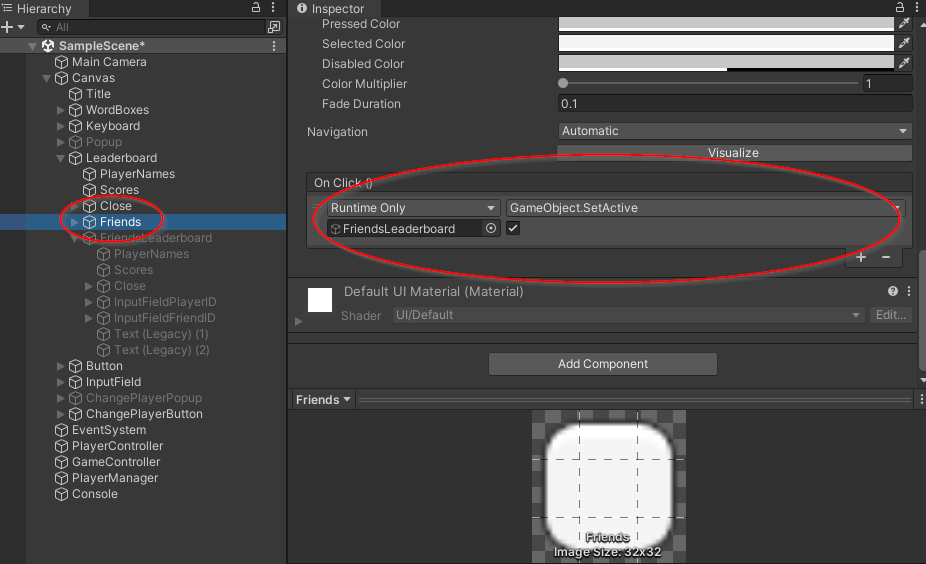
- The first one will turn on the leaderboard gameObject
- The second one will fetch our leaderboards:
Score once per day
We now have our leaderboards set up.
But players can be sneaky. Once they’ve solved the puzzle once, they know what the answer is. So, if it really matters that much to them, they could play again and submit a perfect score to the leaderboard. Let’s stop them from doing that.
This is similar to what we do when we submit the score. A function takes the player score, and if the metadata matches, we give the player a popup saying to come back tomorrow instead.
- Add public bool allowedToPlay = false; to PlayerManager.cs:
Quick test: Play in the editor and guess the correct word. You shouldn’t be able to guess again until a new day arrives. (Although you can cheat by using your own seed. It’s your game after all.)
2.8 Player Identity
We want players to be able to enter their own names.
This is quick and easy to set up.
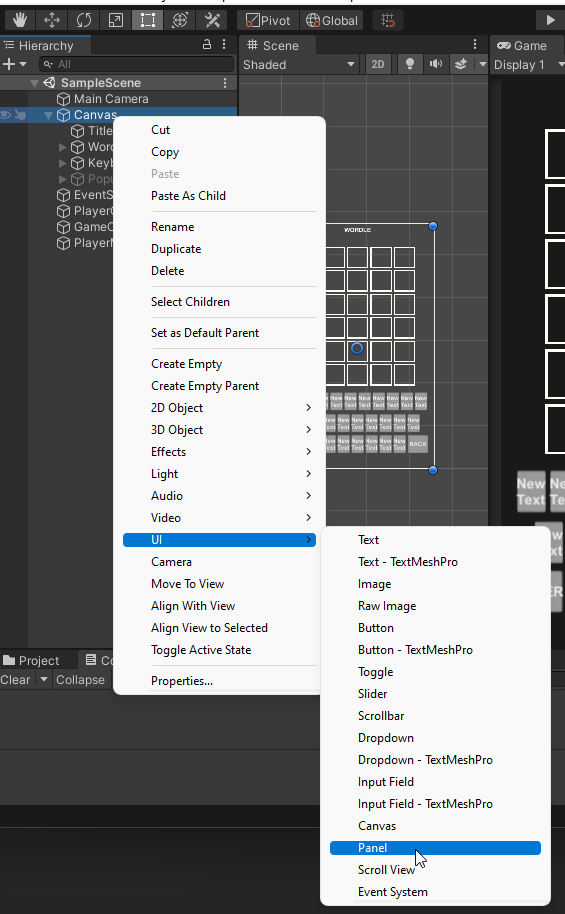
Setting up the UI
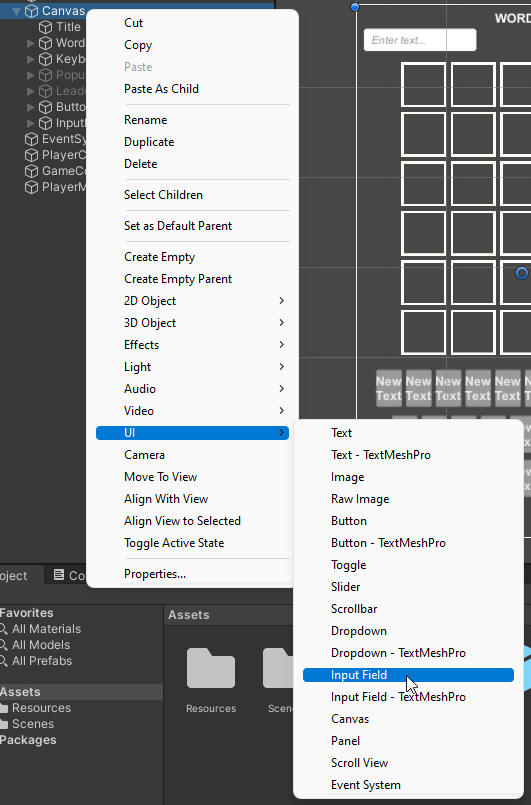
- Add an Input Field to the Canvas (Right click, UI -> Input Field):
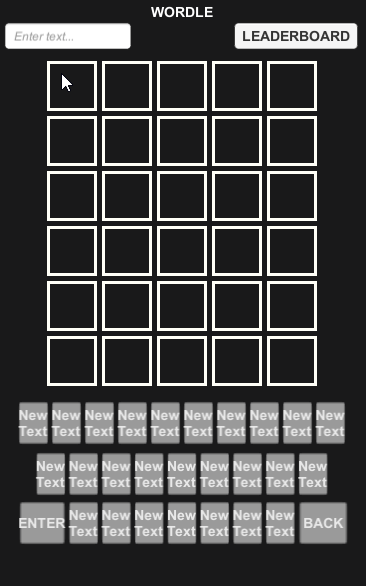
We’ll store our player’s name and let them change it whenever they enter something different. A popup will appear when they’ve changed their name. If they’ve changed it, their current name will show. Otherwise it’ll just say ‘Enter name…’
-
Set up these variables in PlayerManager.cs
public Text inputFieldPlaceHolderText;
public Text inputFieldText;
public InputField playerNameInputField;
Insert this function to handle name changes:
Call this function from Setup() in GameController. We don’t need to wait for this to finish – just call this directly after we’ve started the session:
In PlayerManager.cs, add this function to let the player change their name:
In GameController.cs, add a function to call this IEnumerator – and another IEnumerator to handle the waiting:
Set up references on PlayerManager:
- Text to inputFieldText
- InputField to playerNameInputField
- Placeholder to inputFieldPlaceHolderText:
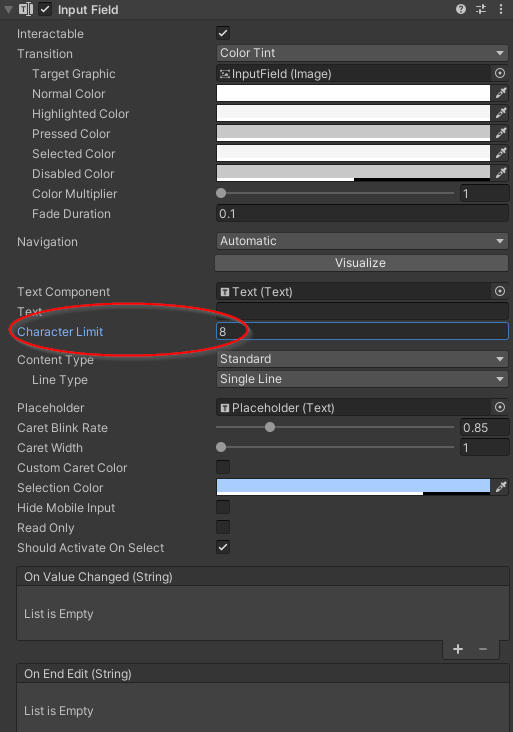
On the Input field component, add a function call to ChangePlayerName() on On End Edit():
Quick test: Press play and change your name. A popup should…well, popup…to let you know if it worked. Restart the game and it should then show the name you entered before.
2.9 Multiple devices, one account
In the original Wordle you’re locked to one device. This can be troublesome if you, for example, want to play on your phone as well as your laptop. Since we are using LootLocker and have the player logged in, we can make that possible.
There are multiple ways to solve this:
- A login system with a password
- Using an email as an identifier
A drawback of using any of these types of login systems is that we add another step for the player before they can play the game. The original Wordle just lets you play instantly. We want to keep that functionality.
So instead, we can use a unique identifier for the player, that they can copy to continue playing on another device.
Setting up PlayerID UI
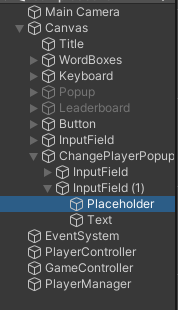
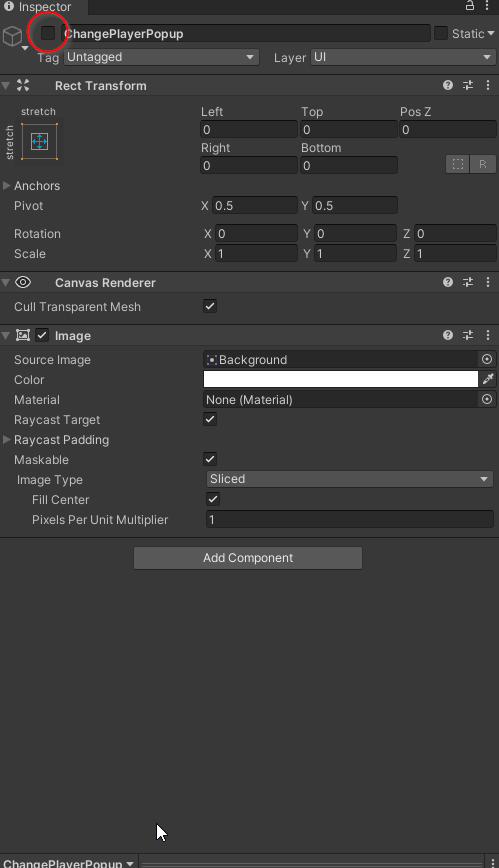
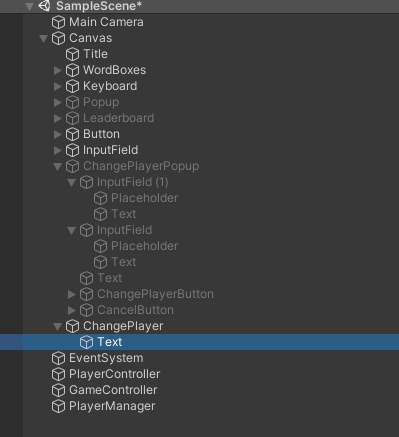
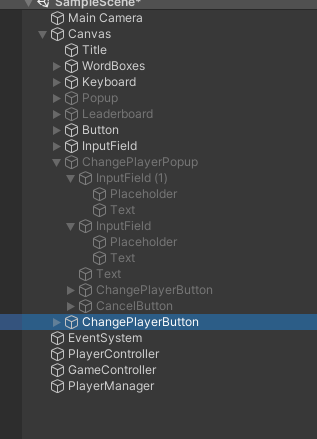
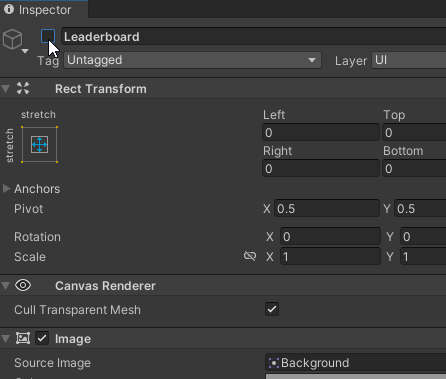
- Under canvas, add a new Panel and name it ChangePlayerPopup:
- Change the color to not be transparent (click the Image component -> Color):
- Add an input field to the ChangePlayerPopup (Right click UI -> InputField):
- The playerID is quite long at the moment. So let’s scale the input field so it can fit a bit more text. (T for rect tool, +Alt to scale in both directions from pivot.):
- Duplicate (Ctrl + D) the Input field and position it (W):
The top Input field will show the player’s current ID. The field below it will let the player paste a new UUID.
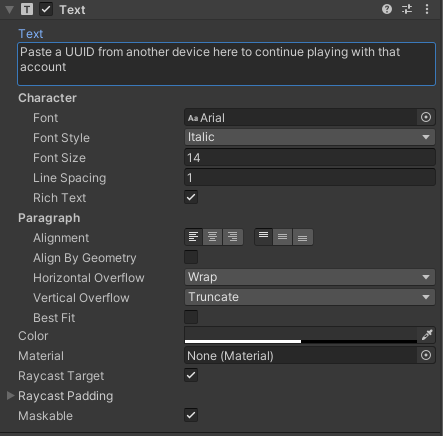
- Change the placeholder text of the bottom part to say:
“Paste a UUID from another device here to continue playing with that account”.
(Select the bottom Input Field component and change the PlaceHolder Text):
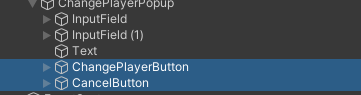
- one for changing the account
- one for Cancel
Changing the player
Now we’ve got our UI set up, we need to add some code so that it can actually do something.
- Add these new variables to PlayerManager.cs:
This next function will take the text of the changePlayerInputText and set it as the new player ID. Then it’ll restart the game, so the new player will be logged in.
- In PlayerManager.cs add this function called ChangePlayerIdentity():
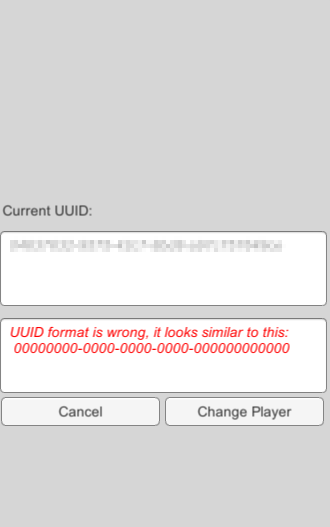
Quick test: Press play and click on the Change Player button. The text should change to say the playerID isn’t valid:
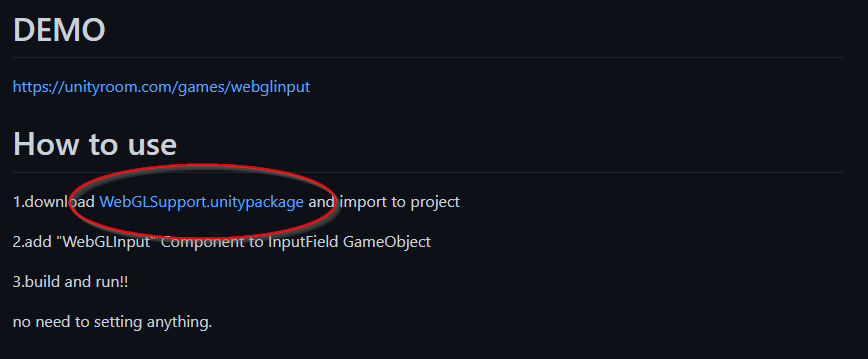
Copying and pasting for WebGL
Unity doesn’t support copying and pasting for WebGL out of the box. But the clever people from the internet have solved this for us.
We’ll use a small third-party plugin to handle copying and pasting in WebGL. This plugin is made by https://github.com/kou-yeung. You should send him a tweet to thank him for the great plugin!
(You can skip this part if you’re not planning to release your game as a Web GL version.)
- Go to this link:
https://github.com/kou-yeung/WebGLInput - Scroll down and click the link for the Unity Package:
This plugin has a MIT license, so we need to include that license in our project.
- Download this file and drop it into your Unity project:
https://github.com/LootLocker/wordle-guide-part-2/blob/main/LICENSE - We now have a new component called ‘Web GL Input’ in our third party library. Add it to the input fields where we want to be able to copy and paste text:
Opening and closing the window
The Cancel button needs to close the ChangePlayerPopup. And another button needs to open the popup.
- Set ChangePlayerPopup’s gameObject to false:
- Turn the ChangePlayerPopup off. (Un-tick the checkbox in the top left of the inspector):
The player now needs a way to open this window.
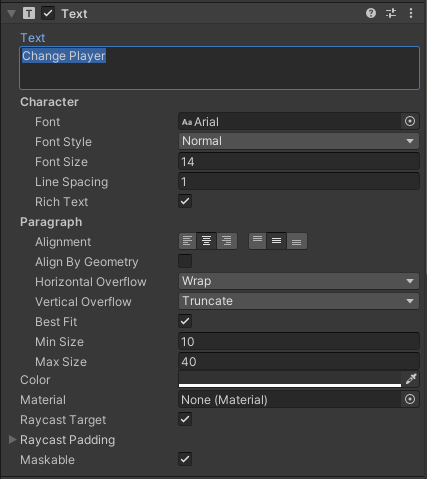
- Add a button to the top of the game screen:
- Change the text of the text component to Change Player:
Quick test: Make a build or open your project on another computer. Copy the ID and paste it onto the other device. You should now be logged in with the same account.
2.10 Playing with friends
Playing games with friends is usually more fun than playing them alone, right? (Depending on who your friends are.) So let’s give players the option to play with friends. This also makes the game far more sticky as people can more easily compete with their friend group.
We’ll store the players' friends as assets in LootLocker. We’ll give them an ID that they can copy and paste to add someone as their friend.
This is fairly easy to set up – we can do it all in Unity.
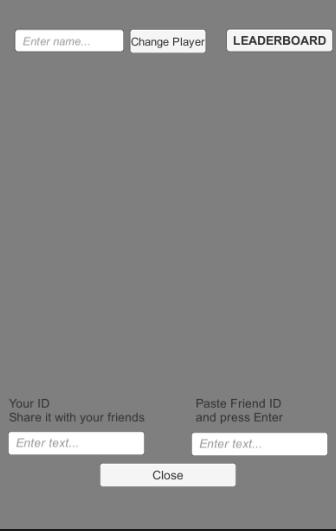
The player's ID will need to be visible, so they can copy it and send it to someone else. And that player needs to have a field where they can add a friend's ID.
The player will then have the option to view just their friends scores or the global leaderboard.
Setting up friends
-
Add these variables to PlayerManager.cs:
We’ll now fetch and populate our friends list like this:
- Get the player's storage to see what friends they have
- Get the scores from their friends
- Sort them
Create a new IEnumerator in PlayerManager and call it SetupFriends():
In StartSession() take the playersId and set it to the Text of playerPublicID:
Adding friends
If we tried to run this now, nothing would happen – because we can’t add friends yet.
We’ll need a coroutine to add a new friend with information from the addFriendInputID Input Field. Once the friend is added, we’ll fetch the scores again to update the leaderboard.
- Add a public function to call when we paste new text in the addFriendInputID. And add an IEnumerator to add the new friend to the players storage in PlayerManager.cs:
- Let’s set up some UI for our friends. Right-click the leaderboard panel in the hierarchy, create a new button (UI -> Button) and put it next to the ‘Close’ button:
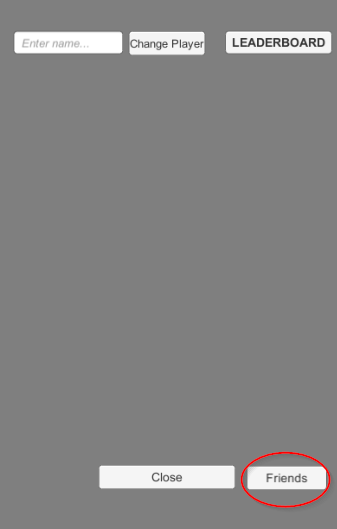
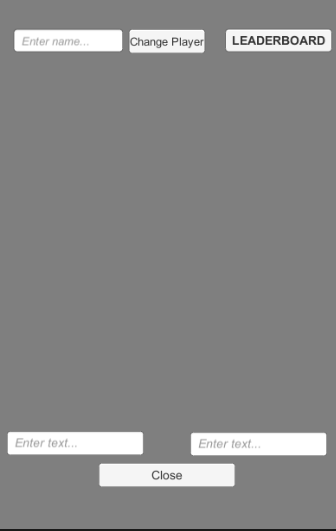
Now we need input fields where we can paste our friends’ IDs. We also need a text field to share our own ID.
- Add two new Input fields to the bottom of the friend leaderboard:
Decide what to do next
So there it is – you now have a fully working Wordle prototype that you can expand and improve however you like. As always, we've uploaded the game to Itch.io for you to play yourself, and uploaded the source code to Github for you to download. You can find both links below.


From here you could add different languages, an achievement system, a chat system, the sky's the limit!
The possibilities are endless with LootLocker
Hopefully this guide has shown you how quick and simple it is to use LootLocker. Get in touch if you want to chat about how LootLocker can level up your game with backend features.
If you found this guide useful, let us know! Here are some great ways to join our community.