- Intro
- Getting the drop on drop tables
- Set up a drop table using the LootLocker dashboard
- Drop tables in action
- Need some help?
Getting the drop on drop tables
Drop tables are similar to loot boxes, in that they reward players. But they give you more control over exactly how you do that. You can use a drop table to let players choose one, several, or all assets, based on their rarity. So for example, in an online RPG, you could use a drop table to allow players to choose one of lots of randomly selected items when they slay a big bad boss or get to the end of a dungeon.
Drop tables use weighted randomness, which is a fancy way of saying that you decide what the chances are that a particular item will drop.
Let’s take a look at how to add drop tables to your game (don’t worry, it’s really easy).
Before we get into that
You’ll need to have a free LootLocker account before you can get to grips with drop tables. You’ll also need to understand a few other LootLocker concepts. Those are:
Assuming you’re happy with those, let’s get going.
Set up a drop table using the LootLocker dashboard
You can make your drop tables as simple or as complicated as you want to – it’s completely up to you and what your game needs. The good news is that they use the same structure as all other LootLocker complexities.
- First head to Settings, then Contexts, then click Add Context.
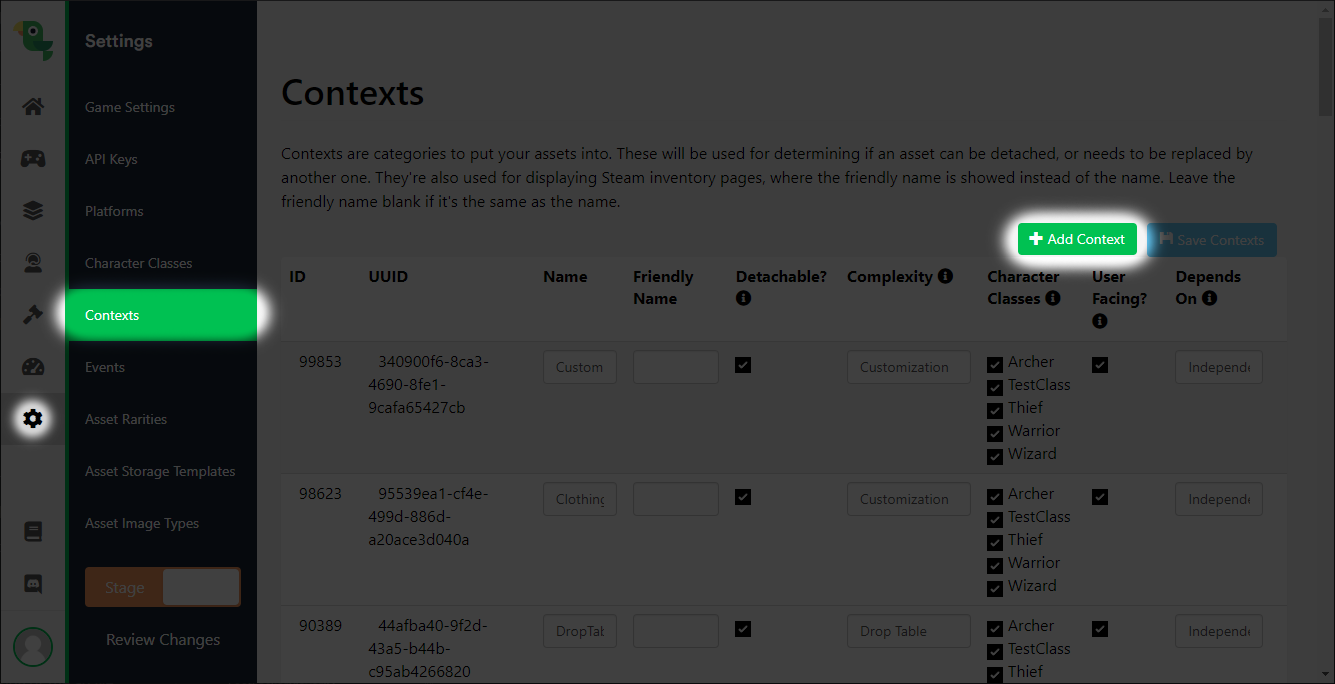


Save, then navigate to Content, then Assets. Click Add Asset at the top right of the screen.
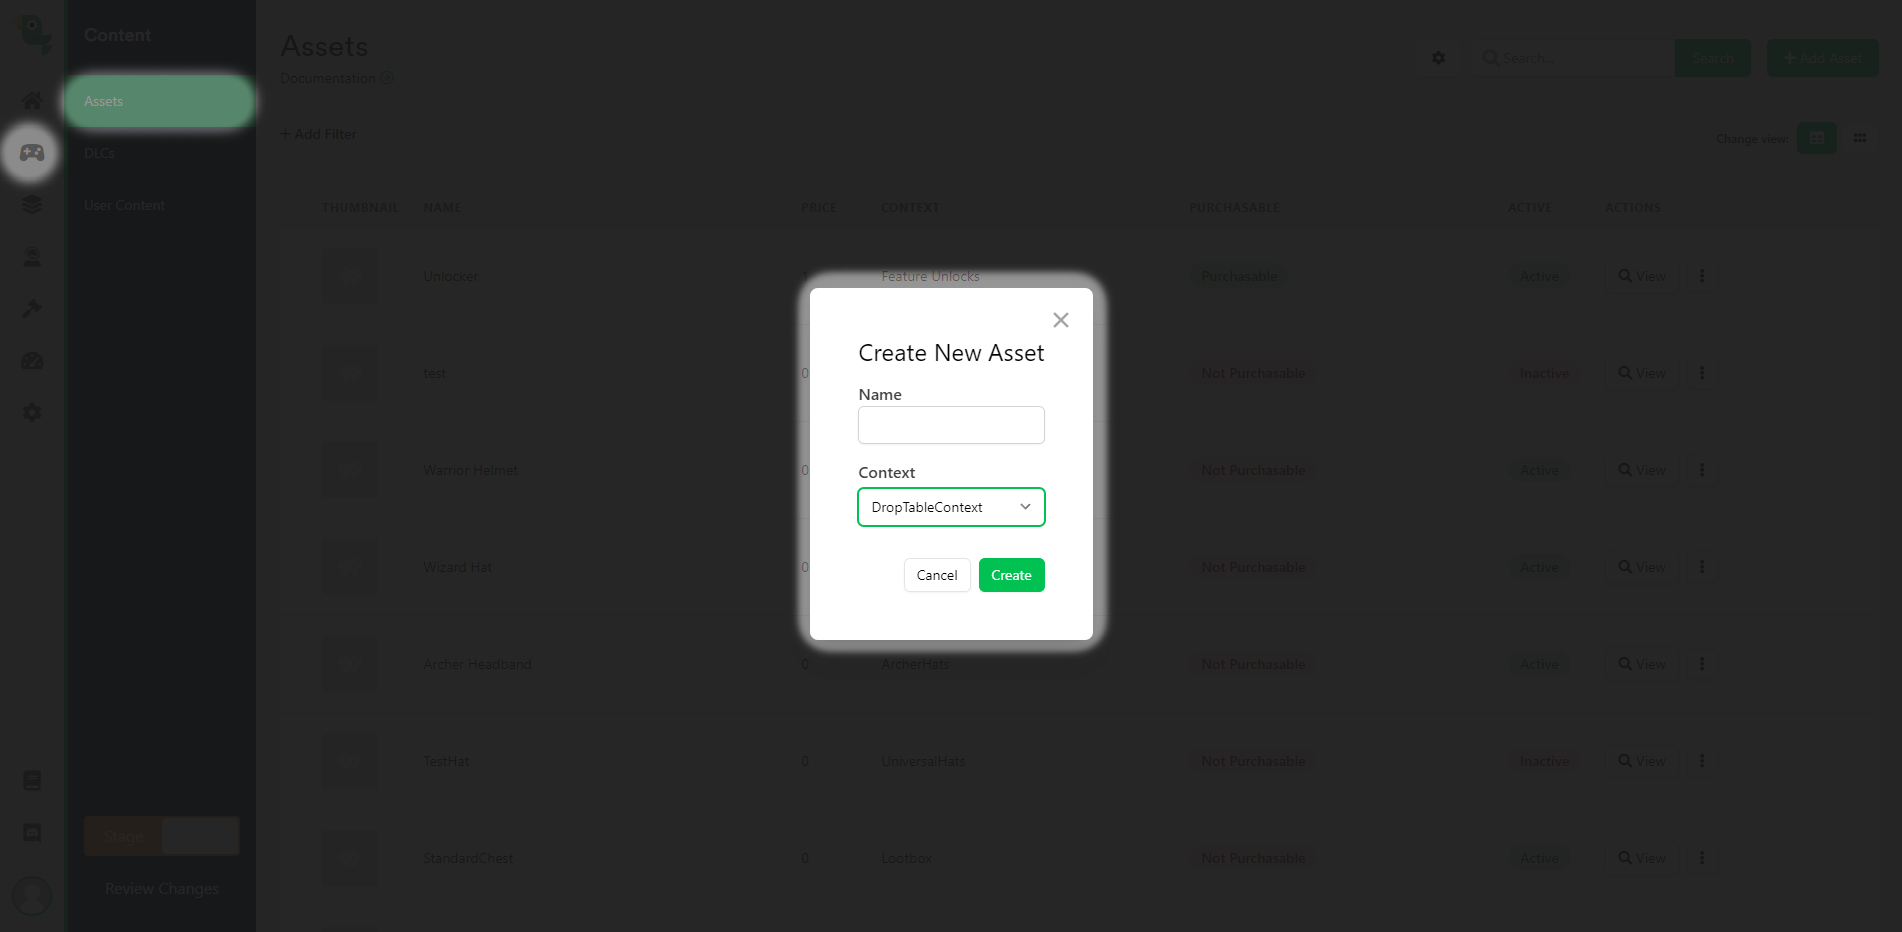
Give your asset a name, then change the context to your newly created drop-table complexity. Click Create.
You’ll now see a new tab called “Drop Table”. And you have a couple of different options to choose which will control how your players get their loot:
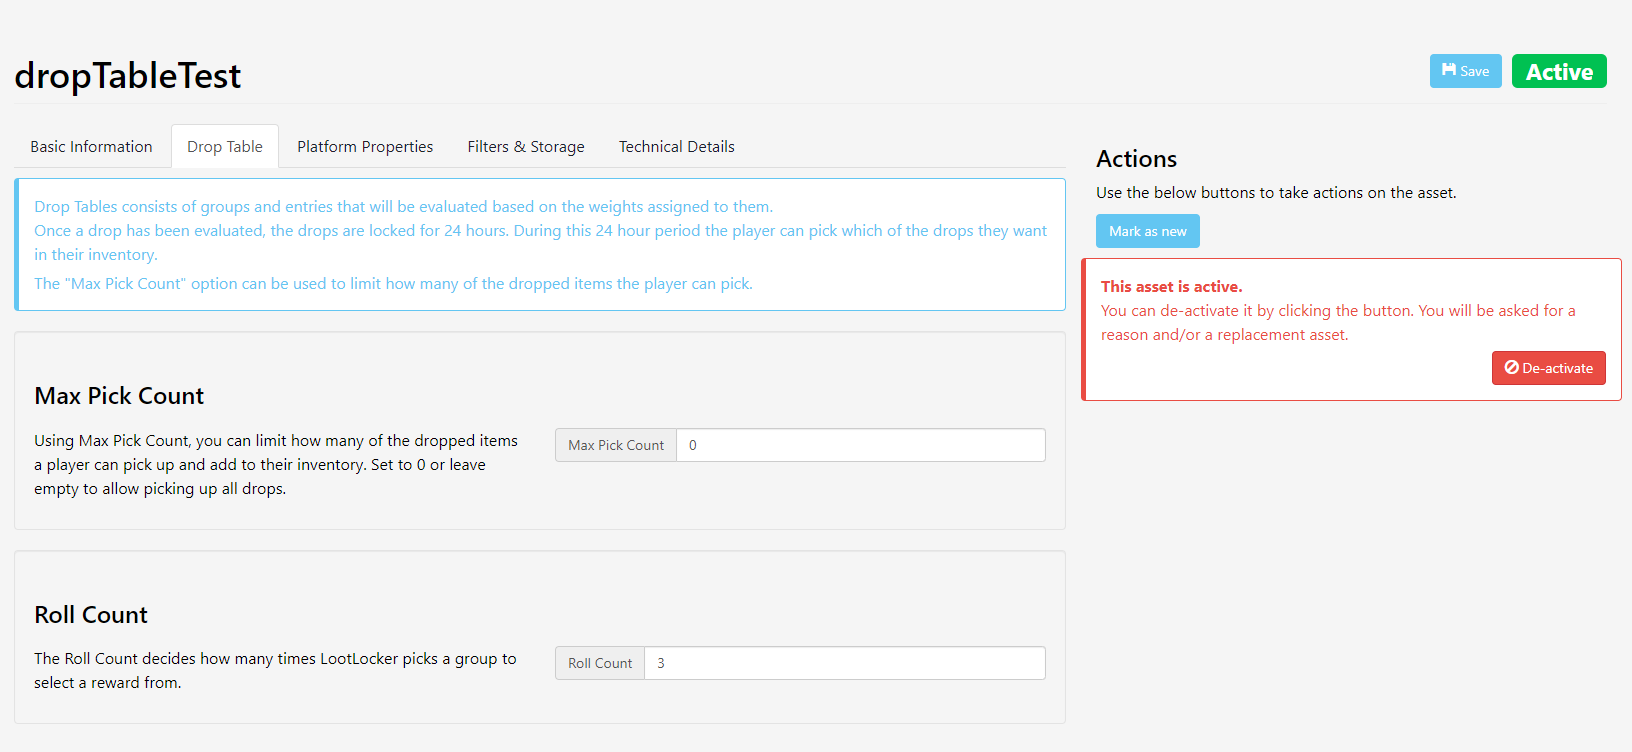
- Max Pick Count: Use this to limit how many items a player can pick up and add to their inventory. If you’re feeling generous and want them to be able to pick up as many as they like, leave this empty or choose 0
- Roll Count: This lets you choose how many times LootLocker will pick a particular group to select a reward from. Depending on how you have your assets and groups set up in your drop table, you might sometimes want to re-roll for items a certain amount of times. We’re using two in this example.
Next you need to create some groups for your drop table. Click Add Group, and give it a name. In this example we’re creating three groups, and we’ve called the first one AlwaysGrantedGroup.
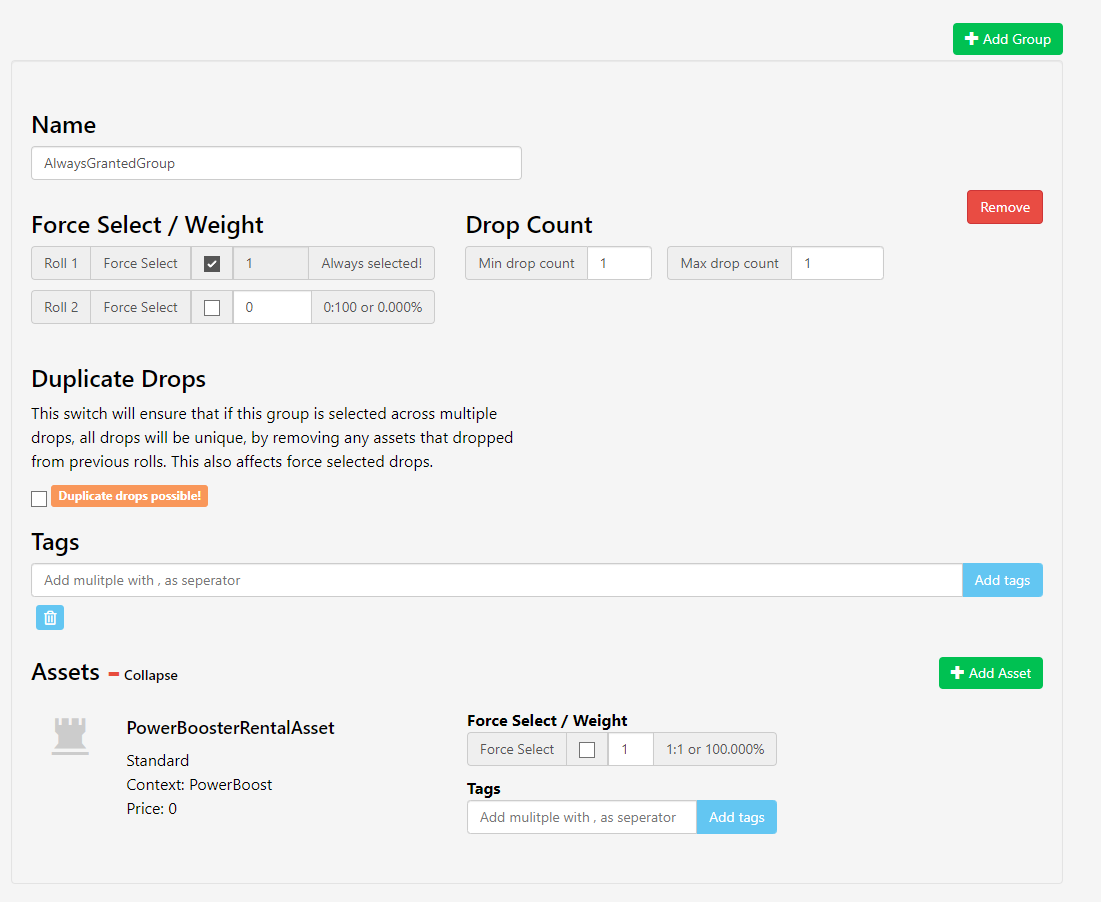
This will reward the player with a single booster asset. As there’s only one asset in this group we don’t need to change the weights – because players can only get this one item.
You’ll notice there’s a Duplicate Drop button. Tick this if you want to allow, you’ve guessed it, duplicate drops. So if you don’t want the player to be able to be able to get the same asset twice, don’t tick this.
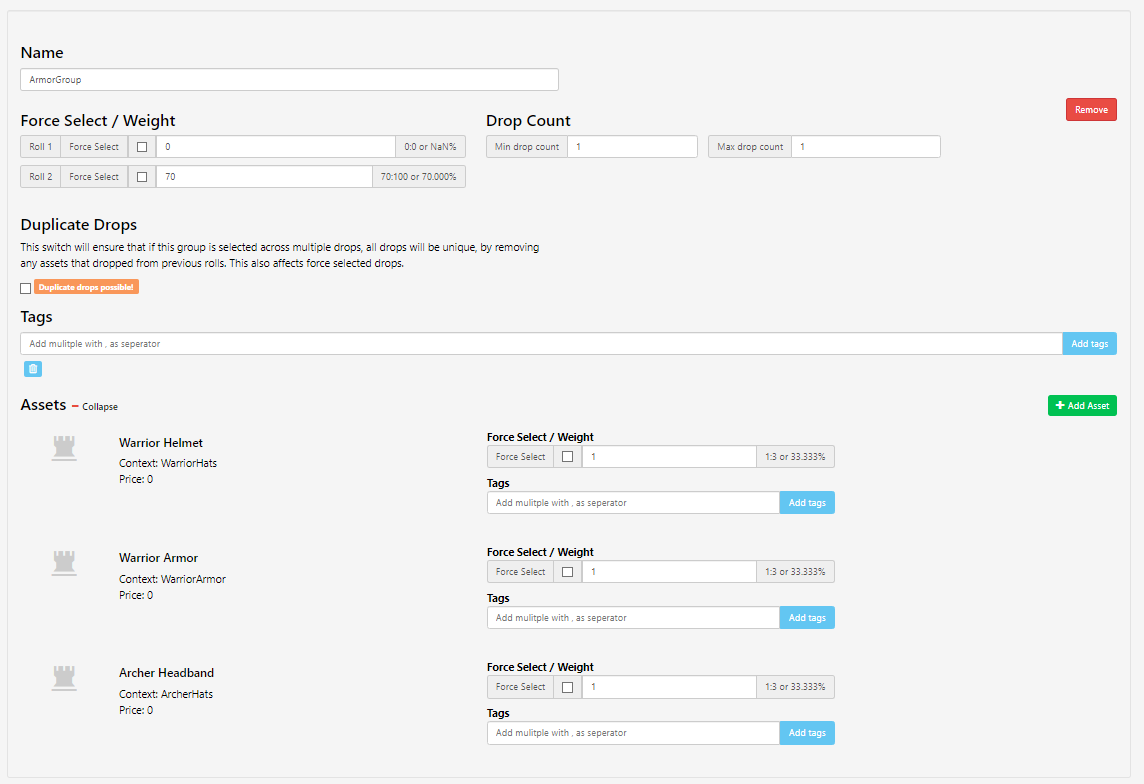
We’ve called our second group “ArmorGroup”, and added three different armor assets to it. We’ve let LootLocker assign the weights automatically here, so there’s a 33.33% chance for any of them to be returned (that’s an equal chance, just in case your math isn’t great).
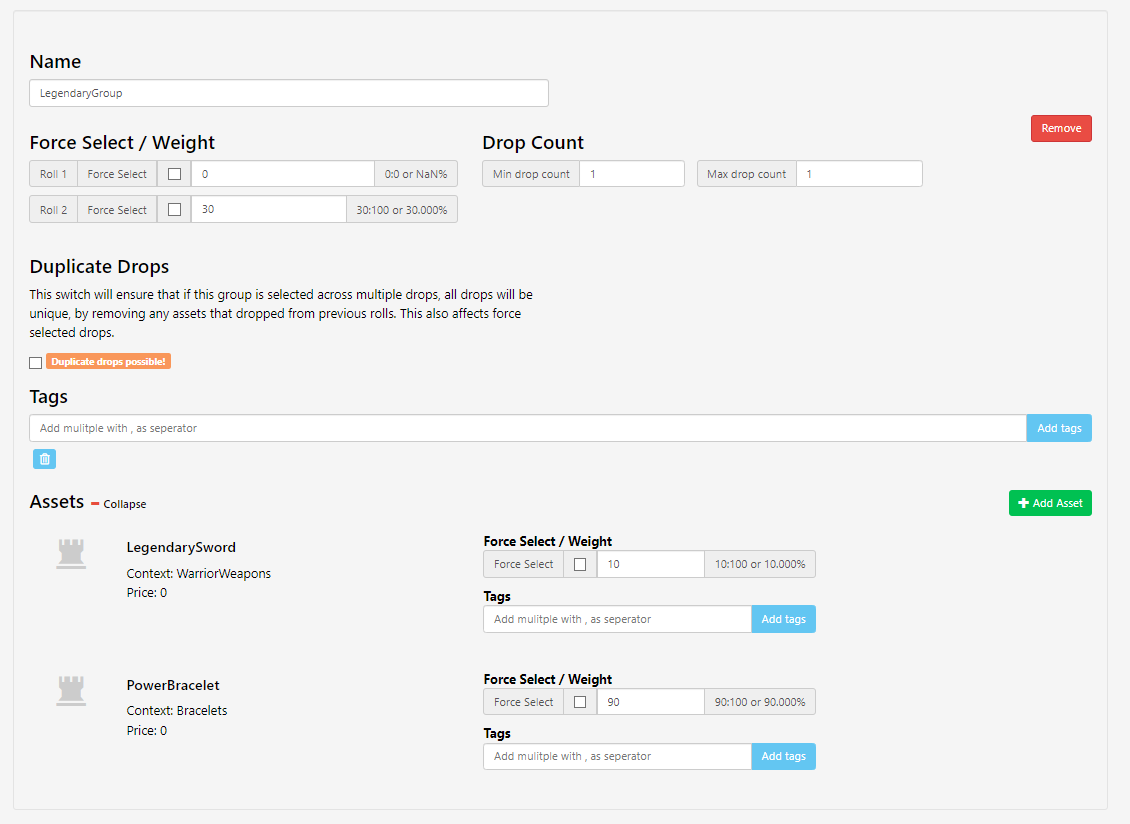
We’ve called the third group “LegendaryGroup” and added a legendary sword asset and a power bracelet to it. In this case we want most players to get the power bracelet rather than the sword. So we’ve assigned 10% under Force Select / Weight to the sword and 90% to the power bracelet. Just to be super clear, that means that 90% of the time, players will be rewarded with a power bracelet, and only get the legendary sword for 10% of the time.
Now we’ve set up our groups and assets, we’re going to doublecheck their weights. We have two rolls for each one. For the AlwaysGrantedGroup, we want the first item the player gets to always be the power booster asset. So we need to click Force Select for the first roll, and leave the second roll at 0.

Next, let’s have a look at our ArmorGroup. Here we want players to always get the power booster first. So we’ve set the weight on roll 1 to 0. We’ve then set roll 2 to 70, and the display shows “70:70 or 100%”. This will change when we set the weight for the LegendaryGroup.

Speaking of which, for the LegendaryGroup, we’ve set the first roll to 0 and the second one to 30. That means there’s a 30% chance on the second roll that the player gets a better item than they do from the armor group.

Drop tables in action
Let’s have a look at a drop table in a simple game example that I’ve built.

I’ve started with a trigger in LootLocker that will reward the player with a drop table. In Unity, the center button will execute the trigger we set up in LootLocker and give the player the drop table. When we click it, the function GetDropTable() is triggered, and it adds a drop table to the player’s inventory. We then run LootLockerSDKManager.GetAssetNotification(), which in this case will return our drop table, because it’s the latest asset added to the player’s inventory. Now we execute LootLockerSDKManager.ComputeAndLockDropTable() which locks the drop table with all our different weights. It then returns a list to us with the different items that were included in this drop.
We take this information and generate clickable items that let the player choose what they want. For every clicked item, I run the function SelectDrop() which saves the AssetInstanceID in a list.
The player clicks the “Claim” button which runs the function LootLockerSDKManager.PickDropsFromDropTable(). We then send in the list of AssetInstanceIDs that we saved earlier. When we get a response from this request, the assets have been added to the player’s inventory.
Of course, this is only one example of how to use drop tables. There are lots of other, much more complex, ways to do this – for example, a drop table could include a loot box that includes a drop table, and on and on and on. Your game, your way.
Need some help?
Hopefully, you now know exactly what you’re doing with drop tables. So you might want to have a look at some of LootLocker’s other features. Check out our online guides to find out more.
Any questions?
Get in touch on Twitter or Discord. And if you like these guides, please let me know by tweeting me directly – I’d love to hear from you.
