How to use LootLocker’s customization complexity in a Unity game
Our customization complexity makes it easy to create different looks for the same asset in your game – like different styles of helmets, armor or uniforms, colored faction emblems, different skins, and so on. This complexity is great for roguelikes, RPGs, and MMORPGs, but can also come in handy for platformers or fighting games (among others). It can also be very useful if you have lots of assets with similar appearances in your game and don’t want to crowd your database with all of them.
Before we start customizing…
You’ll need to have a free LootLocker account before you can get to grips with drop tables. You’ll also need to understand a few other LootLocker concepts. Those are:
All done? Let’s get started.
How it works
You can make your drop tables as simple or as complicated as you want to – it’s completely up to you and what your game needs. The good news is that they use the same structure as all other LootLocker complexities.
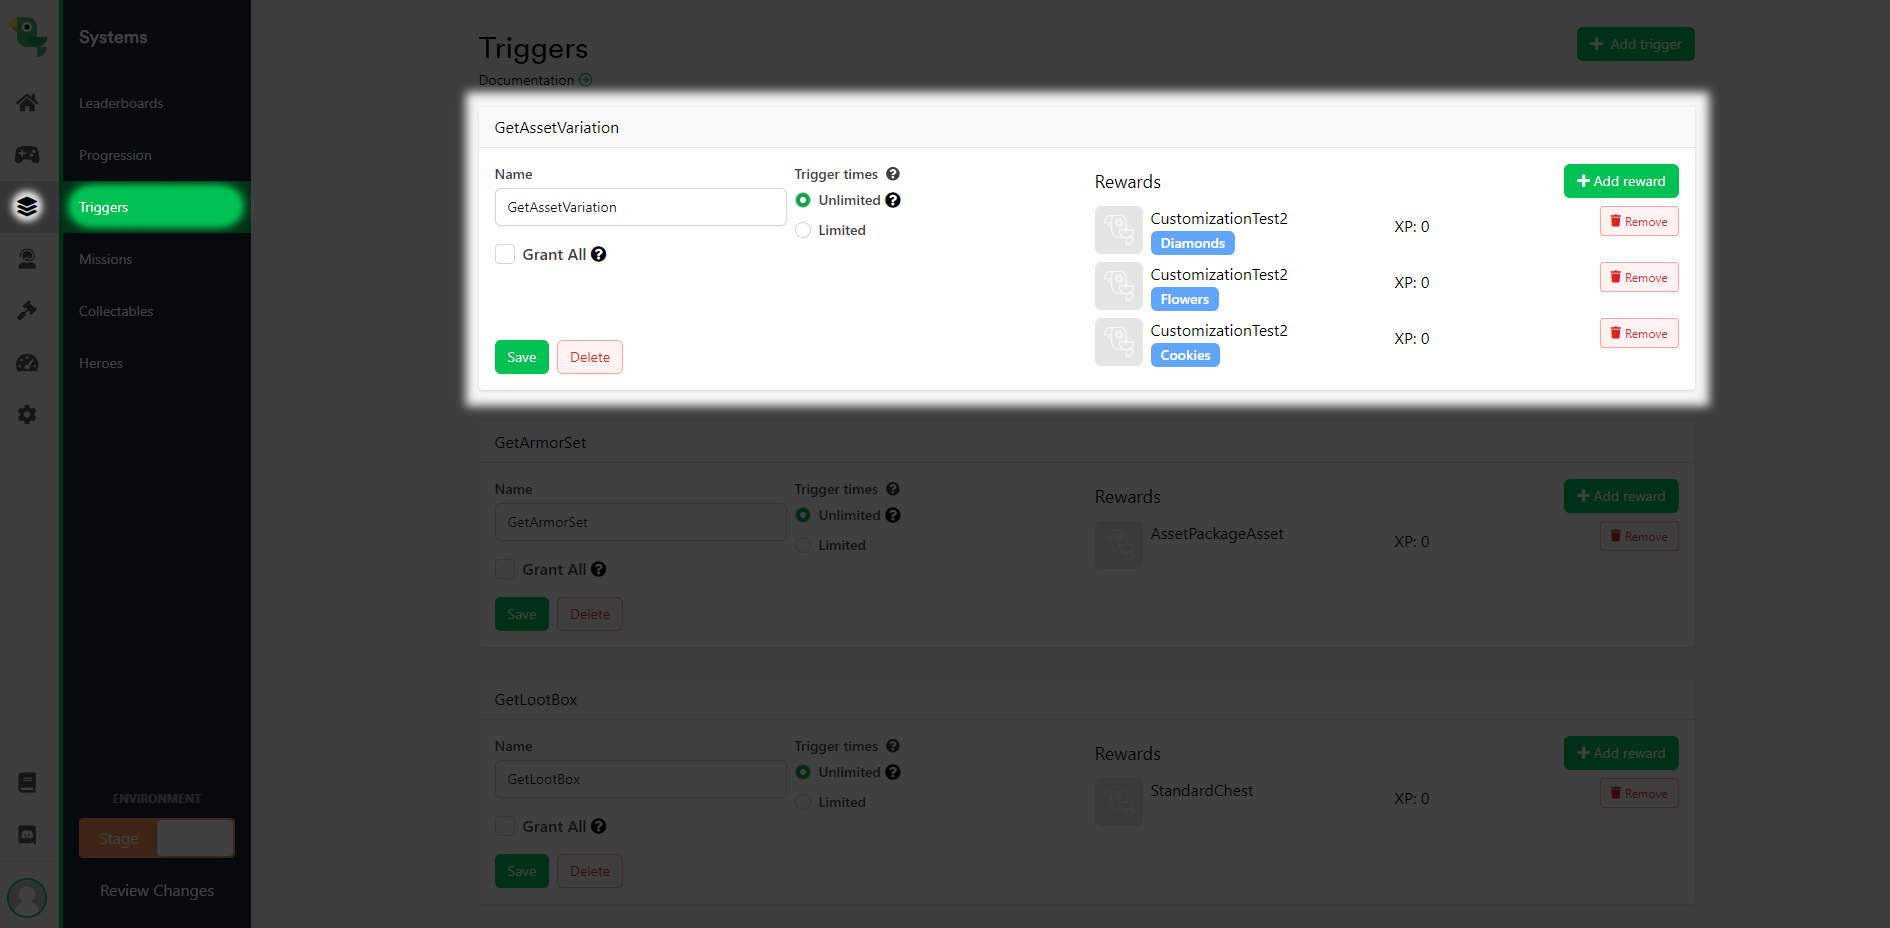
- First head to Settings, then Contexts, then click Add Context.
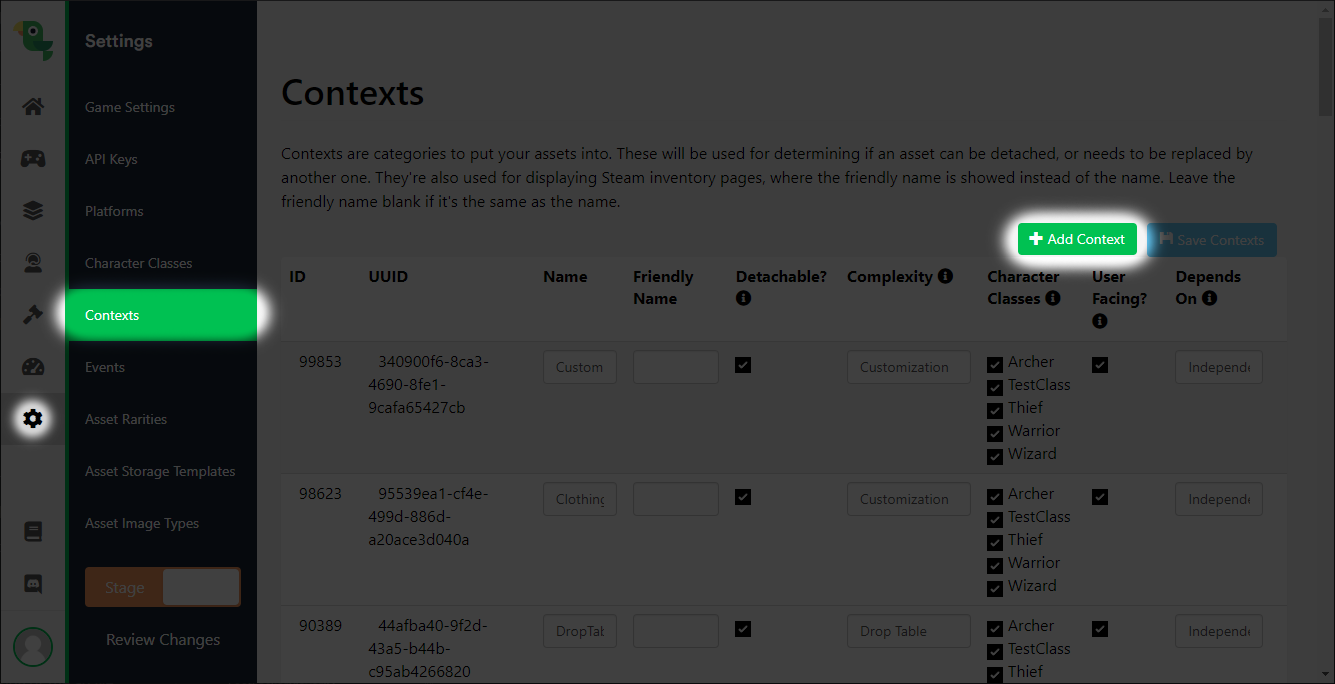


Save, then navigate to Content, then Assets. Click Add Asset at the top right of the screen.
Give your asset a name, then change the context to your newly created customization complexity. Click Create.
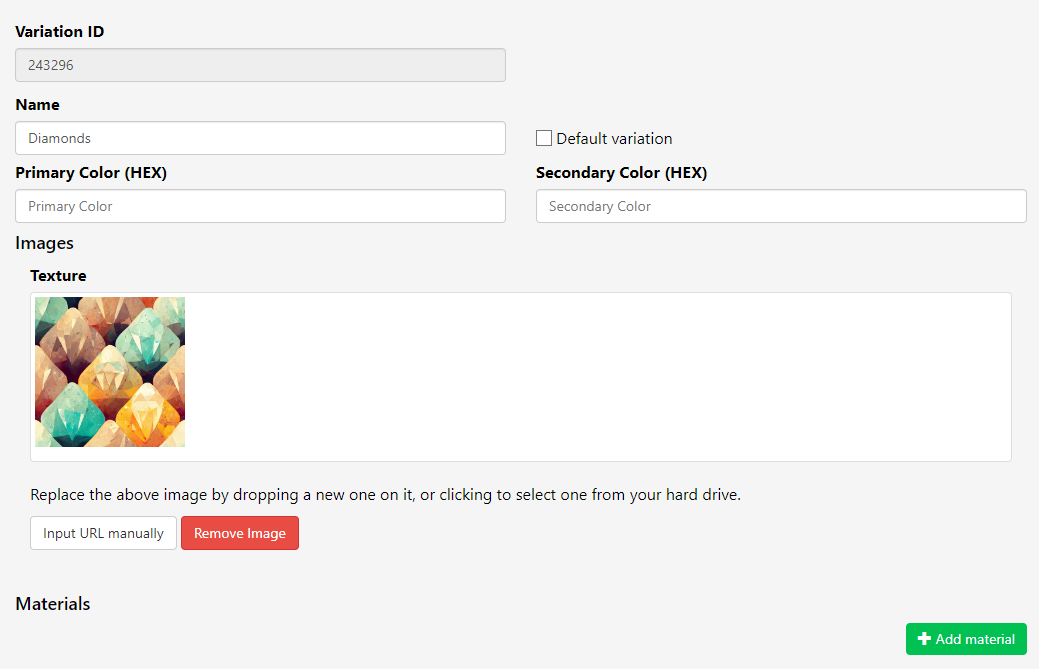
You’ll now see a new tab on your asset called “Variations”. This is where you’ll specify what makes it different to the generic asset. Click the green “Add variation” button which will show you the customization options.

It’s completely up to you what you do here. You have “Name”, “Primary Color” and “Secondary Color”, and “Images” available to you. If your game supports it, there’s also a “Materials” option. This lets you set a path to a material that should be chosen for this particular variation, including binding paths. You can also set specific materials for different game versions, and use the “Attachment Type” to add extra information (like a value for a shader or a texture offset).
Customization in action
In the web console
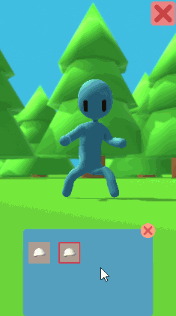
Let’s have a look at an example using the “Image” feature. Back to our hat with three different textures. The player will be rewarded with one of the variations at random when they press a particular button.
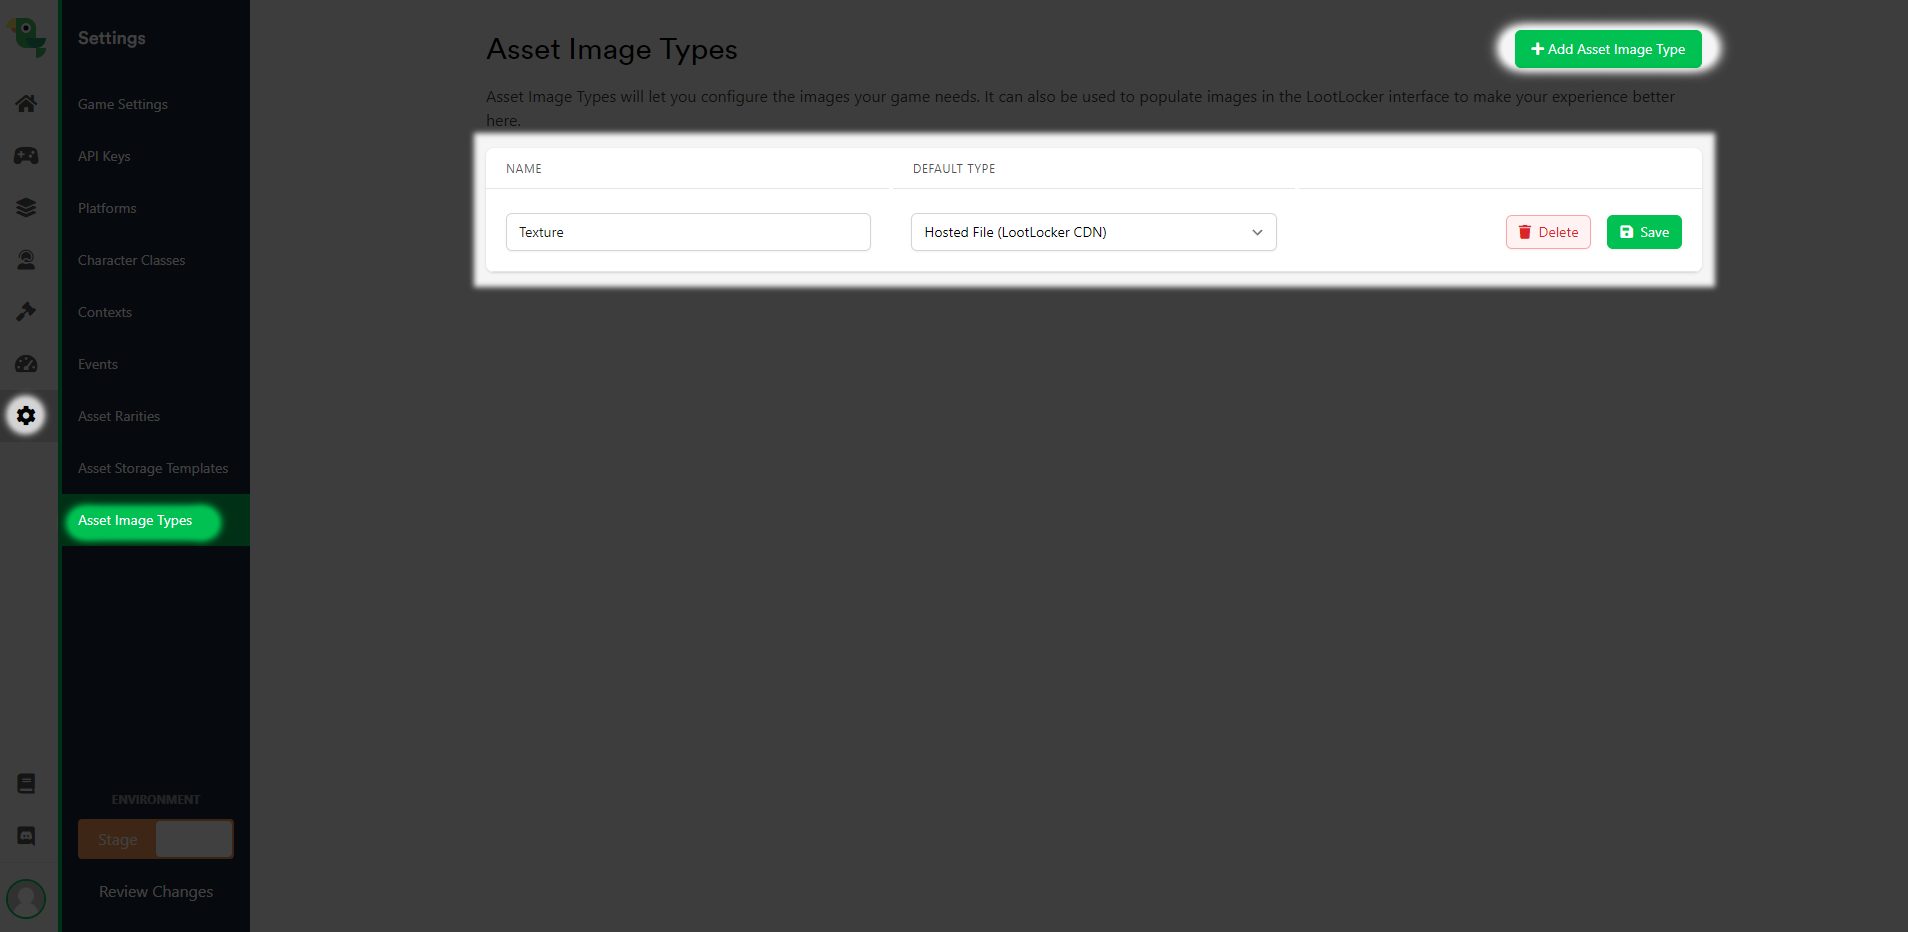
To set this up, we first need to create an image type. Head to “Settings” then “Asset Image Types”, and click the green button marked “Add Asset Image Type”. I’m then going to choose “Hosted File (LootLocker CDN)” as the default type – this just means the file will be hosted on LootLocker’s server. You can also choose “Local Path In Game or Self-hosted”, that lets you enter a path to the image instead. You can use this to get an image in-game or from another site. For this example, I’m naming my image-type “Texture”.
Next, let’s go back to our hat asset in, you’ve guessed it, “Assets”. Find the asset and click the “Variations” tab again. Then click in the “Texture” box to add it, or just drag and drop it. And that’s it – our first hat variation is done. I can now repeat the process to add the next two variations and my other textures.
In a simple game
When the trigger returns a successful response, the asset has been added to our player’s inventory. So in my implementation, I add the URL for the texture when creating the inventory. When the item is created in the inventory, I check if the asset is tagged as having a texture.
Now the information about the URL for this asset sits in the inventory. So when I click the asset in the inventory, I run the function UseItem(). This function checks if the asset has a textureURL. If it does, it’ll send the textureURL when equipping the asset.
We then equip the asset on LootLocker’s server with EquipIdAssetToDefaultCharacter(). With that done, I can generate the visual item with the function VisuallyEquipItem and send in the textureURL that we got from the item.
Next, I create the item with the function GenerateEquipped(). This will set the correct mesh for the asset and check if the item has a texture.
Finally, I download the texture of the asset. So I start the co-routine FetchTextureRoutine() which first creates a new UnityWebRequest to the URL of the texture, waits for it to complete and then sets that texture as the texture for our mesh.
And that’s it – we’re customized.
Need some help?
You’re now officially a customization expert. But remember that LootLocker has lots of other useful features as well – check out our guides to find out more.
Any questions?
Get in touch on Twitter or Discord. And if you like these guides, please let me know by tweeting me directly – I’d love to hear from you.